
Create Layer 3 Service Profile
Important: You must first create a Routing Instance before trying to create a service profile for a layer 3 service.
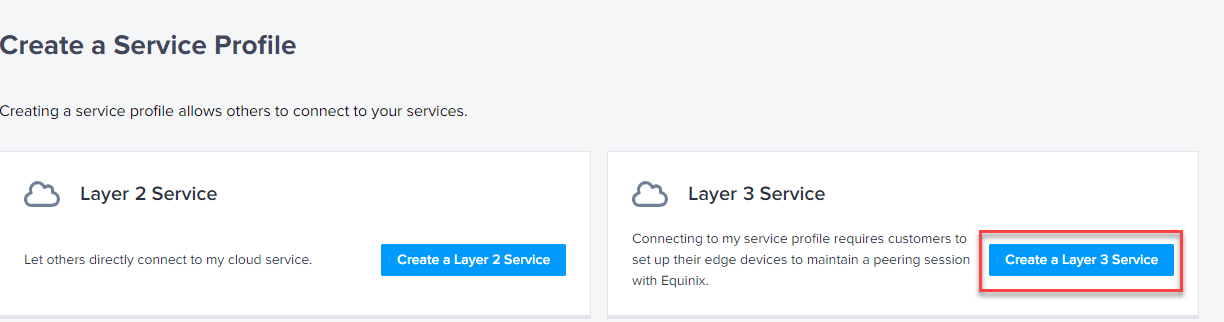
To create a Layer 3 Service Profile:
- Log in to Equinix Fabric.
- Click Administration and select Create a Service Profile.
- In the Layer 3 Service card, select Create a Layer 3 Service.

- Follow the steps to define custom configuration options for public and private connectivity to your service. The chart tracks your progress as you advance through the service profile creation process.
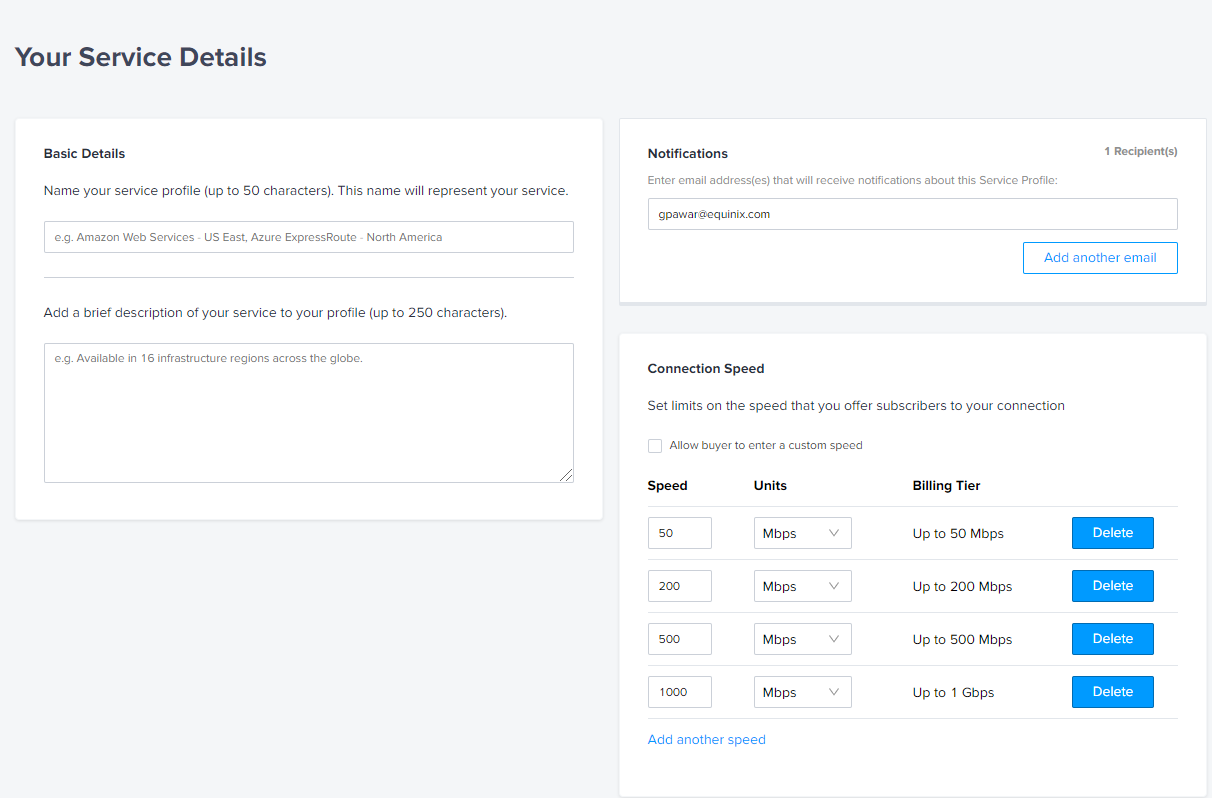
Service details
- Fill all the required information in the basic details section.
- As we are automating the Equinix Fabric Service Provider Availability to be API-driven, the accuracy of your service profile name is critical to ensure your services to the customers within the Equinix Fabric portal.
-
The notification section must have the email address of the person who receives email notifications about this service profile.

Optional Details
Depending on the new service profile requirement, you can set optional network details:
- Require an Authentication Key from Buyers - The Authentication Key service allows Service Providers with Q-in-Q ports to accept groups of connections or VLANs from Dot1q port customers. This is similar to S-Tag/C-Tag capabilities
-
Receive Equinix-Only Routes - To know the validity of the routes, this service consolidates all advertised routes from both local and remote subscribers to Equinix-owned route prefixes before it is advertised into your routing instances. When customers subscribe to your service, their IP addresses are evaluated and NAT’d if necessary, before routing traffic to you.
Note: You must accept more specific routes (/24 and above) if you want to accept traffic from remote markets.
- Remote Connections - You can choose this option to allow your customers to reach various locations through a different location.
- Manually Accept or Reject Connections - Layer 3 connections are automatically accepted on behalf of the service profile provider. If you want to see all your connection requests before accepting or rejecting them, you can indicate them here.
- Custom Fields for Your Service - You can add up to 10 custom fields of information to capture from your customer.
- BGP Community Tag - Enter a description that describes the details for potential subscribers if your service offers BGP Community support.
Locations
Choose the locations where others are able to access your services. These locations will need at least one routing instance present in order to qualify as an available zone.
Review
Displays how your service profile will look like. When you are satisfied with the details, click Create Service Profile.
A success message indicates that your service profile is being reviewed by an Equinix Admin. The new service profile displays on your My Company. You receive an email notification when the profile is approved.
