Portal - Connecting to Google Cloud Platform
Use Fabric to establish connections to Google Cloud Platform from Fabric ports, Fabric Cloud Routers, or using service tokens.
For instructions on connecting from a Network Edge virtual device, see Network Edge to Google Cloud Platform.
Prerequisites
Before creating a connection, you must have:
- An Equinix Customer Portal account, with the
Fabric Connections Managerrole. - A Fabric port(s), an A-side service token, or a Fabric Cloud Router.
Creating a Connection
To create a connection to Google Cloud Platform:
-
Sign in to the Customer Portal > Fabric Dashboard.
-
Use the Context Switcher and select the project under which you want to create the connection. For more information on projects, see Managing Projects.
-
From the Connections menu, select Create Connection.
-
In the A Service Provider card, click Connect to a Service Provider.

-
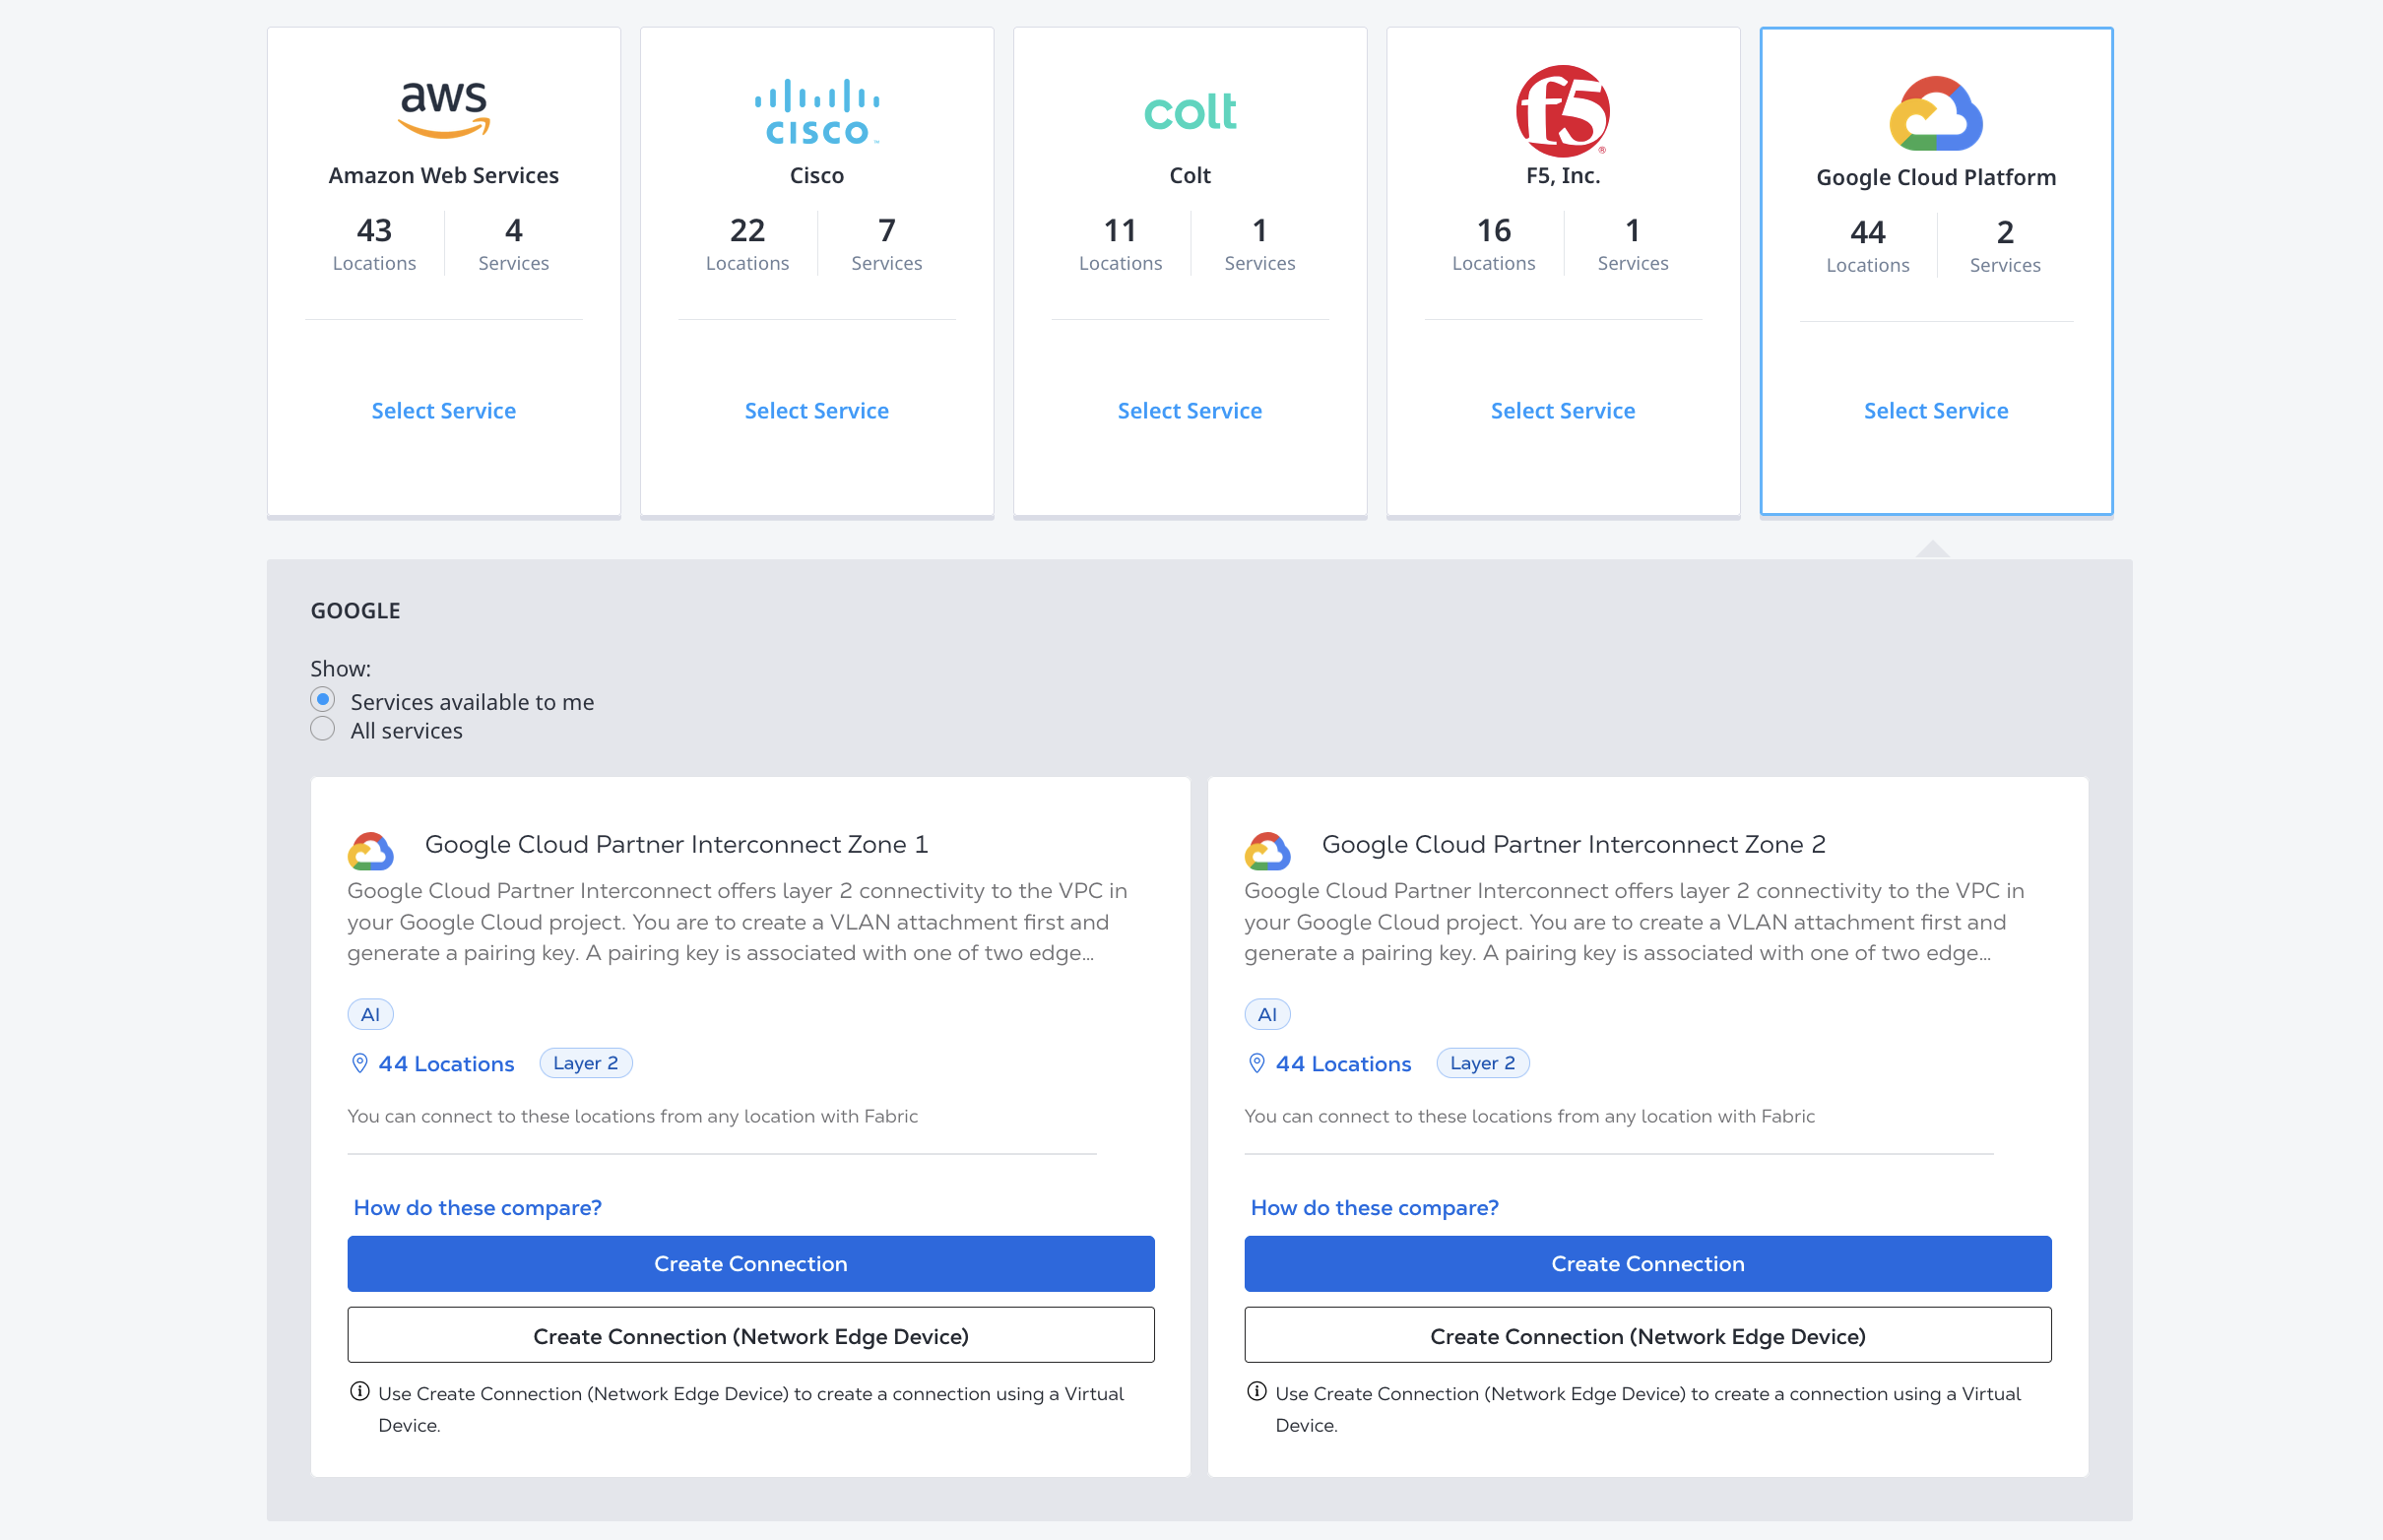
Locate the Google Cloud Platform card and click Select Service.
-
Choose the service profile to use for your connection and click Create Connection. More information on the Google Cloud Provider Interconnect service profiles is available on the Overview page.
Enter Your Google Cloud Information
-
Select a connection type:
- Redundant - Create a redundant pair of connections. You need one pairing key for each connection. One must end in
/1and the other must end in/2. - Primary - Create a single, primary connection. You need a pairing key ending in
/1. - Secondary - Create a single, secondary connection. You need a pairing key ending in
/2.
- Redundant - Create a redundant pair of connections. You need one pairing key for each connection. One must end in
-
Enter your Google Cloud Pairing Keys.
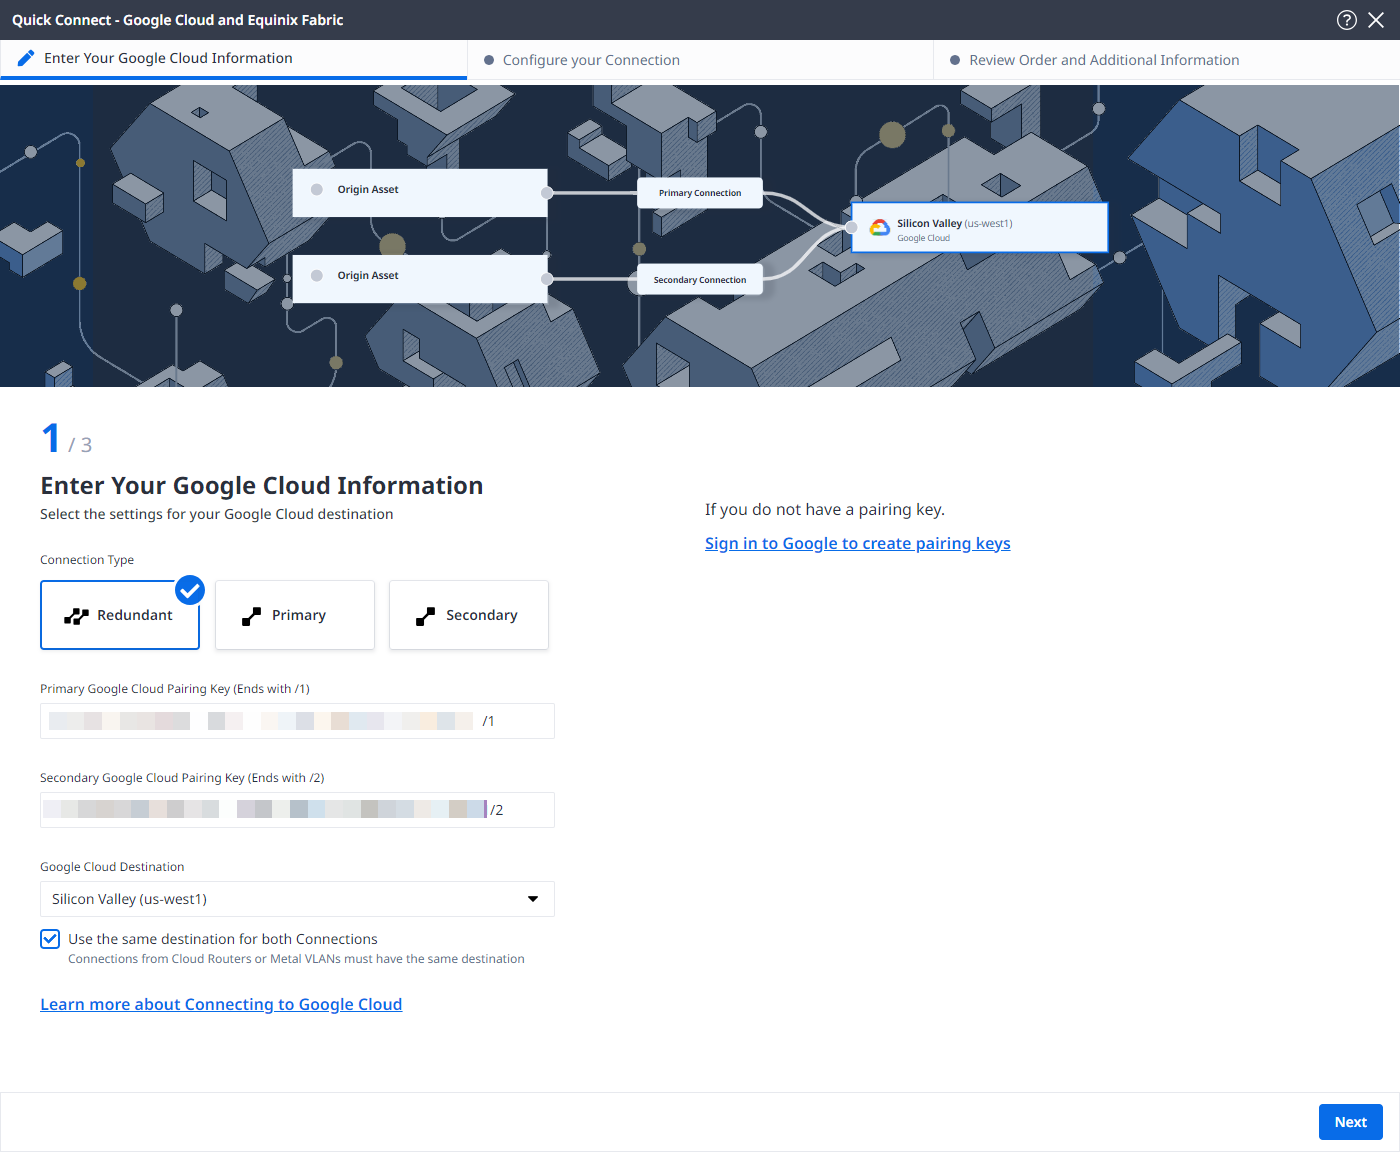
If you have not already created Pairing Keys, click Sign in to Google to create pairing keys, review the prerequisites, then click Sign In.
-
From the Google Cloud Destination drop-down list, select the metro you want to connect to. If you want to terminate your primary and secondary connections in different locations, deselect the Use the same destination for both Connections option and select the metro for each connection individually.
-
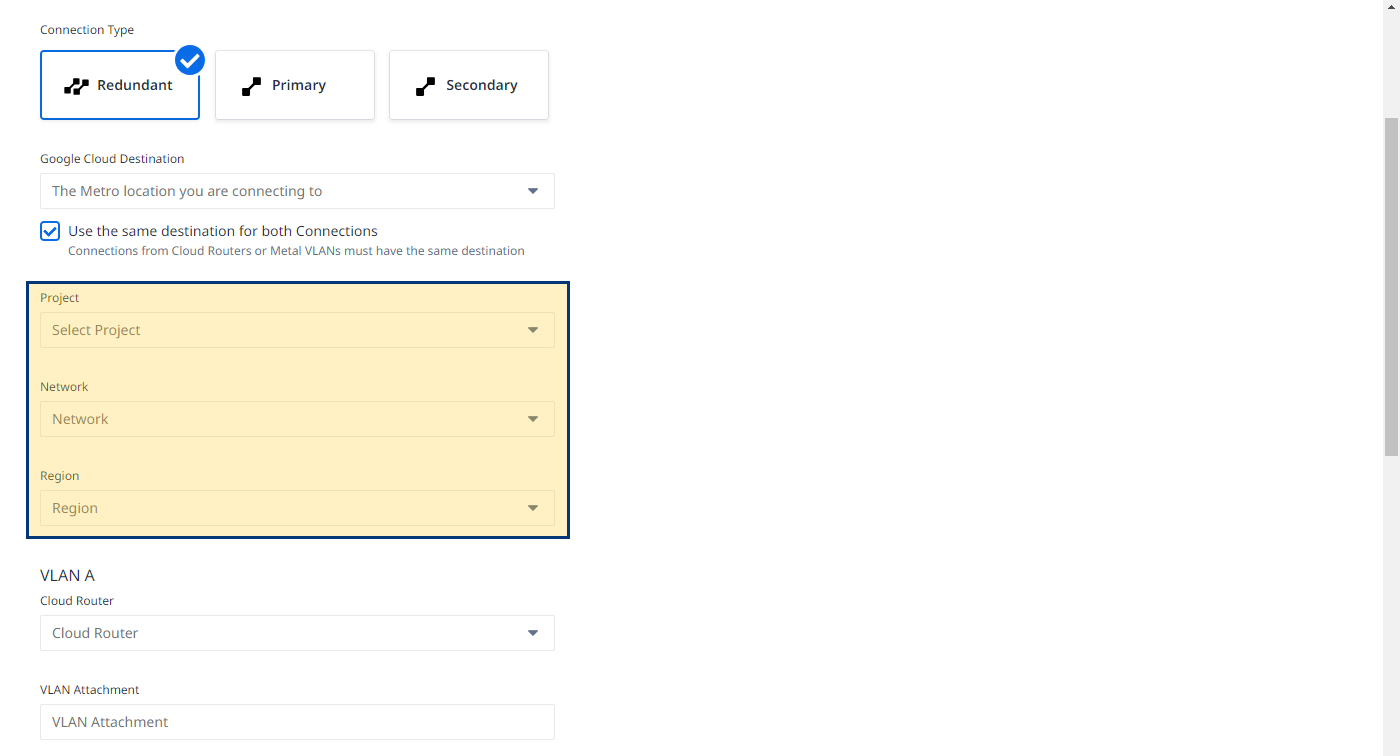
Select your GCP project, choose a VPC network, and select a region.
-
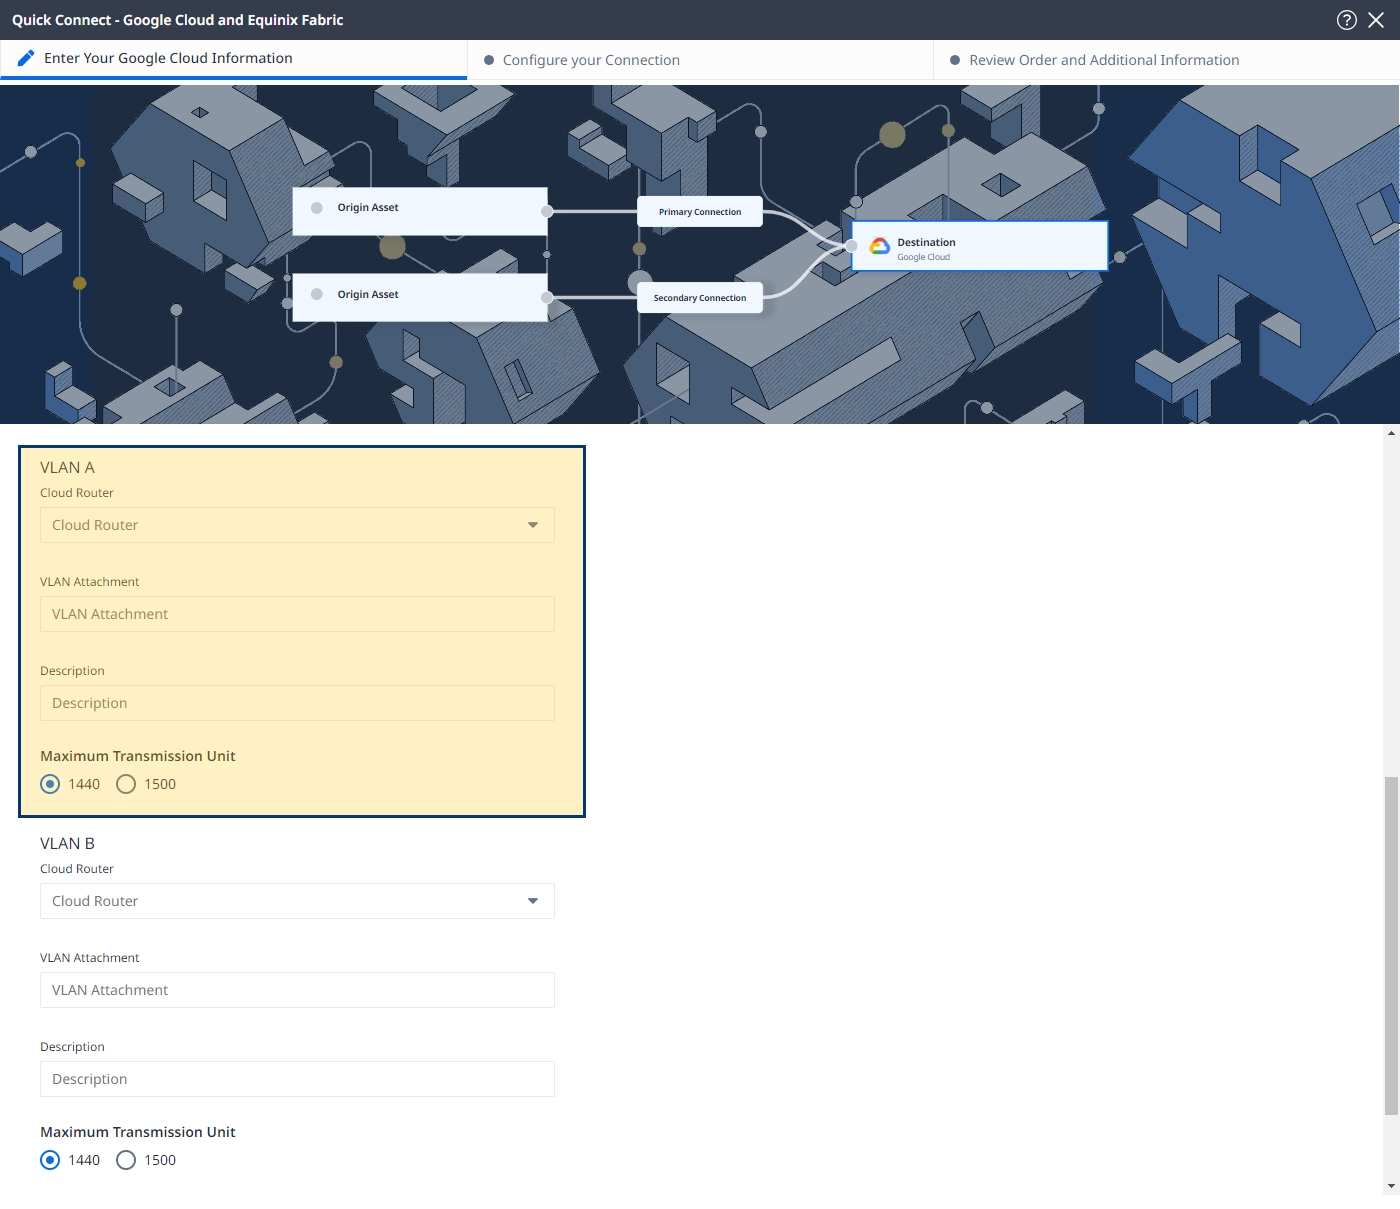
In the VLAN A section:
- Cloud Router – Choose from the cloud routers available in the selected project, network, and region.
- VLAN Attachment – Enter a name for the primary VLAN attachment.
- Description – Enter an optional description.
- Maximum Transmission Unit – Select packet frame size.
-
In the VLAN B section:
- Cloud Router – Choose the same cloud router you selected in the VLAN A section.
- VLAN Attachment – Enter a name for the secondary VLAN attachment.
- Description – Enter an optional description.
- Maximum Transmission Unit – Select packet frame size.
-
Click Next.
Connection Configuration
Configure your connections depending on the origin asset type.
Port
From the Origin Asset Type drop-down list, select Port.
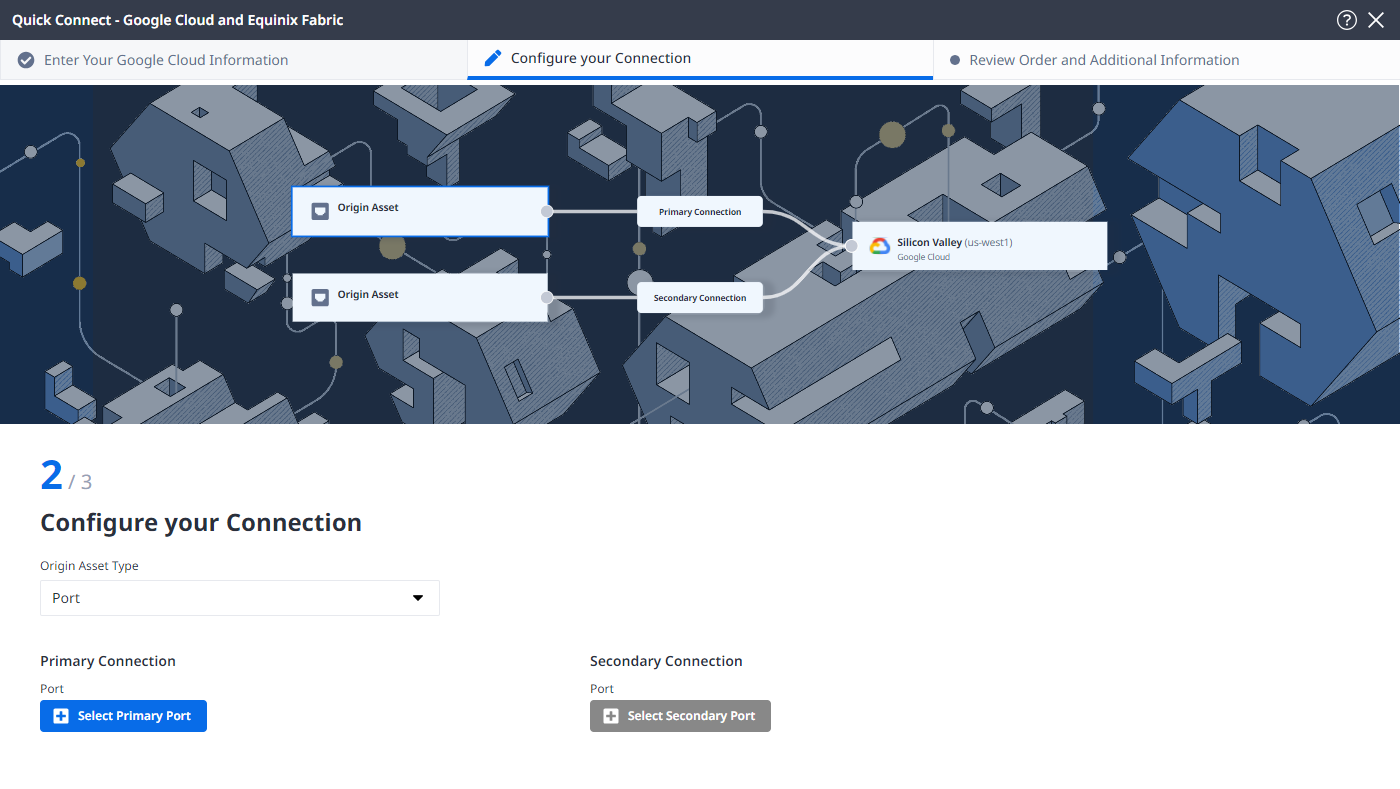
In the Primary Connection section:
-
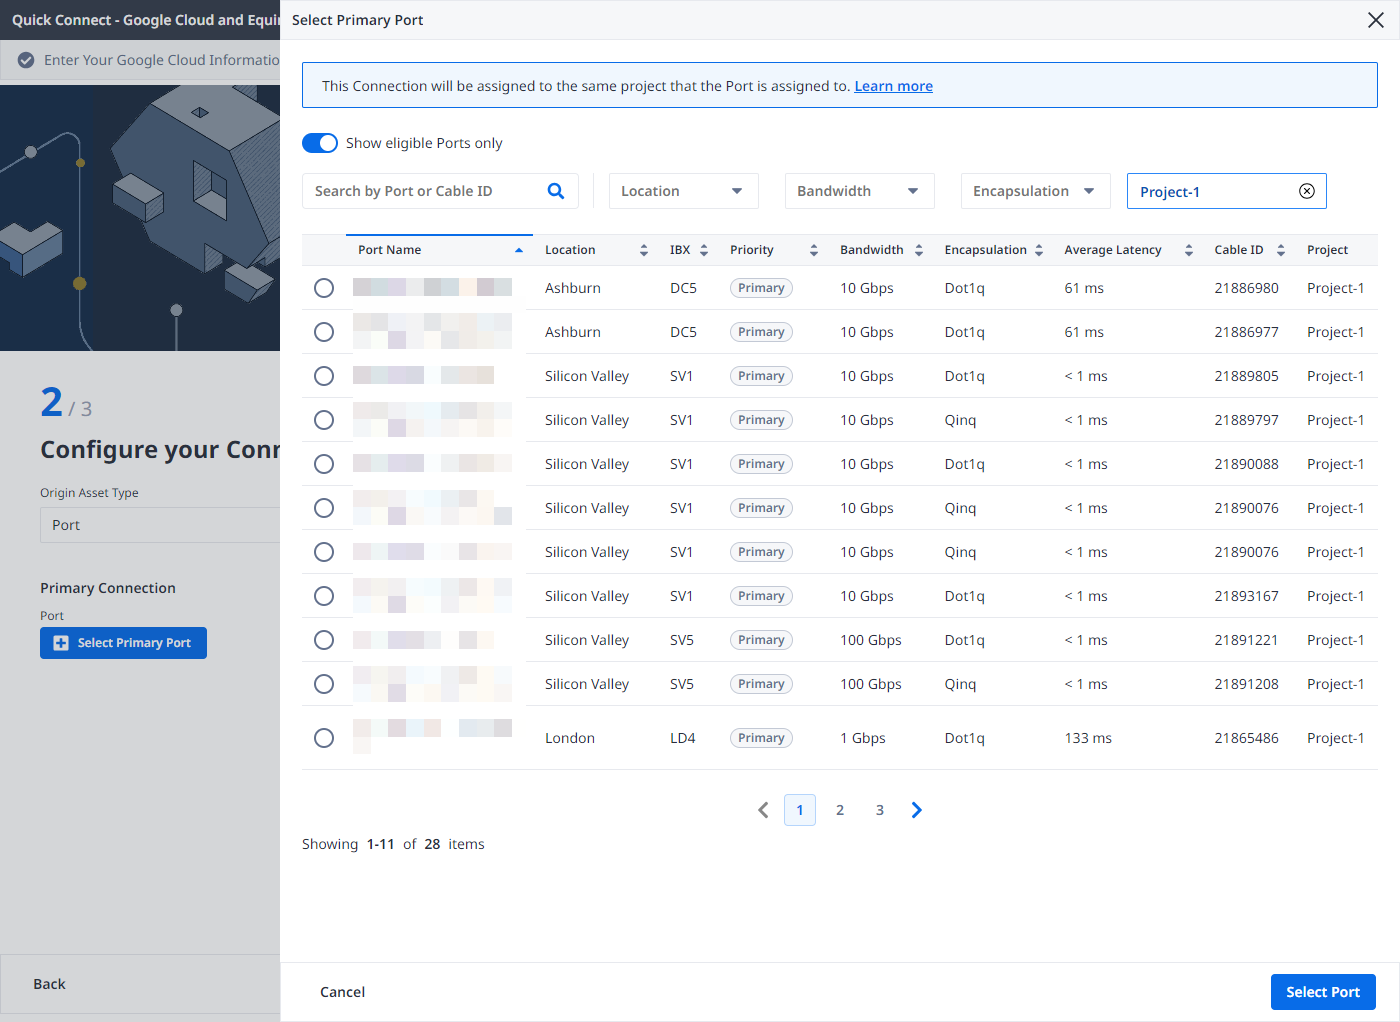
Click + Select Primary Port, then select your primary connection port and click Select Port. Only primary ports are available for selection.
-
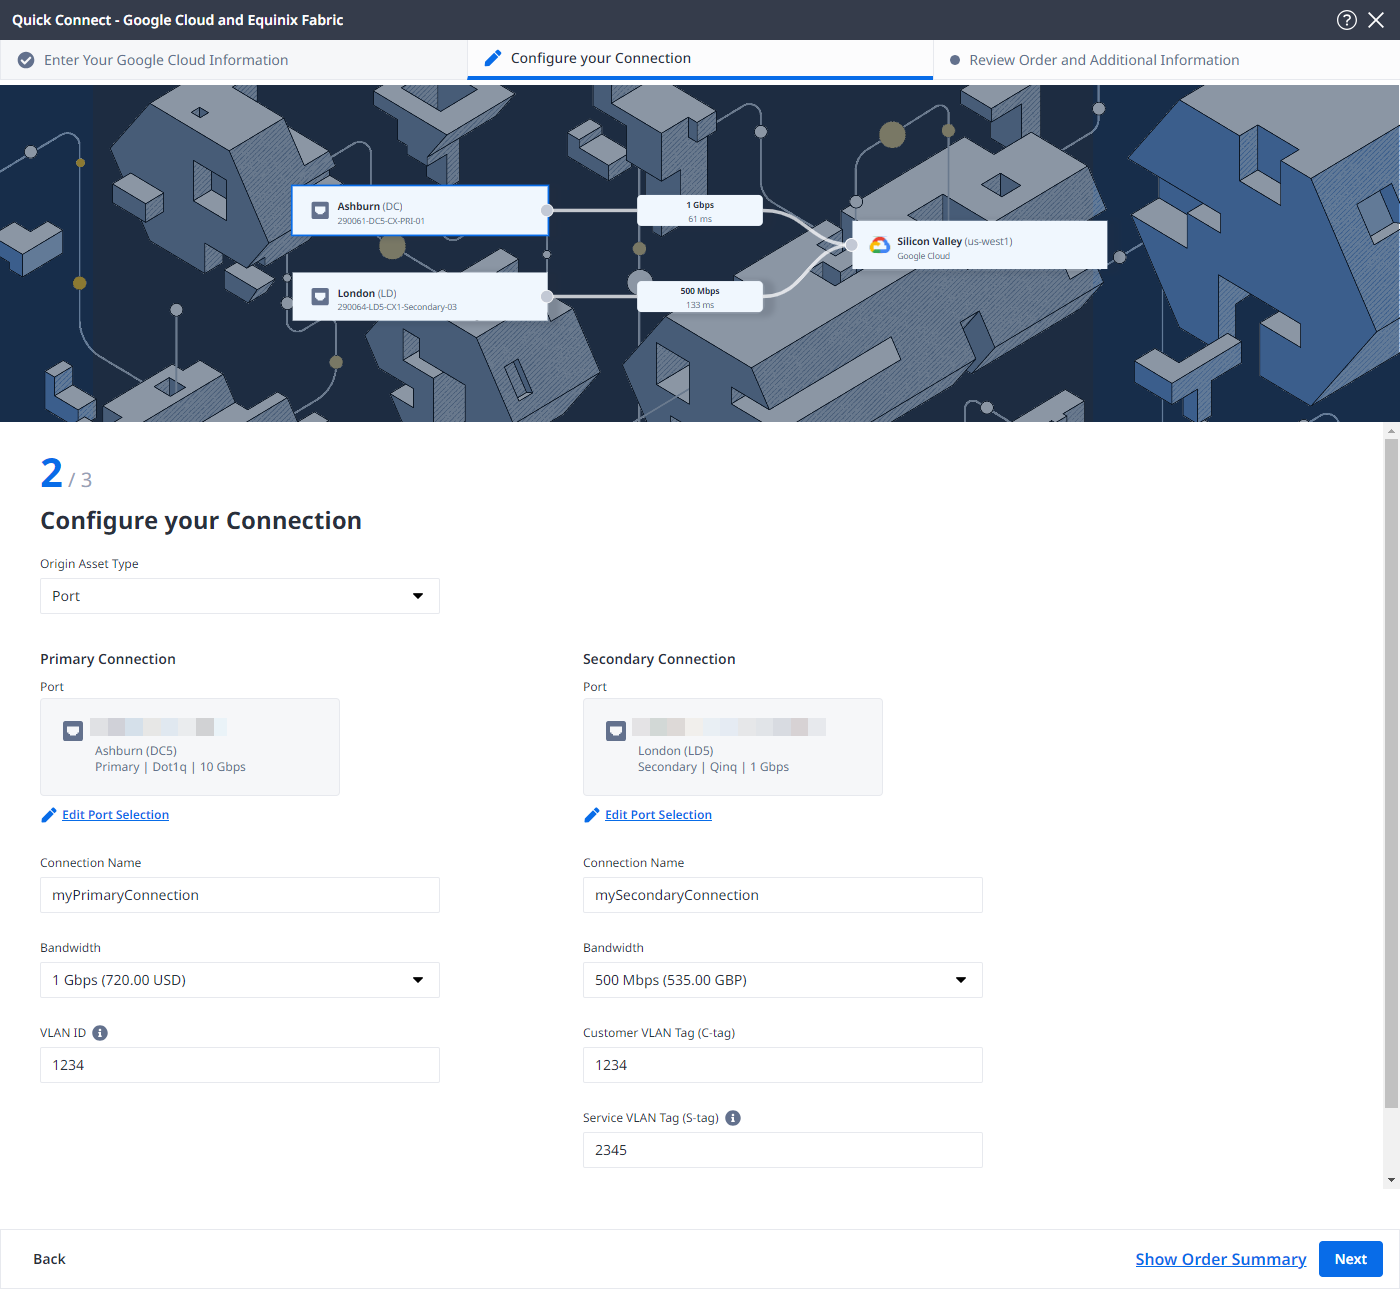
Enter the primary connection name.
-
Select a bandwidth.
-
Enter a VLAN ID (applicable to Dot1q ports) or a Customer VLAN Tag (C-tag) and a Service VLAN Tag (S-tag) (applicable to Qinq ports).
In the Secondary Connection section:
- Click + Select Secondary Port, then select your secondary connection port and click Select Port. Only secondary ports are available for selection.
- Enter the secondary connection name.
- Select a bandwidth.
- Enter a VLAN ID (applicable to Dot1q ports) or a Customer VLAN Tag (C-tag) and a Service VLAN Tag (S-tag) (applicable to Qinq ports).
- Click Next.
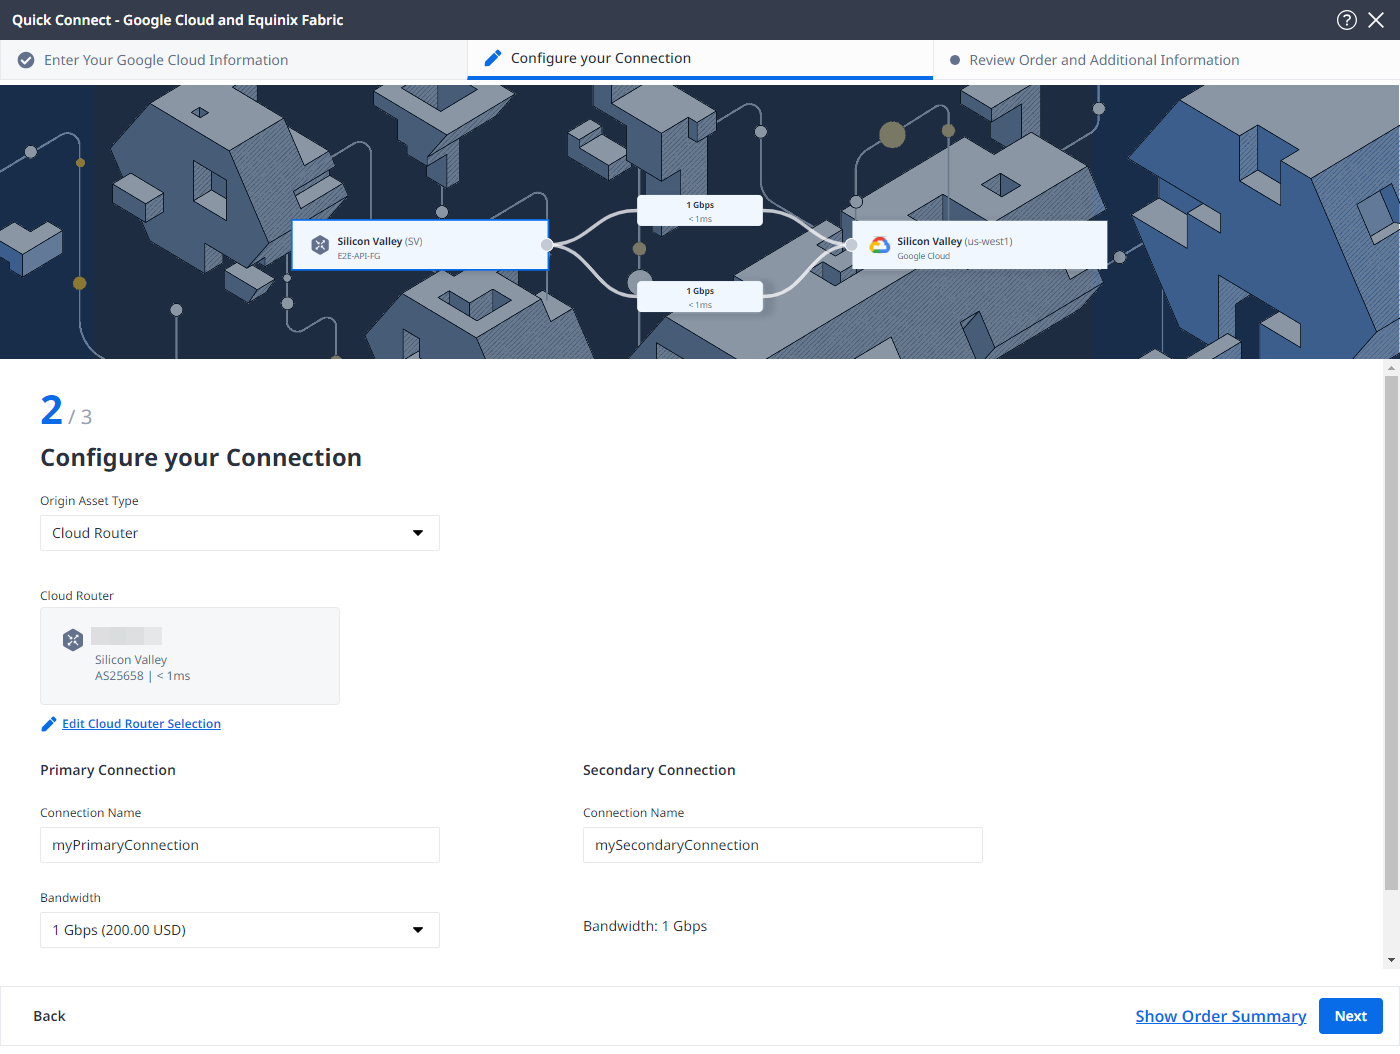
Cloud Router
-
From the Origin Asset Type drop-down list, select Cloud Router.

-
Click + Select Cloud Router, select a cloud router instance, then click Select Cloud Router.

-
In the Primary Connection section:
- Enter the primary connection name.
- Select a bandwidth. The bandwidth value you select will also apply to the secondary connection.
-
In the Secondary Connection section, enter your secondary connection name.
-
Click Next.
Service Token
-
From the Origin Asset Type drop-down list, select Service Token.
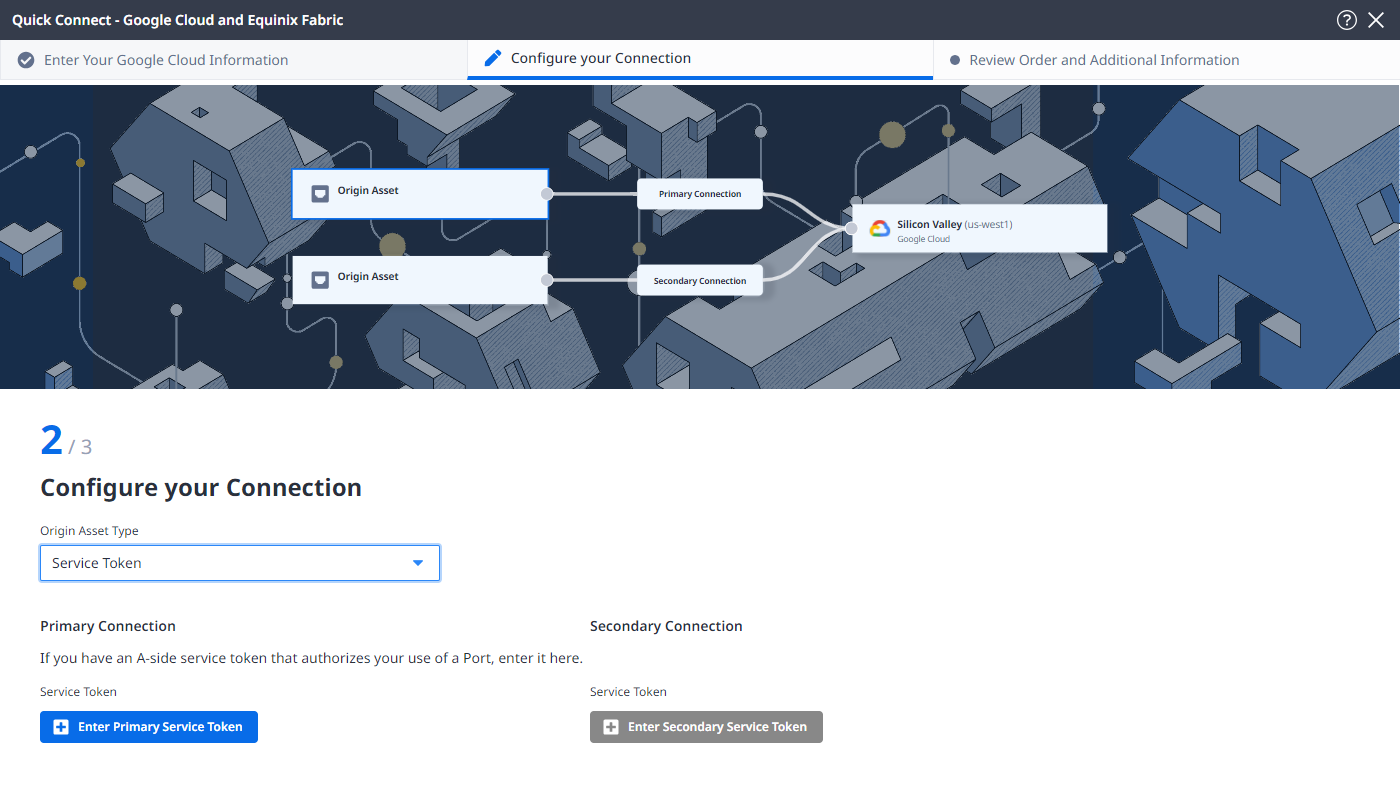
-
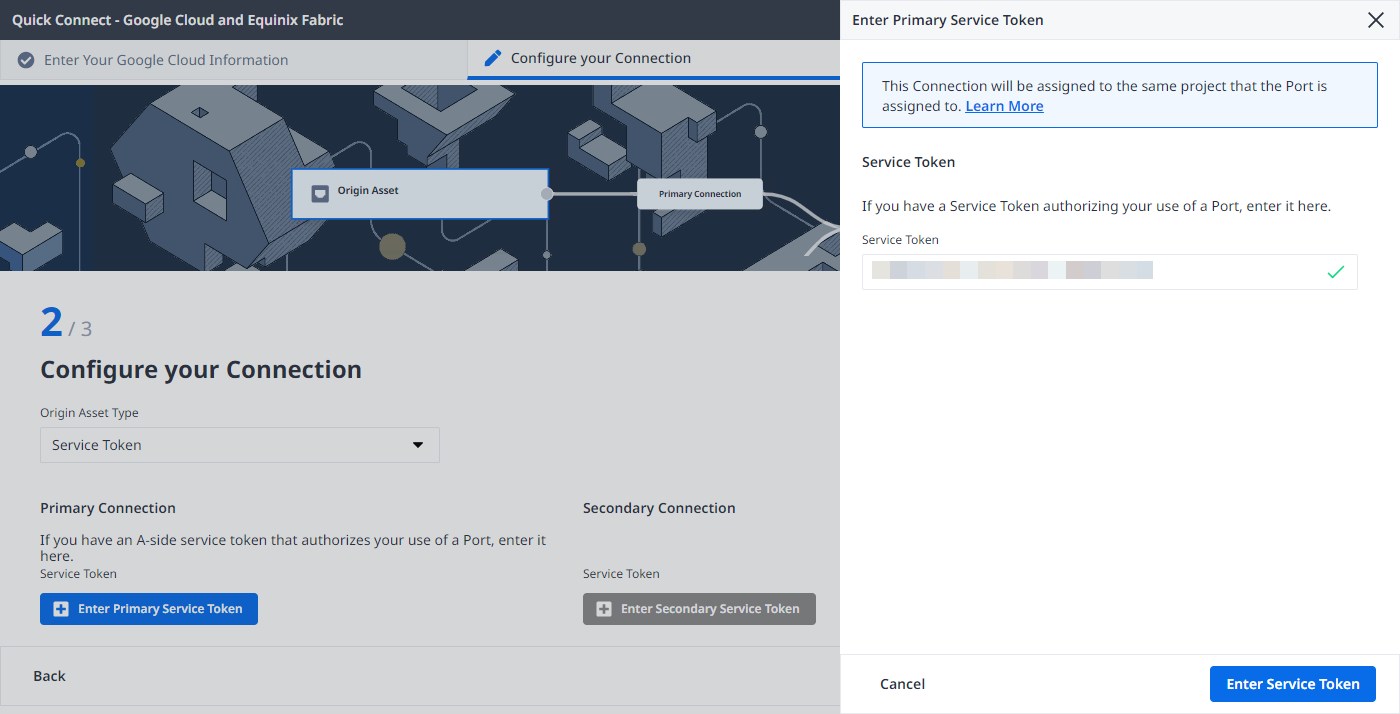
In the Primary Connection section:
-
Click + Enter Primary Service Token, provide the service token, then click Enter Service Token.
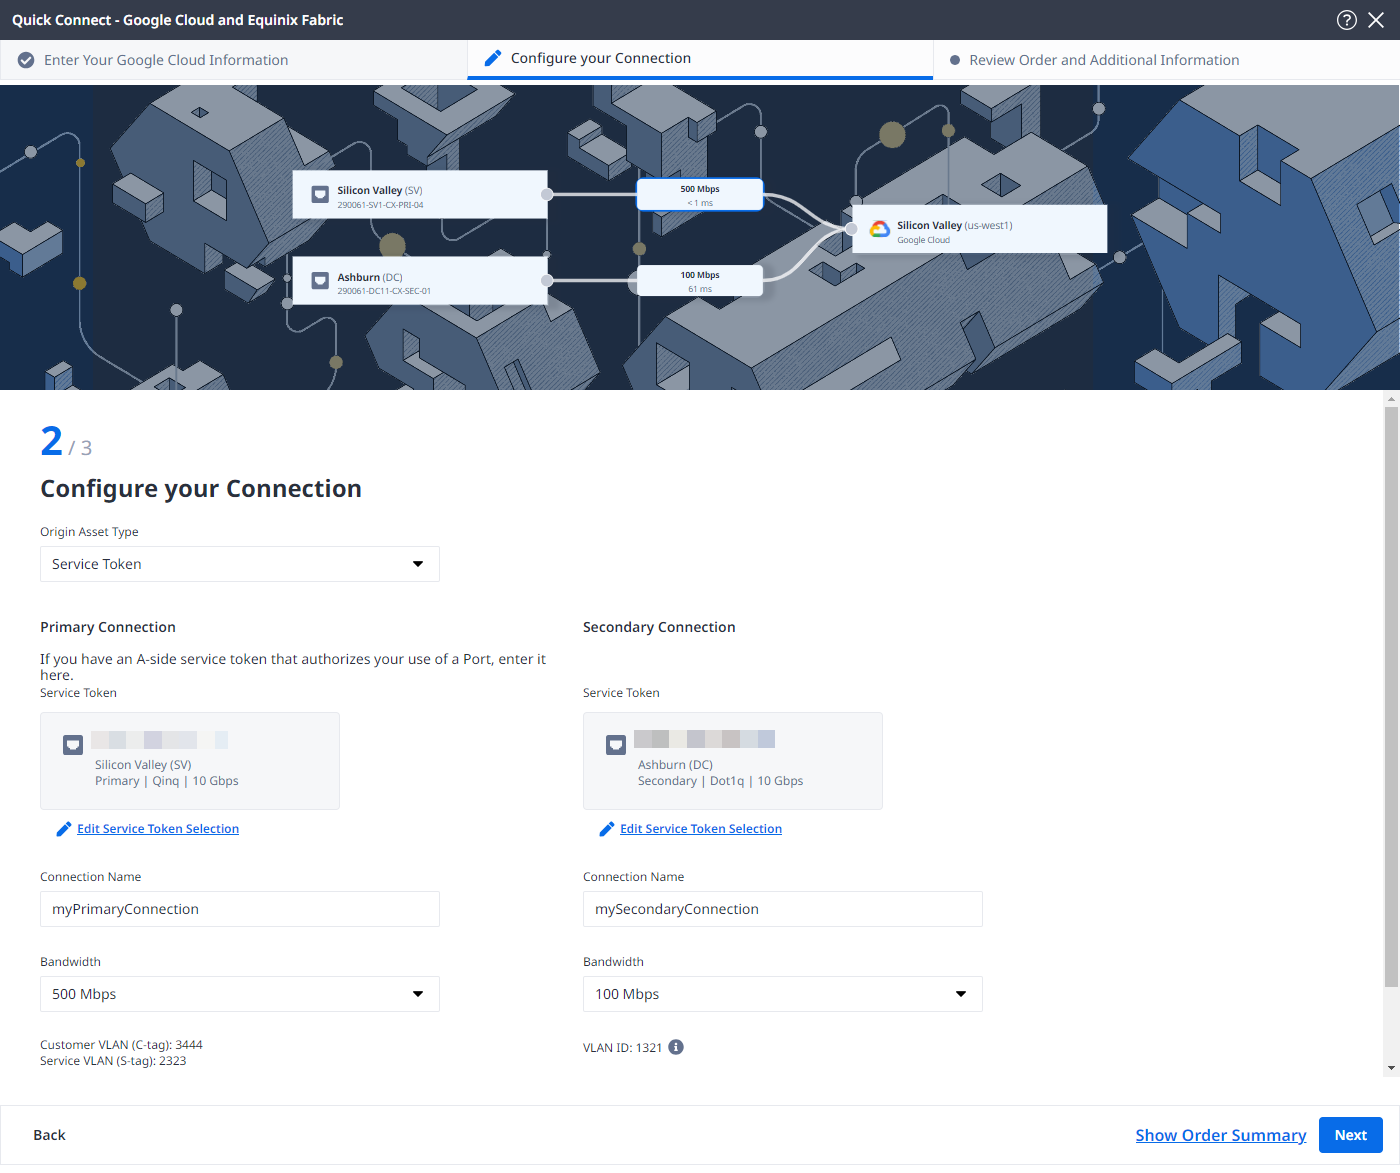
-
Enter the primary connection name.
-
Select a bandwidth.
-
-
In the Secondary Connection section:
- Click + Enter Secondary Service Token, provide the service token, then click Enter Service Token.
- Enter the secondary connection name.
- Select a bandwidth.
-
Click Next.
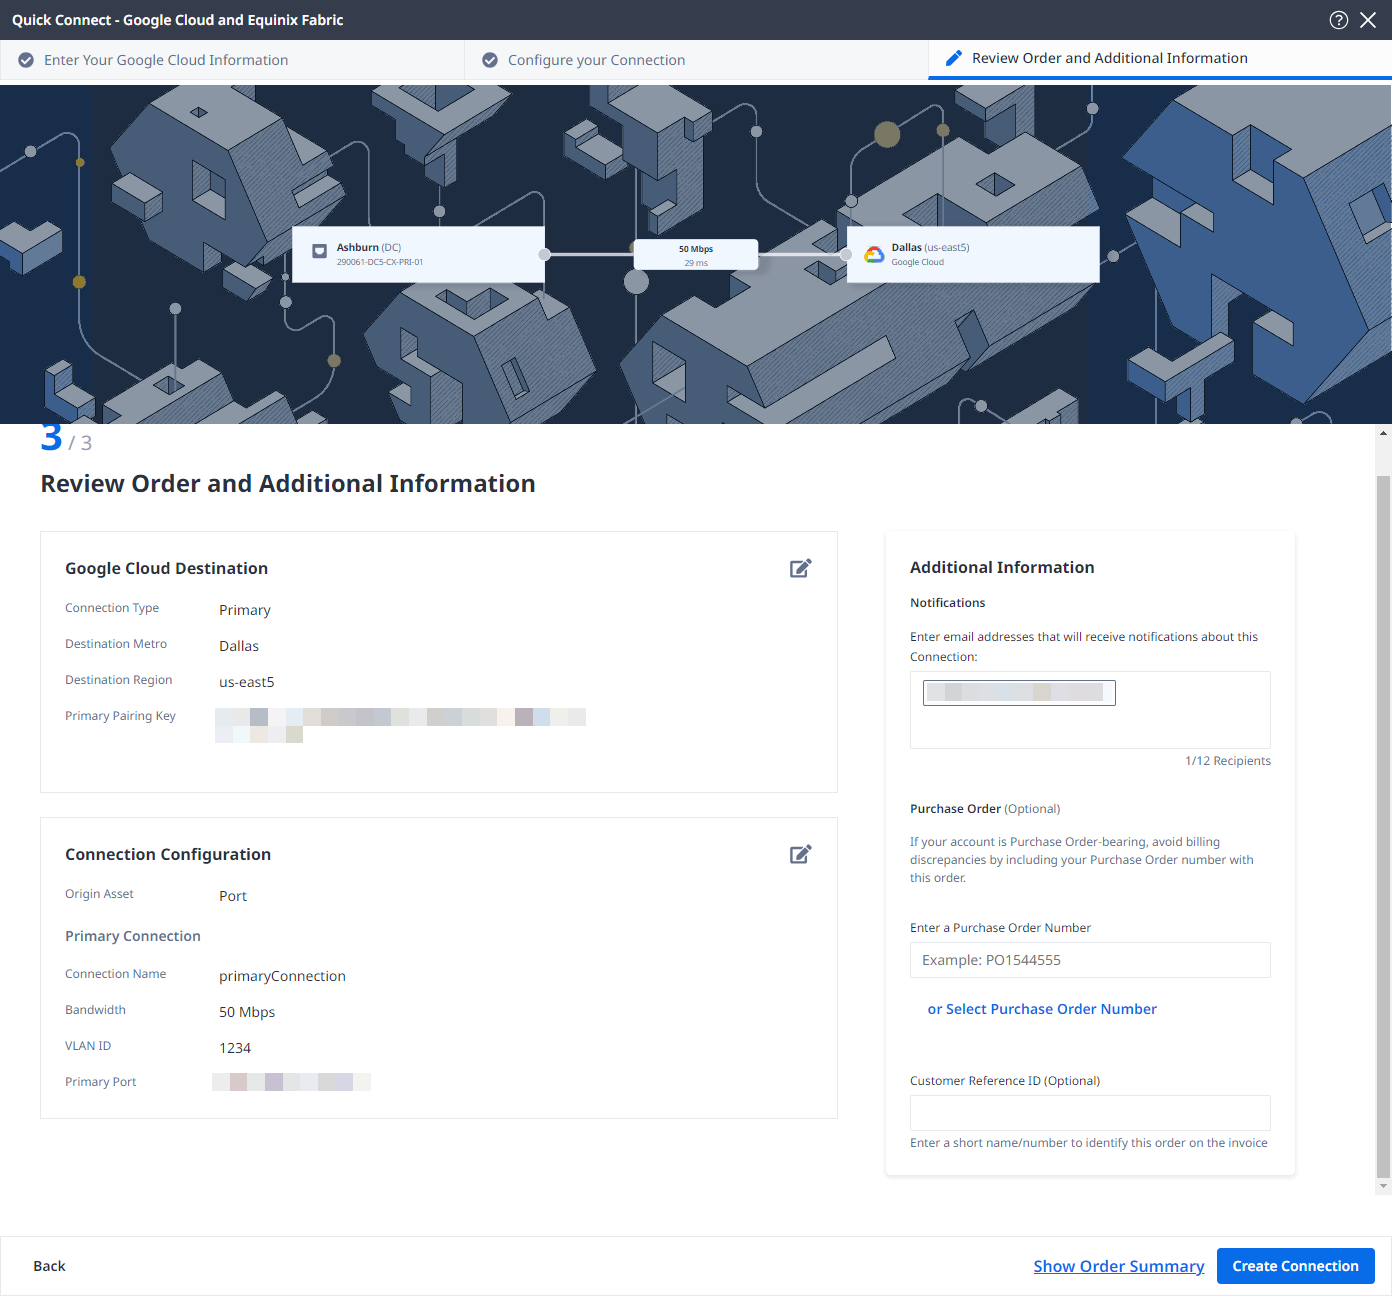
Review and Submit
-
Review the information in the Connection Configuration section.
-
Use the Notifications field to provide the email addresses of the recipients to be notified about the connection's status. You can add up to 12 email addresses.
-
(Optional) Enter or add order information in the Purchase Order section.
- Click Select Purchase Order Number.
- Click Select an Existing Purchase Order.
- Select purchase order number you want to apply to your order, then click Done.
-
Provide customer reference identifier, that will help you identify this order on your invoice.
-
Click Show Order Summary to see order details and connection pricing information.
When you are ready, click Create Connection.
Monitoring the Connection Status
Once you have created the connection, it appears in your Connections Inventory where you can monitor its status.
equinixStatus parameter values | providerStatus attribute values | Google Status | Description |
|---|---|---|---|
PROVISIONING | PROVISIONING | Connection request has not been sent to Google yet. | |
PROVISIONED | PENDING_APPROVAL | Waiting for service provider. | Connection waiting for acceptance. |
PROVISIONED | PROVISIONING | Activation needed -> Border Gateway Protocol (BGP) configuration required. | Connection establishment in progress. |
PROVISIONED | PROVISIONED | Pending -> availability | Connection accepted by client. |
Activating the Connection in the Google Cloud Portal
Once the provisioning job has been completed on the Equinix side, activate your connection in the Google Cloud Portal.
-
In the Interconnect section of the Google Cloud Portal, click Refresh at the top of your browser page. The Status displays
Activation needed. -
Click Activate, then click Accept. The Status updates to
BGP configuration needed. -
Click Configure BGP.
-
In the Peer ASN field, enter the ASN number for your on-premise router. Click Save and continue.
-
Review the Configuring on-premises routers page to complete any steps needed to connect your router to your Google Cloud environment via Google Cloud Interconnect.