
Implementing Service Tokens
Service tokens are associated with an Equinix Fabric port and shared with another user to authorize that user to create a connection to (Z-side tokens) or from (A-side tokens) your port.
Create an A-Side Service Token
Important: The creator of the A-side token is billed for the connection created using it.
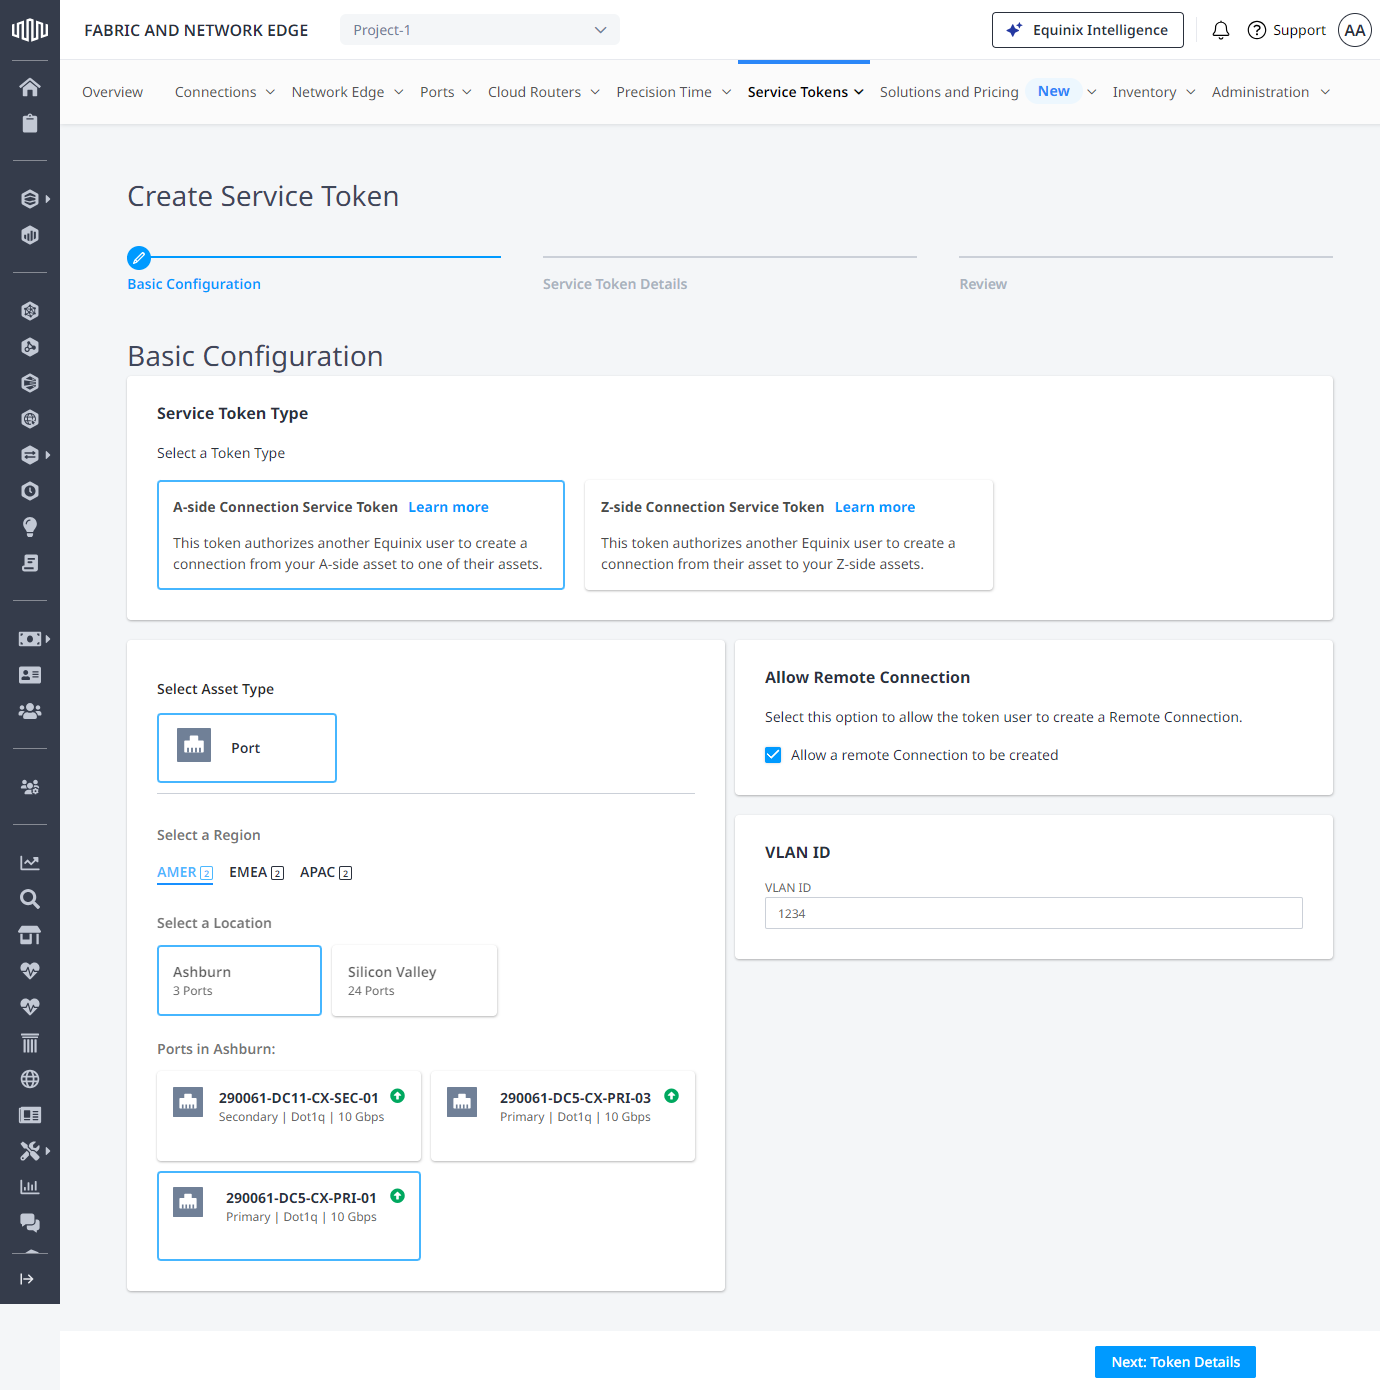
To create an A-side service token:
-
Log in to Equinix Fabric.
-
From the Service Tokens menu, select Create Service Token.
-
In the Basic Configuration section:
-
Select A-side Connection Service Token.
-
Select a location, then choose a port.
-
Deselect Allow a remote Connection if you want to allow only local connections.
-
Enter VLAN ID (applicable to Dot1q ports), or Inner Tag or C-tag and Outer Tag or S-tag (applicable to Qinq ports).
-
Click Next: Token Details.
-
-
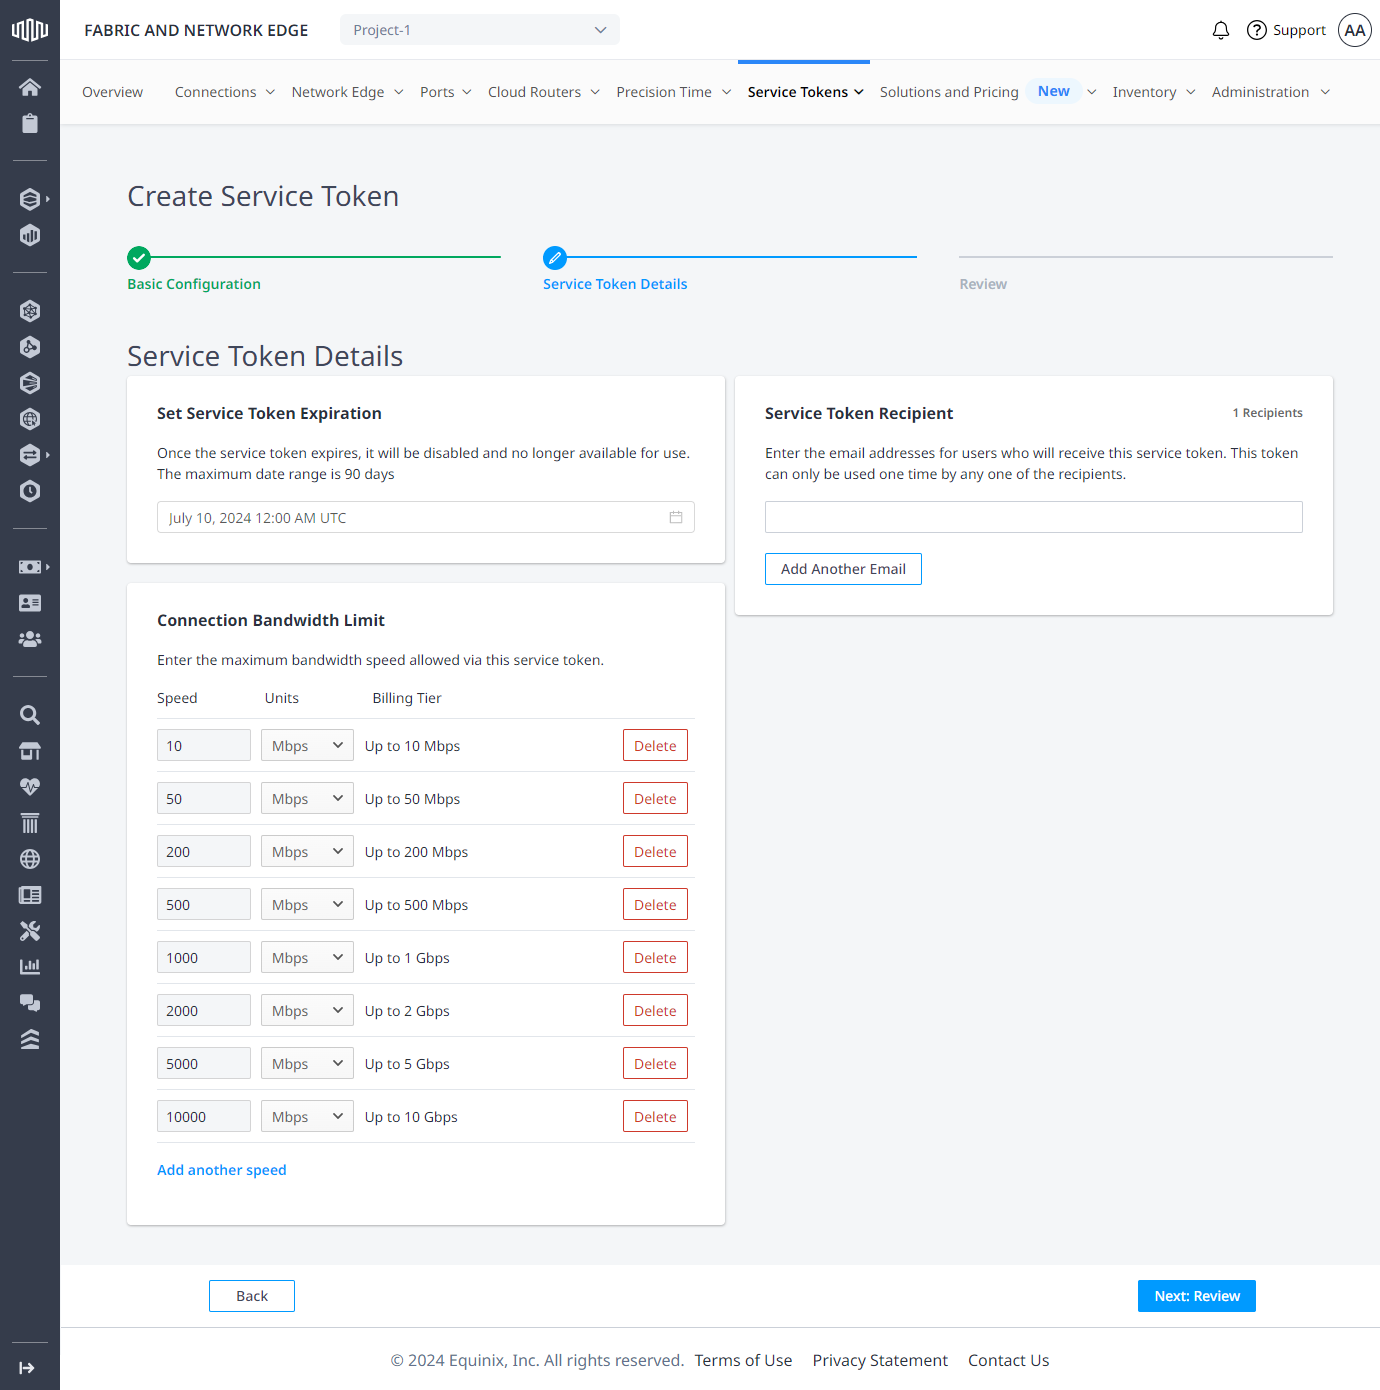
Enter the Service Token Details.
-
Set Service Token Expiration – Indicate how many days the service token is valid before it expires. The maximum number of days is 90.
Tip: You can edit the expiration date after the token has been created.
-
Connection Bandwidth Limit – Indicate the limits on the bandwidth offered by this service token.
-
Service Token Recipient – Enter the email address(es) of the user(s) who will eligible to redeem this service token and use it to create a connection.

-
-
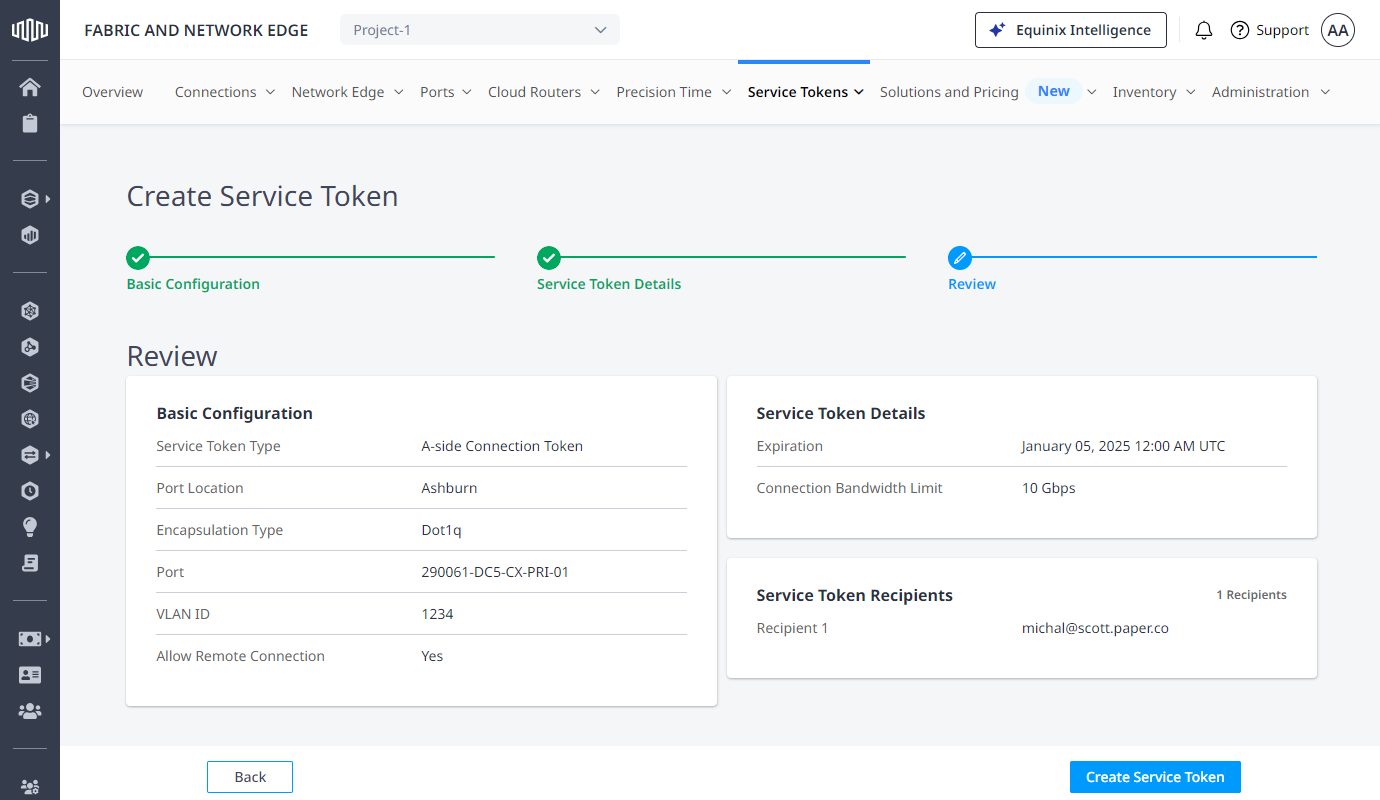
Click Next: Review.
-
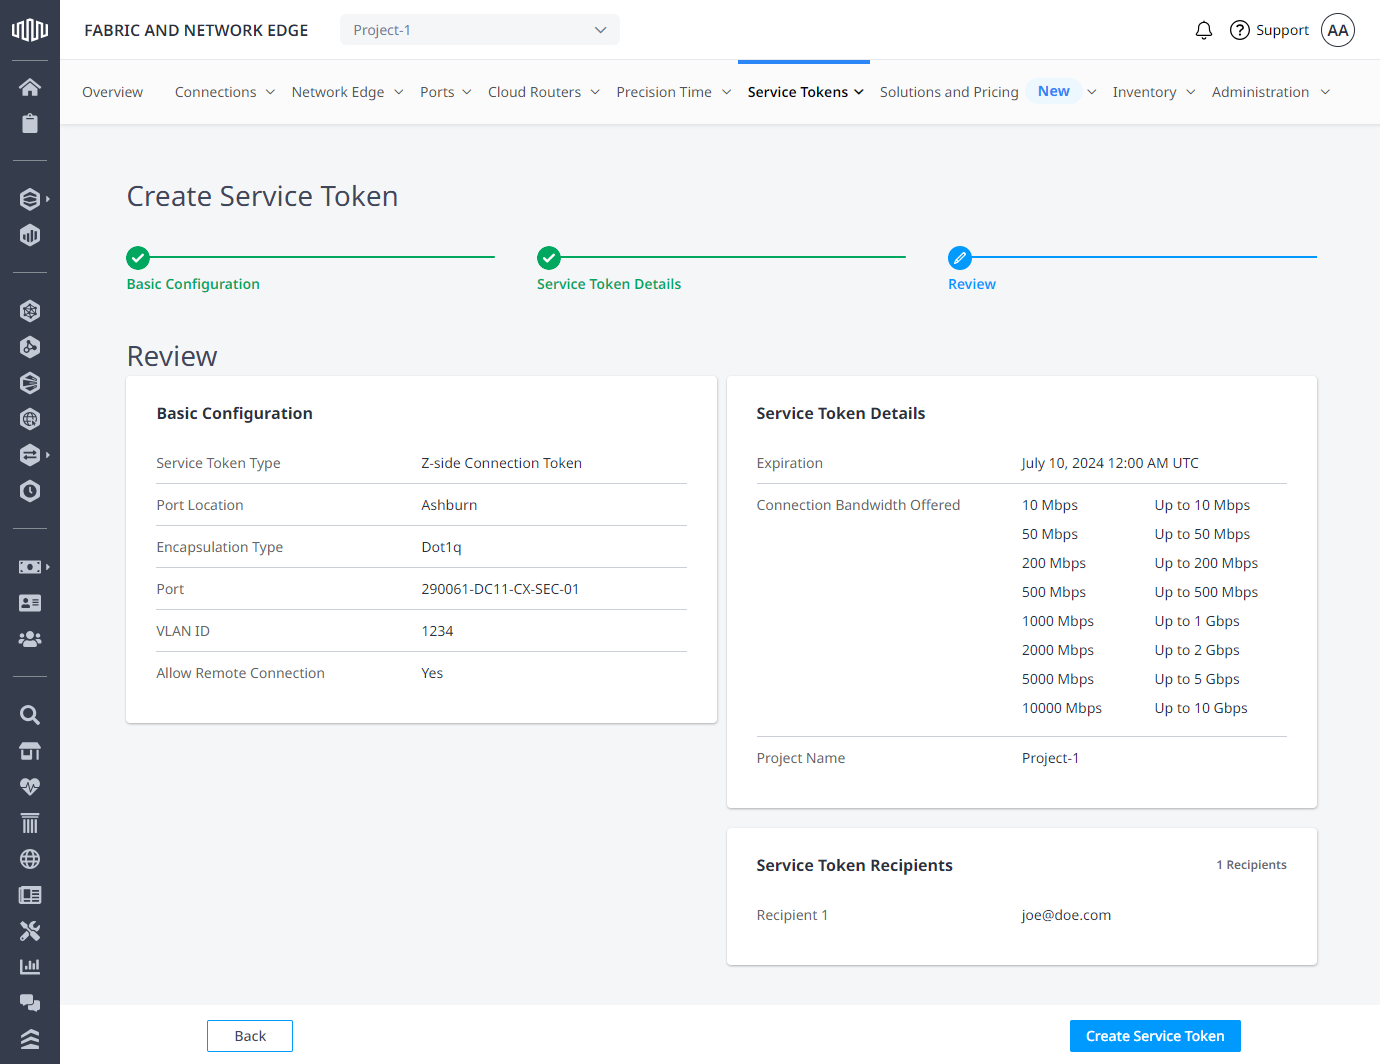
Review the service token configuration, details, and recipient(s).
-
Click Create Service Token.
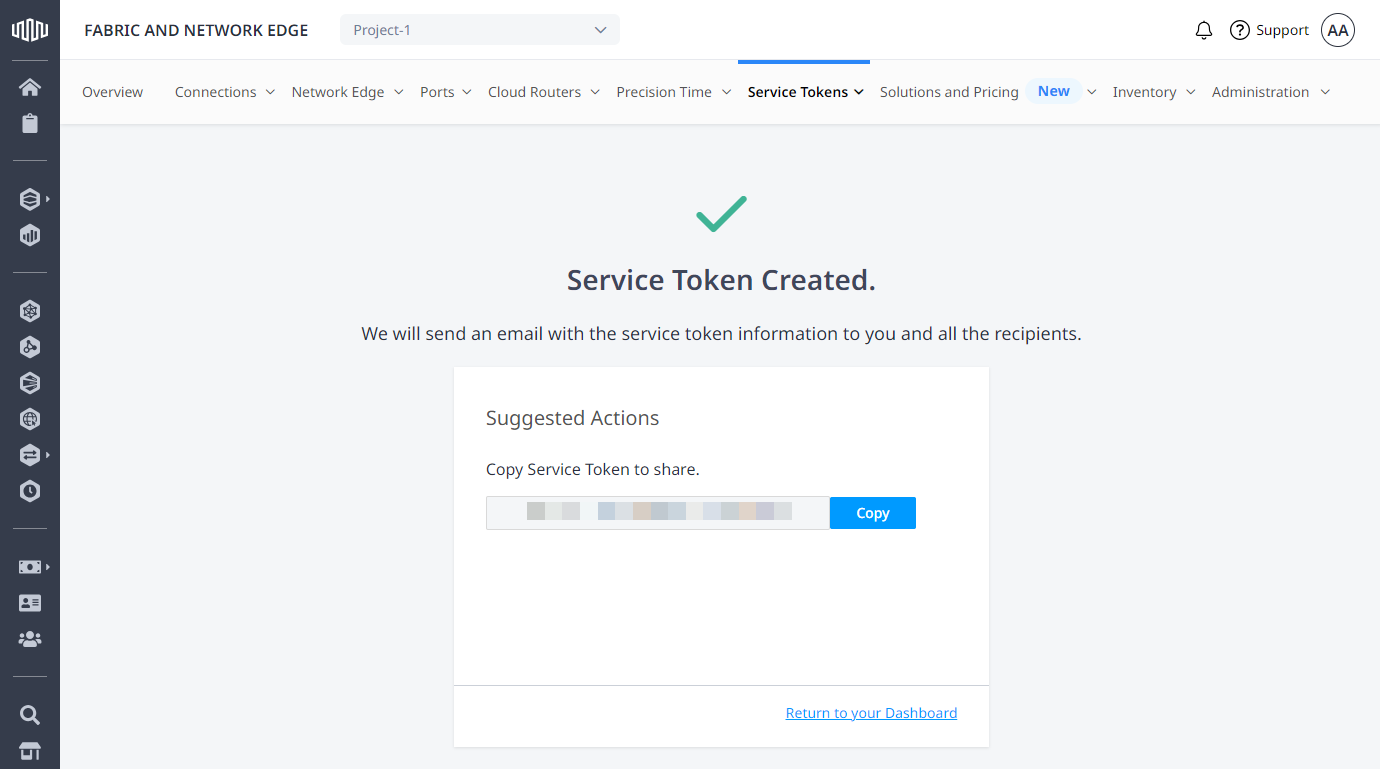
Tip: On the Service Token Created page, click Copy to copy the service token's identifier to the clipboard.
Create a Z-Side Service Token
Note: The creator of the Z-side token won't be charged for the connection created using it. The owner of the A-side is billed.
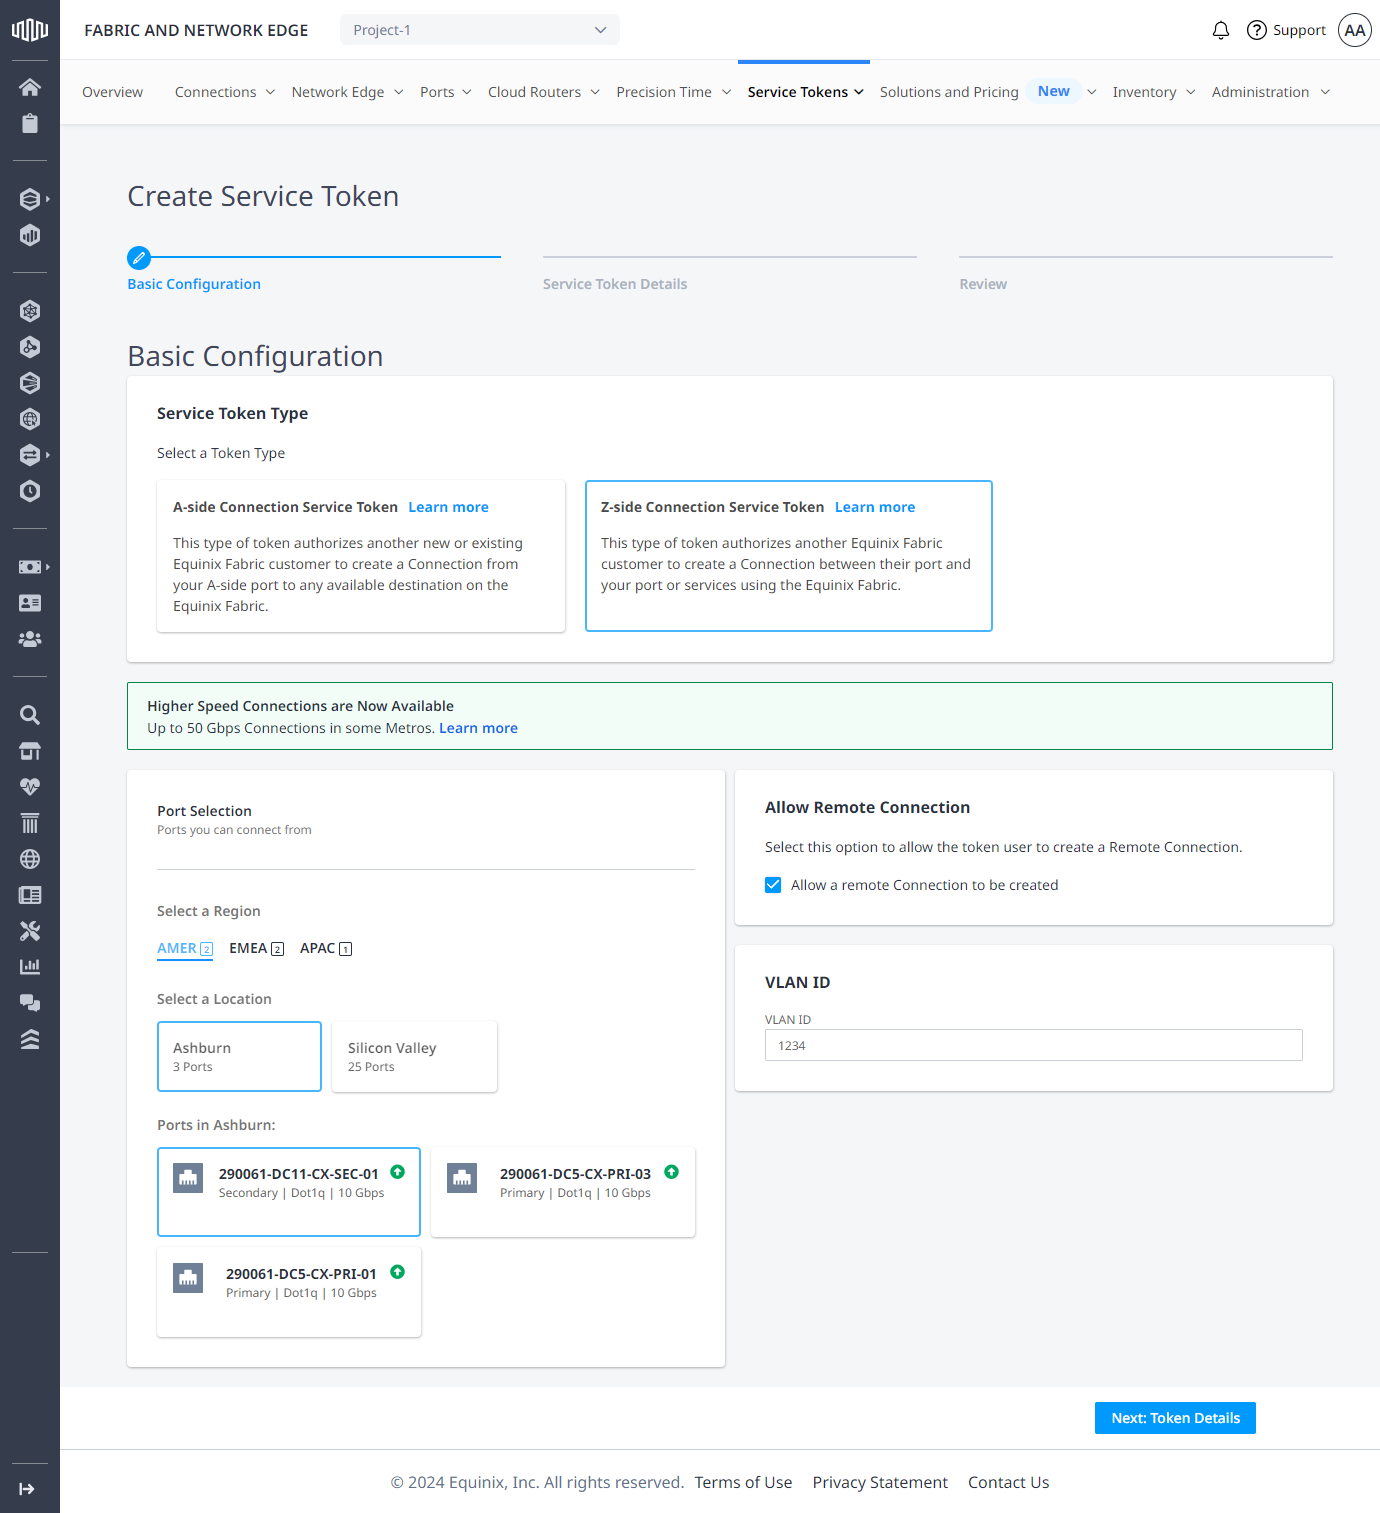
To create a Z-side service token:
- Log in to Equinix Fabric.
-
From the Service Tokens menu, select Create Service Token.
-
In the Basic Configuration section:
-
Select Z-side Connection Service Token.
-
Select a location, then choose a port.
-
Enter VLAN ID (applicable to Dot1q ports), or Inner Tag or C-tag and Outer Tag or S-tag (applicable to Qinq ports).
-
Click Next: Token Details.
-
-
Enter the Service Token Details.
-
Set Service Token Expiration – Indicate how many days the service token is valid before it expires. The maximum number of days is 90.
Tip: You can edit the expiration date after the token has been created.
-
Connection Bandwidth Limit – Indicate the limits on the bandwidth offered by this service token. A standard list of bandwidth configurations will display to give the customer (who is paying for this connection) choices. To delete from the list, click Delete. To add to the list, click Add another speed.
-
Service Token Recipient – Enter the email address(es) of the user(s) who will eligible to redeem this service token and use it to create a connection.
-
-
Click Next: Review.
-
Review the service token configuration, details, and recipient(s).
-
Click Create Service Token.
Tip: On the Service Token Created page, click Copy to copy the service token's identifier to the clipboard.
What next?
Service providers: see Implementing Your Virtual Connections.
