Connect to a Network Edge Virtual Device
Set up and provision new connections between Fabric Cloud Router and a virtual device through the Equinix Customer portal.
Prerequisites
You must already have a Network Edge appliance available. For more information about Network Edge, see Equinix Network Edge documentation.
Create a Connection to a Virtual Device
-
Sign into the Equinix Customer Portal and navigate to Fabric.
-
If your Fabric account has been transitioned to Equinix Identity and Access Management (IAM) platform, use the Context Switcher drop-down list to access your project and its assets. For more information, see Identity and Access Management.
-
From the Connections menu, select Create Connection.
-
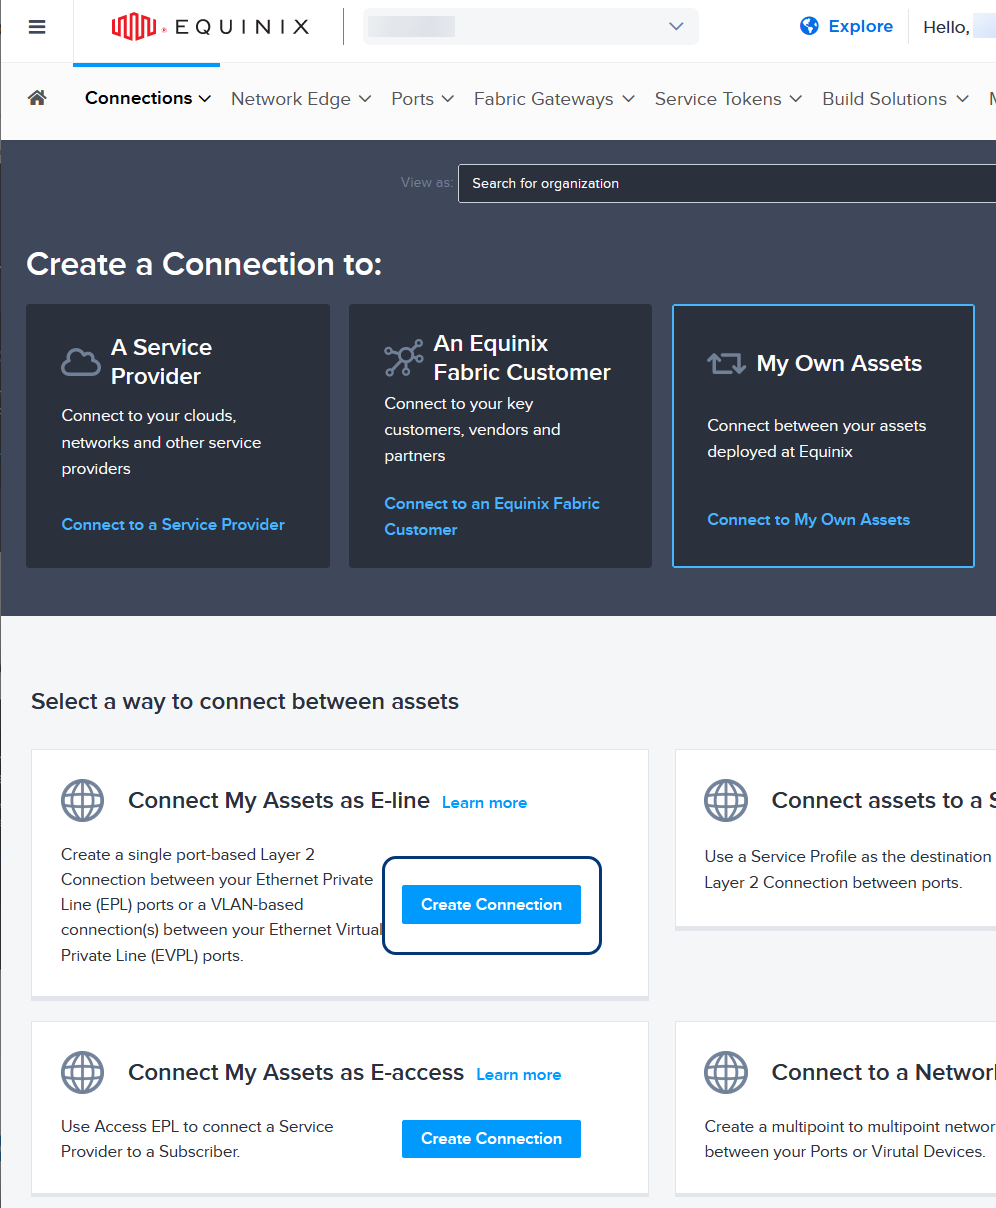
In the Create a Connection to section, click Connect to My Own Assets.
-
On the Connect My Assets as E-line card, click Create Connection.
The Select Locations form is displayed.
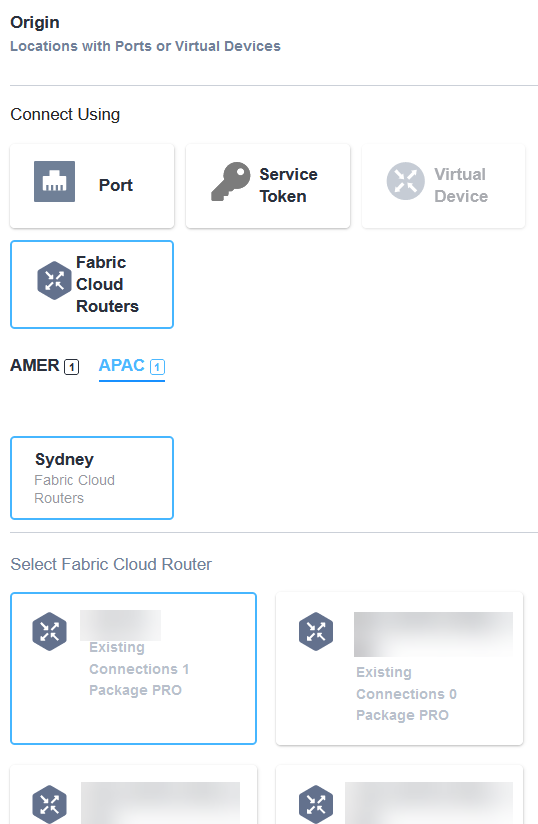
Select Locations
You can only connect a Cloud Router to other endpoints within the same metro location.
-
In the Origin section, click the Fabric Cloud Routers card.
-
Select the region tab, the Metro location, and the Fabric Cloud Router card for your new connection.
-
In the Destination section, select the Virtual Device card and the Metro location.
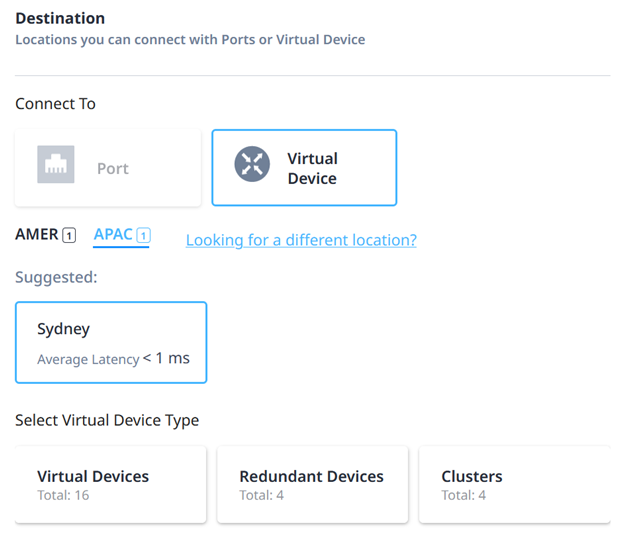
Select Redundancy
Select a redundancy option in the Select Virtual Device Type section.
Virtual Devices – Create a connection to a standalone virtual device within that metro location.
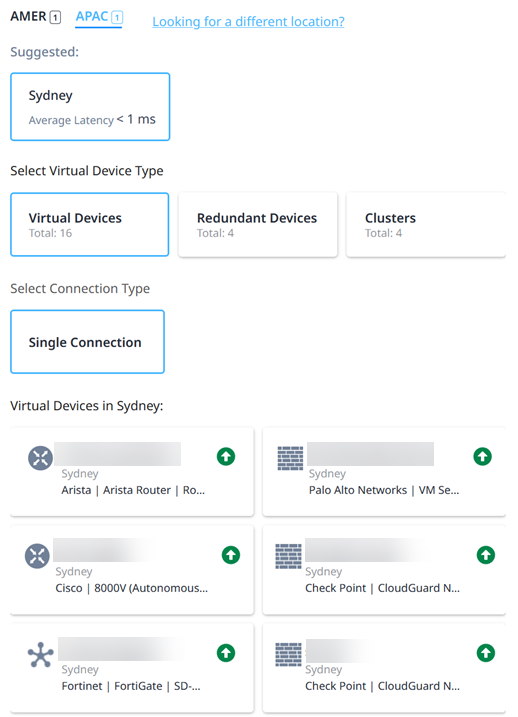
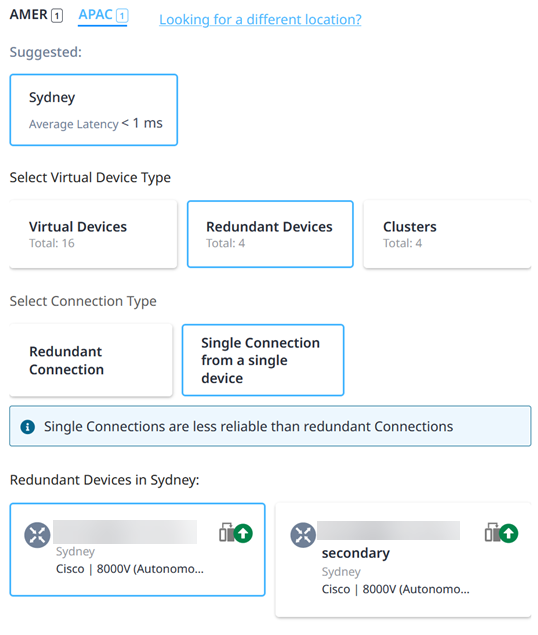
Redundant Devices – Select one of two choices:
-
Click Redundant Connection to create a pair of connections to redundant virtual devices.
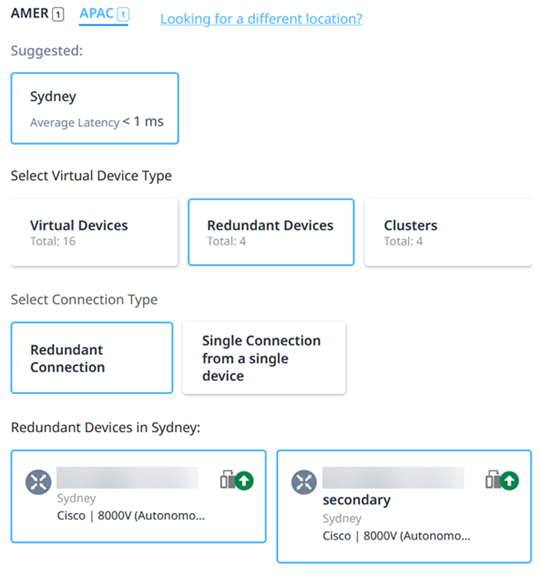
-
Click Single Connection from a single device to connect to one of the redundant virtual devices.
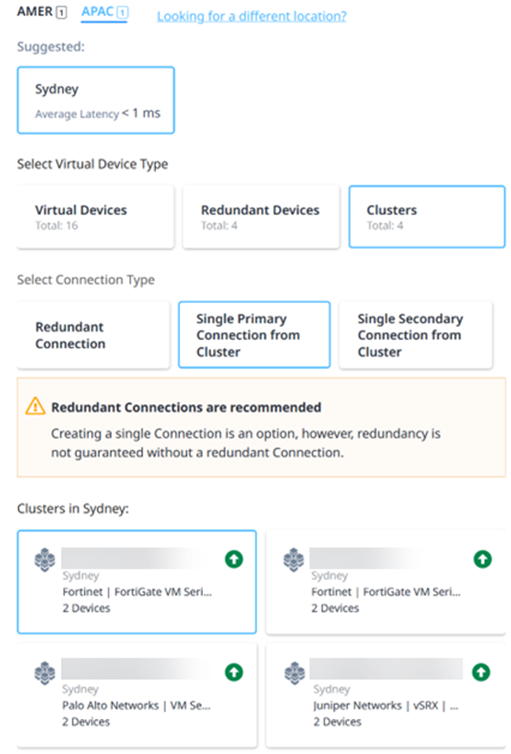
Clusters – Select one of three choices:
-
Click Redundant Connection to create a pair of connections to the cluster.
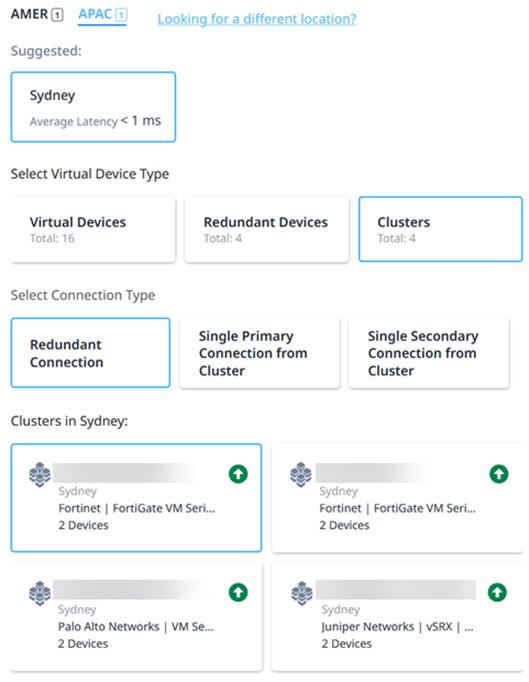
-
Click Single Primary Connection from Cluster to create a single connection to a node in the cluster.
-
Click Single Secondary Connection from Cluster to create a redundant connection to a node in the cluster.
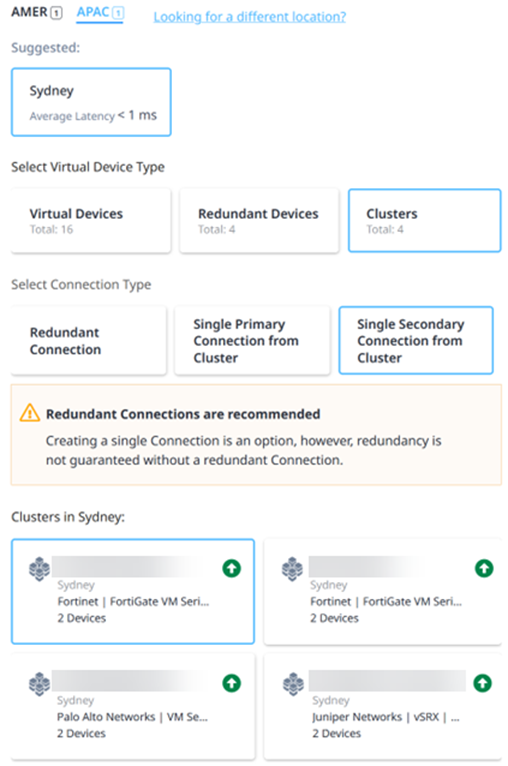
Click Next. The Connection Details form is displayed.
Connection Details
-
Provide details about your new connections in these fields:
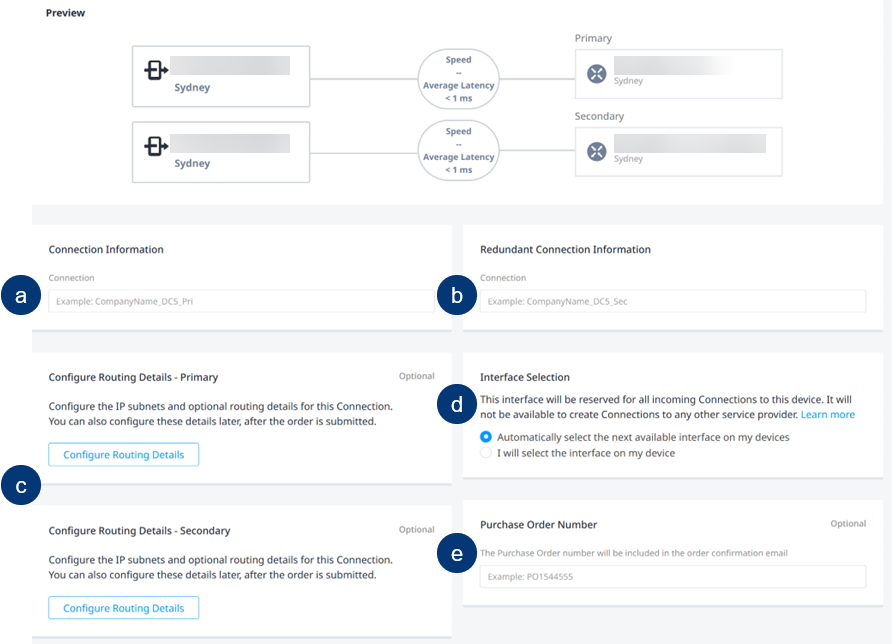
- Connection Information – Enter a name for the new primary connection.
- Redundant Connection Information – Enter a name for the new secondary connection, if you are creating a redundant connection.
- Configure Routing Details (Primary, Secondary) – Enter values for IPv4 and IPv6 subnets, Border Gateway Protocol (BGP), Bidirectional Forwarding Detection (BFD), and other details. You can configure these values now or after the order is submitted. The new connections are not provisioned until the routing details are configured. For more information, see Configure Routing Details.
- Interface Selection – Automatically select the next available interface on the virtual devices, or select an interface from all the available interfaces on the virtual devices.
- Purchase Order Number – Enter a number that will be included in the confirmation email.
-
Select a Connection Speed.
-
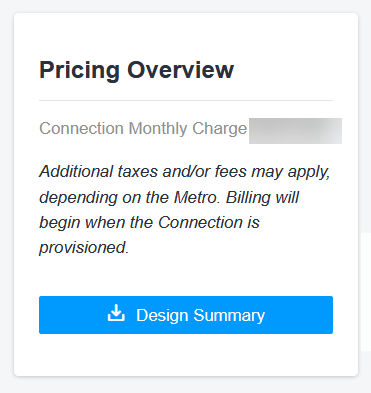
The Pricing Overview section shows the monthly charge for the new connections. Click Design Summary to download a PDF version.
-
Click Next.
The Review page is displayed.
Review
-
Verify the details for the connections in the Connection Summary section.
-
In the Notifications section, you can add one or more additional email addresses. Click Add Another Email and enter an address. Repeat this step to add more addresses.

-
The Pricing Overview section shows the monthly charge. Click Design Summary to download a PDF version.
-
The Routing Details section shows the routing details provided for the connections.
noteYou can provide routing configuration details for the connections before submitting your order. Or you can provide these details after the order is submitted.
-
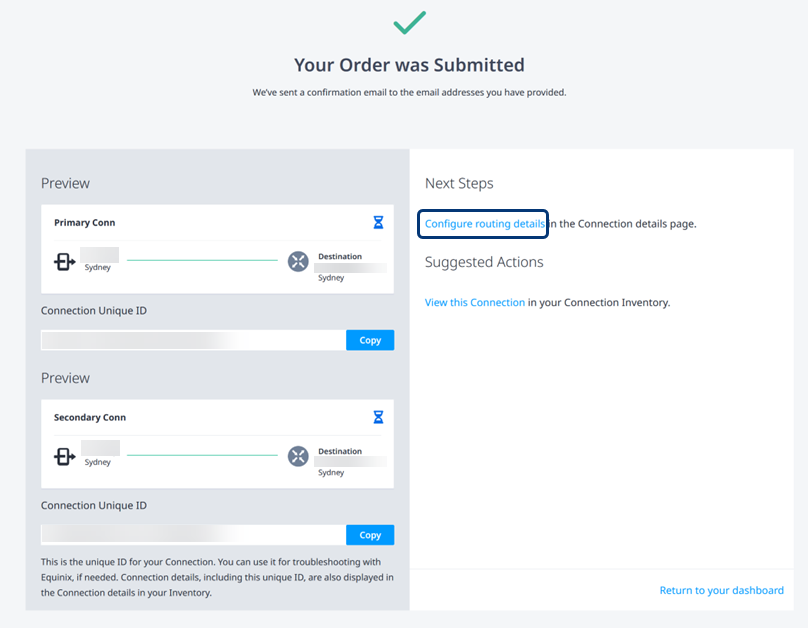
Click Submit Order.
A confirmation page displays the Connection Unique IDs and a link to Configure routing details, if these details have not been provided.
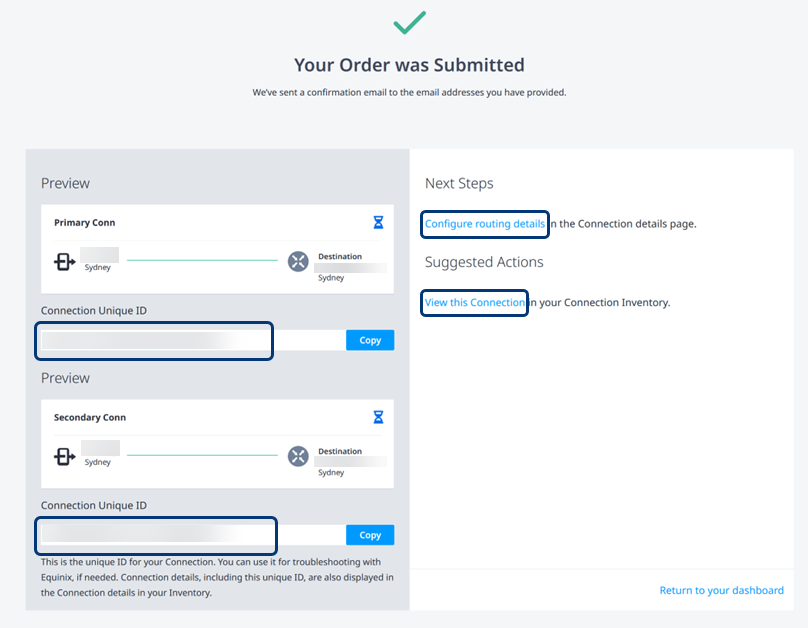
To display the inventory list of your port connections, click View This Connection. For more information, see Fabric Cloud Router Inventory.
Configure Routing Details
If routing details were not provided when the connection was created, the Next Steps section of the confirmation page provides a link to Configure routing details.
-
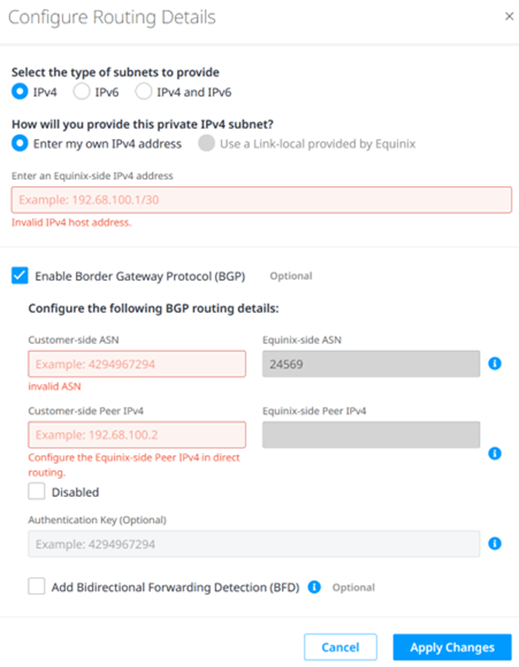
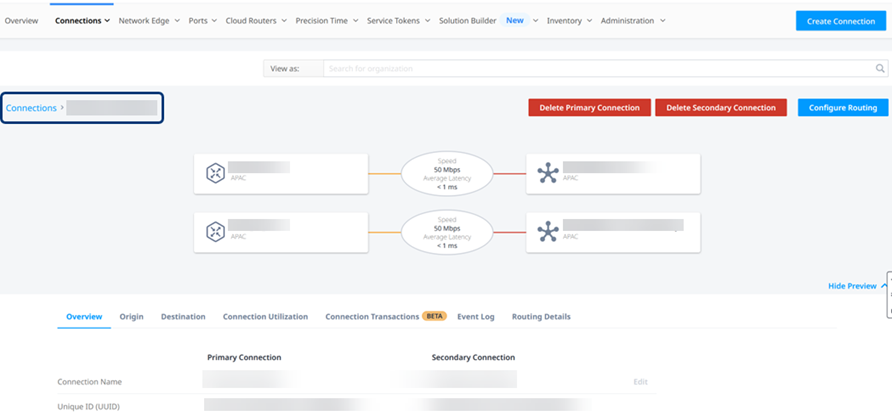
On the Connections page, click Configure Routing. The Configure Routing Details form is displayed.
-
Enter an Equinix-side (Fabric Cloud Router) IPv4 address for the connection.
-
Select Enable Border Cloud Router Protocol (BGP), then enter a Customer-side (virtual device) ASN and a Customer-side Peer (virtual device) IPv4 host address.
-
Enter an Authentication Key and add a Bidirectional Forwarding Detection (BFD) interval.
-
Click Apply Changes.
The Routing Details are updated, and the connection is fully provisioned.
For redundant connections – You can view the details of both connections side by side, but you can only configure Routing Details information for the connection that you selected to view. The connection that you are managing is identified at the top left of the page.
Connect to Network Edge Using API
You can use Fabric Cloud Router API to automate this procedure and integrate it with your internal systems. For details, see Connect Fabric Cloud Router to Network Edge Device.