Connect to Oracle (OCI)
Set up and provision a new connection between Fabric Cloud Router and Oracle Cloud Infrastructure (OCI) by using the Equinix Customer portal.
Prerequisites
-
An existing Fabric Cloud Router in the relevant Equinix metro, to establish the desired cloud-to-cloud networking. (See Create a Fabric Cloud Router.)
-
A valid Oracle Cloud account with the ability to create and modify OCI FastConnect circuits.
-
One or more OCI FastConnect circuits must be created before creating the virtual connection in Equinix Fabric , because OCID Keys are required during the connection creation process below.
Create a Connection
-
Sign into the Equinix Customer Portal and navigate to Fabric.
-
If your Fabric account has been transitioned to Equinix Identity and Access Management (IAM) platform, use the Context Switcher drop-down list to access your project and its assets. For more information, see Identity and Access Management.
-
From the Connections menu, select Create Connection.
-
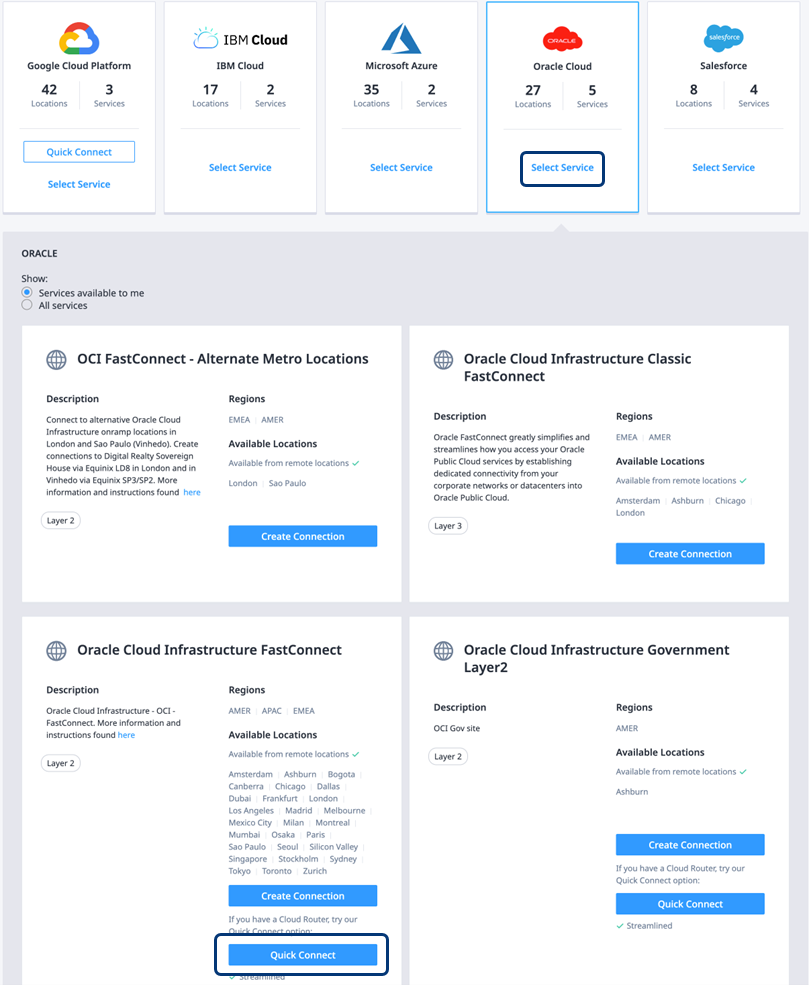
In the Frequent Connections section, click Select Services in the Oracle Cloud card to expand the available services.
-
Based on the desired OCI environment, click Connect under the appropriate profile.
Connect – Oracle Cloud Infrastructure FastConnect
-
Select the Connection Type:
- Redundant – Create a redundant pair of connections.
- Primary – Create a single connection.
- Secondary – Create a redundant connection to improve network reliability.
-
Enter one or more Oracle Cloud identity (OCID) keys from the OCI FastConnect Portal.
-
From the Oracle Destination drop-down list, select the region and metro where your FastConnect circuits and Fabric Cloud Router are located.
- Equinix Fabric metros that have on-ramps to OCI Regions might be located in different cities. These are still considered to be local connections in Fabric.
-
Click Next.
Configure Your Connection
-
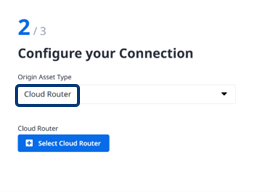
From the Origin Asset Type drop-down list, click Cloud Router.
-
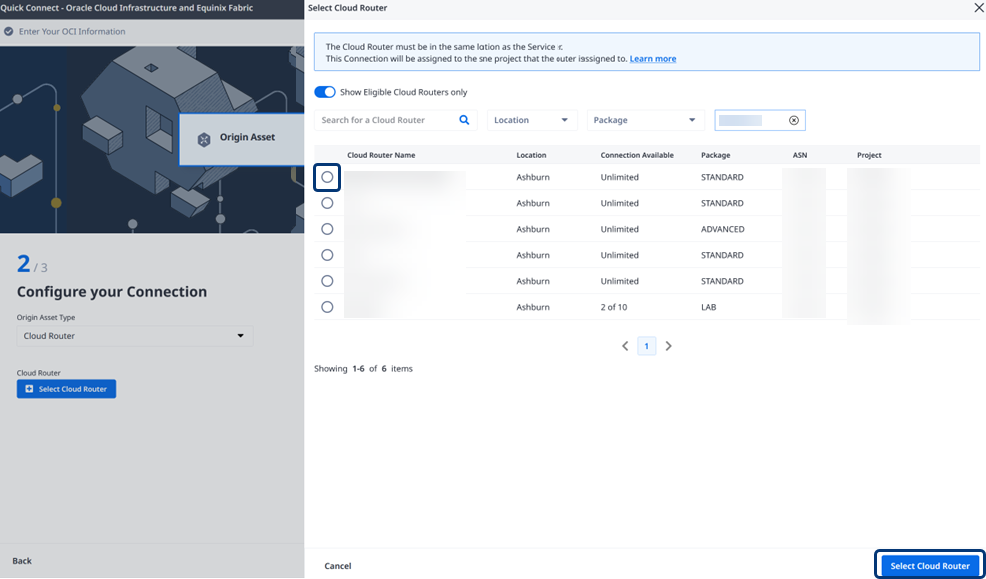
Click Select Cloud Router. In the form that displays on the right side of your browser, choose the Cloud Router that you want to use.
-
Click Select Cloud Router in the lower right corner.
-
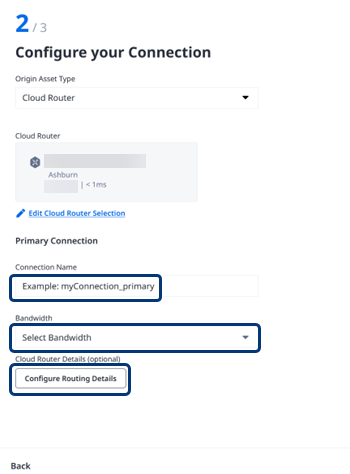
Enter a unique Connection Name for each new connection, depending on the Connection Type.
-
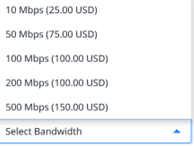
From the Bandwidth drop-down list, select the bandwidth for your connection. Even though Oracle FastConnect OCID keys can only be created with speeds of 1 Gbps or greater, Equinix Fabric allows you to create the Fabric connection with any of the standard bandwidth tiers that are available on Fabric.
If the bandwidth speed for the connection is lower than the speed of the OCID key, Fabric will rate-limit traffic to the connection speed.
-
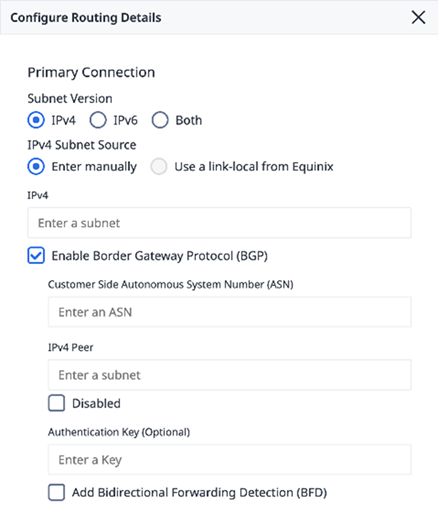
You can configure Border Gateway Protocol (BGP) routing details, or wait to configure BGP after the connection creation process is complete. Select Configure Routing Details and provide the required information. See Configure Routing Details in the Customer Portal below for additional guidance.
-
Click Next.
Contact Information
-
Review the email address for notifications. If needed, change the address, or add additional addresses as desired.
-
Enter a Purchase Order Number and a Purchase Reference ID.
-
Click Create Connection. A confirmation page displays a success message and the overview of your new connection.
-
In the confirmation page, click View this Connection in your Fabric Inventory to continue configuring the routing details.
Configure Routing Details
These configuration steps can be completed during the connection ordering process. If configured previously, you can skip this section.
The Connections Inventory is displayed, including your newly created connection.
-
Ensure that the appropriate OCI FastConnect that you selected in the previous section is fully configured in the Oracle Cloud portal.
-
From the Connection Name list, click the name of your new connection. Start with your primary connection, if it's not configured yet.

A summary of the connection details is displayed, including the status of `Pending Interface Configuration`.
3. Select the Routing Details tab and click Configure Routing. The Configure Routing Details form is displayed.

4. Select the type of subnet to provide: Enter my own IPv4 address.
-
Enter an Equinix-side IPv4 address with CIDR.
/30is sufficient, but/28and/29also are permitted. -
Select Enable Border Gateway Protocol (BGP). Enter a Customer-side ASN and a Customer-side Peer IPv4 host address.

7. If you are using BGP Authentication, enter the shared secret. Ensure that the secret is appropriately configured and matches on the FastConnect circuit in the Oracle Cloud portal as well.
-
If you would like to use Bidirectional Forwarding Detection (BFD), select Enable BFD and set the appropriate interval (in milliseconds). The BFD interval must match on both sides of the connection.
-
Click Apply Changes. The Routing Details are updated, and the Fabric side of the connection is provisioned.

10. If you created a secondary connection to Oracle Cloud, repeat from step 2 to configure the second connection.
To complete the configuration of the end-to-end connection, make the corresponding routing changes in Oracle Cloud.
Changing Your Connection Bandwidth
Once an OCI connection is provisioned, you can downgrade its bandwidth from the Connection Overview screen. Or you can upgrade its bandwidth up to the OCI limit.
-
In the Connection Created success screen, click View Connections in Fabric Inventory.
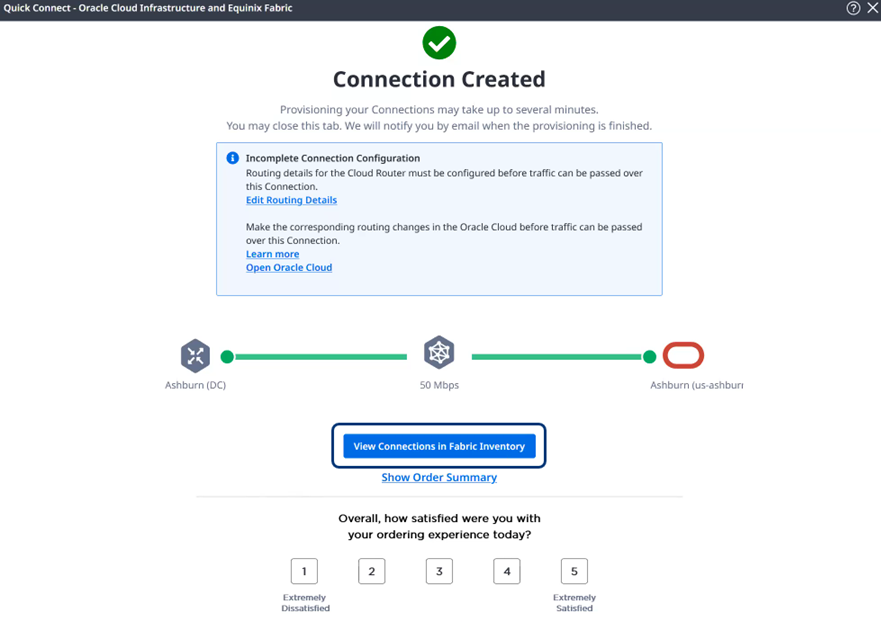
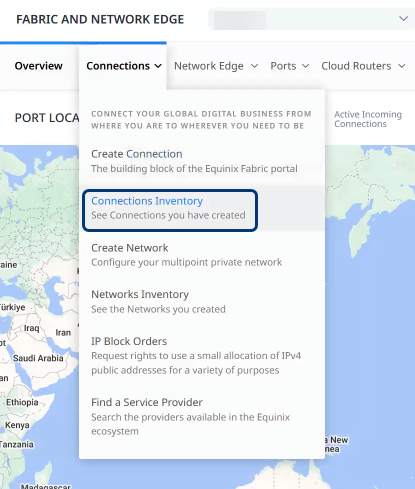
Or, from the Connections menu on the Equinix Customer portal, select Connections Inventory.
-
Select the name of the new connection from the Inventory list.
-
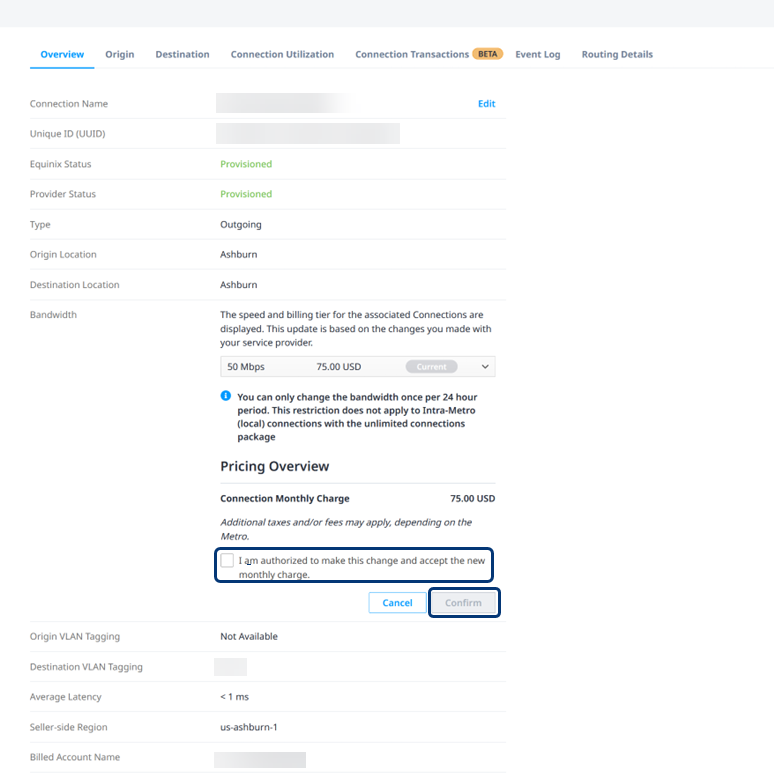
In the Overview details window, click Change in the Bandwidth row.
Other choices for bandwidth and pricing are displayed in the drop-down list.
-
Select a lower or higher bandwidth, from 10 mbps up to the OCID key bandwidth limit.
-
Accept the new monthly charge, and click Confirm.