Network Policies
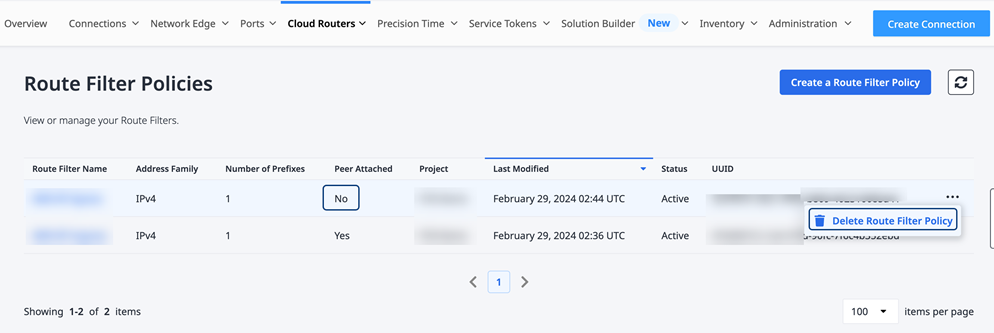
Network policies give you granular control over the advertisement (egress) and reception (ingress) of specific IP prefixes using Border Gateway Protocol (BGP).
Policies and rules are configured to selectively permit or deny the propagation of routes based on their IP address prefixes, enabling users to enforce precise routing policies tailored to their specific needs.
-
Route Aggregation policies aggregate multiple route prefixes under a single address that is advertised to BGP peers.
-
Route Filter policies filter routes based on the route’s prefix and apply the filter to routes received from, or advertised to, BGP peers.
The filters can mitigate the impact of potential BGP routing anomalies or malicious activities, safeguarding the integrity and availability of the Cloud Router and its associated connections.
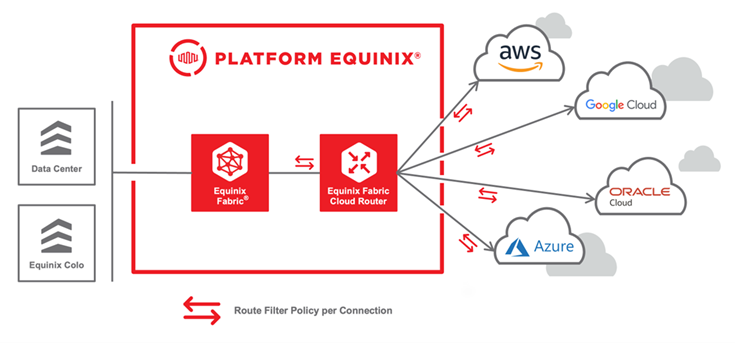
The route filters are applied to the virtual connections associated with your Cloud Router. A policy must be defined as either an IPv4 or IPv6 policy when it is created. However, a route filter can be applied to a virtual connection as ingress or egress.
Route filter policies are supported on point-to-point (IPv4 and IPv6) and IP-WAN (IPv4) connections.
Network Policies are managed through the Equinix Customer portal or APIs, allowing you to create and customize policies as needed. Updates to existing policies are applied automatically, and typically go into effect in less than a minute.
Prerequisites
Complete these steps before continuing to the procedures below:
- Sign into the Equinix Customer Portal and navigate to Fabric.
If your Fabric account has been transitioned to Equinix Identity and Access Management (IAM) platform, use the Context Switcher drop-down list to access your project and its assets. The IAM roles required for this function:
* Fabric Cloud Router Manager
* Fabric Manager
Create a Network Policy
-
In the Fabric portal, select Network Policy Inventory from the Cloud Routers menu.
-
In the Actions drop-down, select Create a Route Filter Policy or Create a Route Aggregation Policy.

-
Enter the policy name.
-
If you are creating a Route Filter Policy, select
IPv4orIPv6for the Address Family. If you are creating a Route Aggregation Policy,IPv4is already selected by default. -
Click Create.
The policy is created, and the Network Policies inventory list is displayed. Next, add rules to the new policy as described below.
Edit a Network Policy to Add or Remove Prefixes
In the Fabric portal, select Network Policy Manager from the Cloud Routers menu.
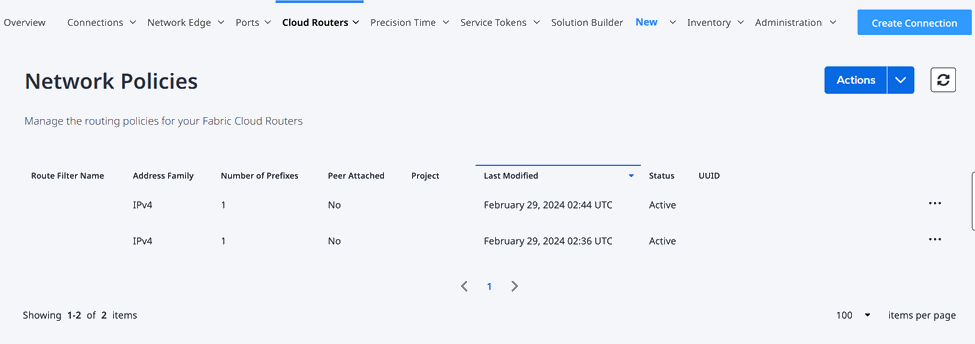
To edit an existing policy (adding or removing prefixes):
-
Click the name of the desired policy to select it.
-
Click the drop-down arrow next to Actions and select Edit Route Filter Policy.
-
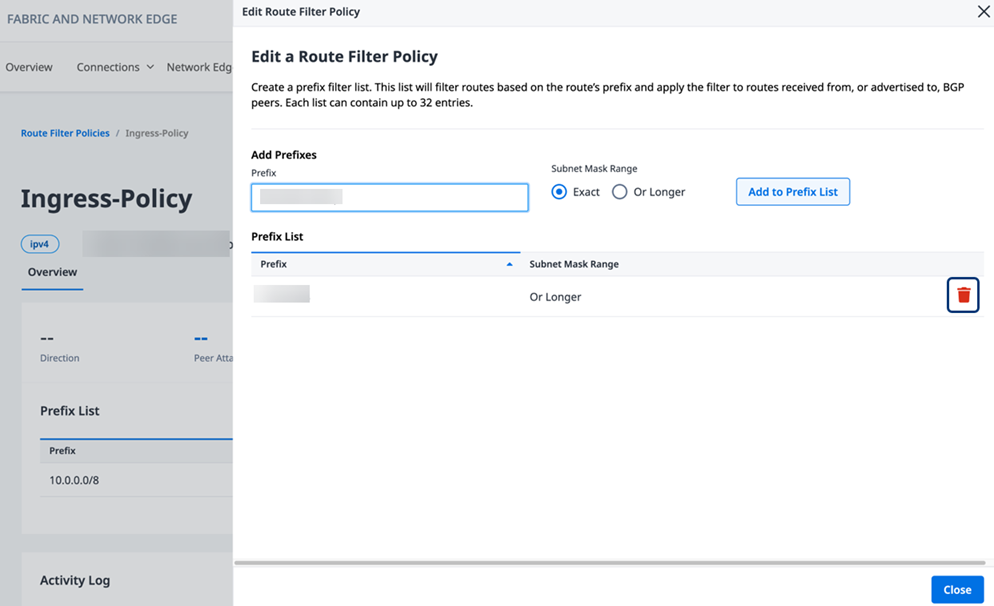
To add a new prefix to the policy, provide an IP Address and CIDR, then select a Subnet Mask Range of either Exact / Or Longer and select Add to Prefix List. A route filter policy can contain up to 32 prefixes.
-
To remove an existing prefix from the policy, click the trash icon on the right of the prefix.
noteThe action of adding or removing prefixes from a Route Filter Policy is processed immediately and updates are applied and saved automatically, including changes made to a Route Filter Policy that is already applied to a connection.
-
-
Click Close to return to the Route Filter Policy details.
Attach or Detach a Route to/from a Connection
-
From the Connections menu in the Fabric portal, select Connections Inventory.
-
Select a connection name.
-
On the Connection Details page, select Routing Details.
-
In the Route Filter Policy section:
- Select an IP type: IPv4, IPv6, or both.
- Select the direction: Ingress and/or Egress.
To attach a Route Filter Policy:
- Select Edit.
- From the drop-down list, choose the Route Filter Policy to be attached.
- Click Save.
The Route Filter Policy Status changes to ATTACHING, then to ATTACHED.
To check for status updates, click the refresh icon at the top of the Route Filter Policy list.
To detach a Route Filter Policy:
- Select Edit.
- Select Detach Policy.
- Click Save.
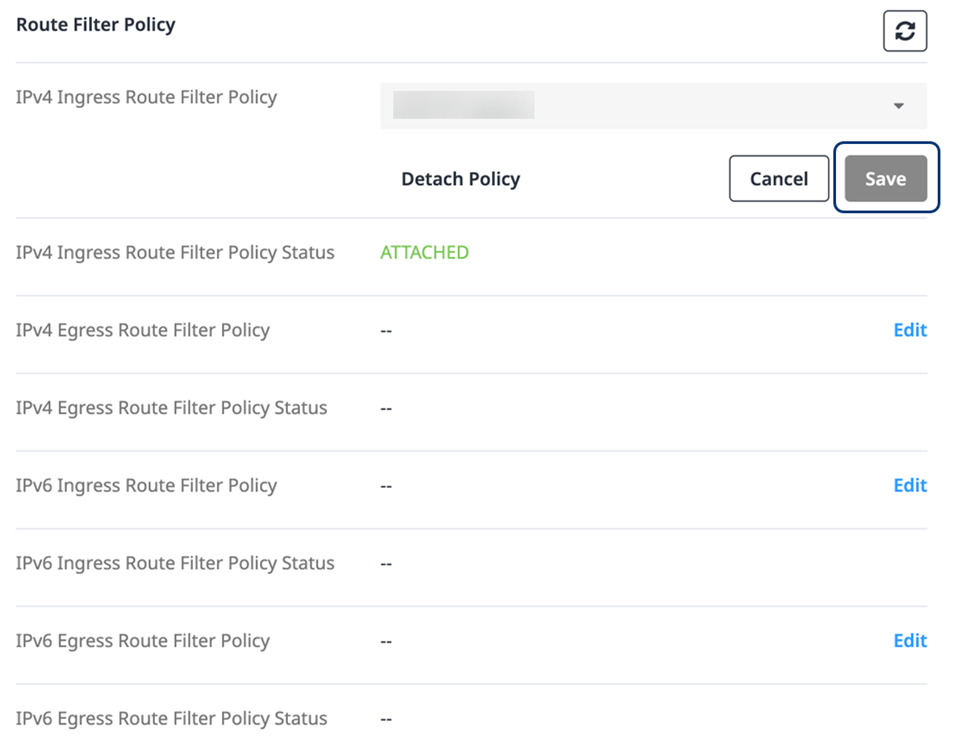
The Policy Status changes to DETACHING, then displays two dashes (--).
To check for status updates, click the refresh icon at the top of the Route Filter Policy screen.
Delete a Network Policy
- In the Fabric portal, select Network Policy Inventory from the Cloud Routers menu.
- Identify the Route Filter Policy to be deleted, and click the ellipsis (...).
- Select Delete Route Filter Policy.
Before you delete a Route Filter Policy, the Peer Attached status for the policy must display No. If the policy is still attached to a connection, you must detach the policy before it can be deleted. For more details about detaching a route from a connection, see the procedure above.
