Ordering Internet Access for a Dedicated Port
You can order a dedicated Equinix Internet Access port in an Equinix IBX data center where you already have a cage or a cabinet. The following steps guide you through the ordering flow based on the assets that are assigned to your organization, project, and account.
This page covers ordering Internet Access over a Dedicated Port. Information on ordering service for a Fabric Port or Network Edge device is available on Ordering Internet Access.
Start Your Order
To order Internet Access:
-
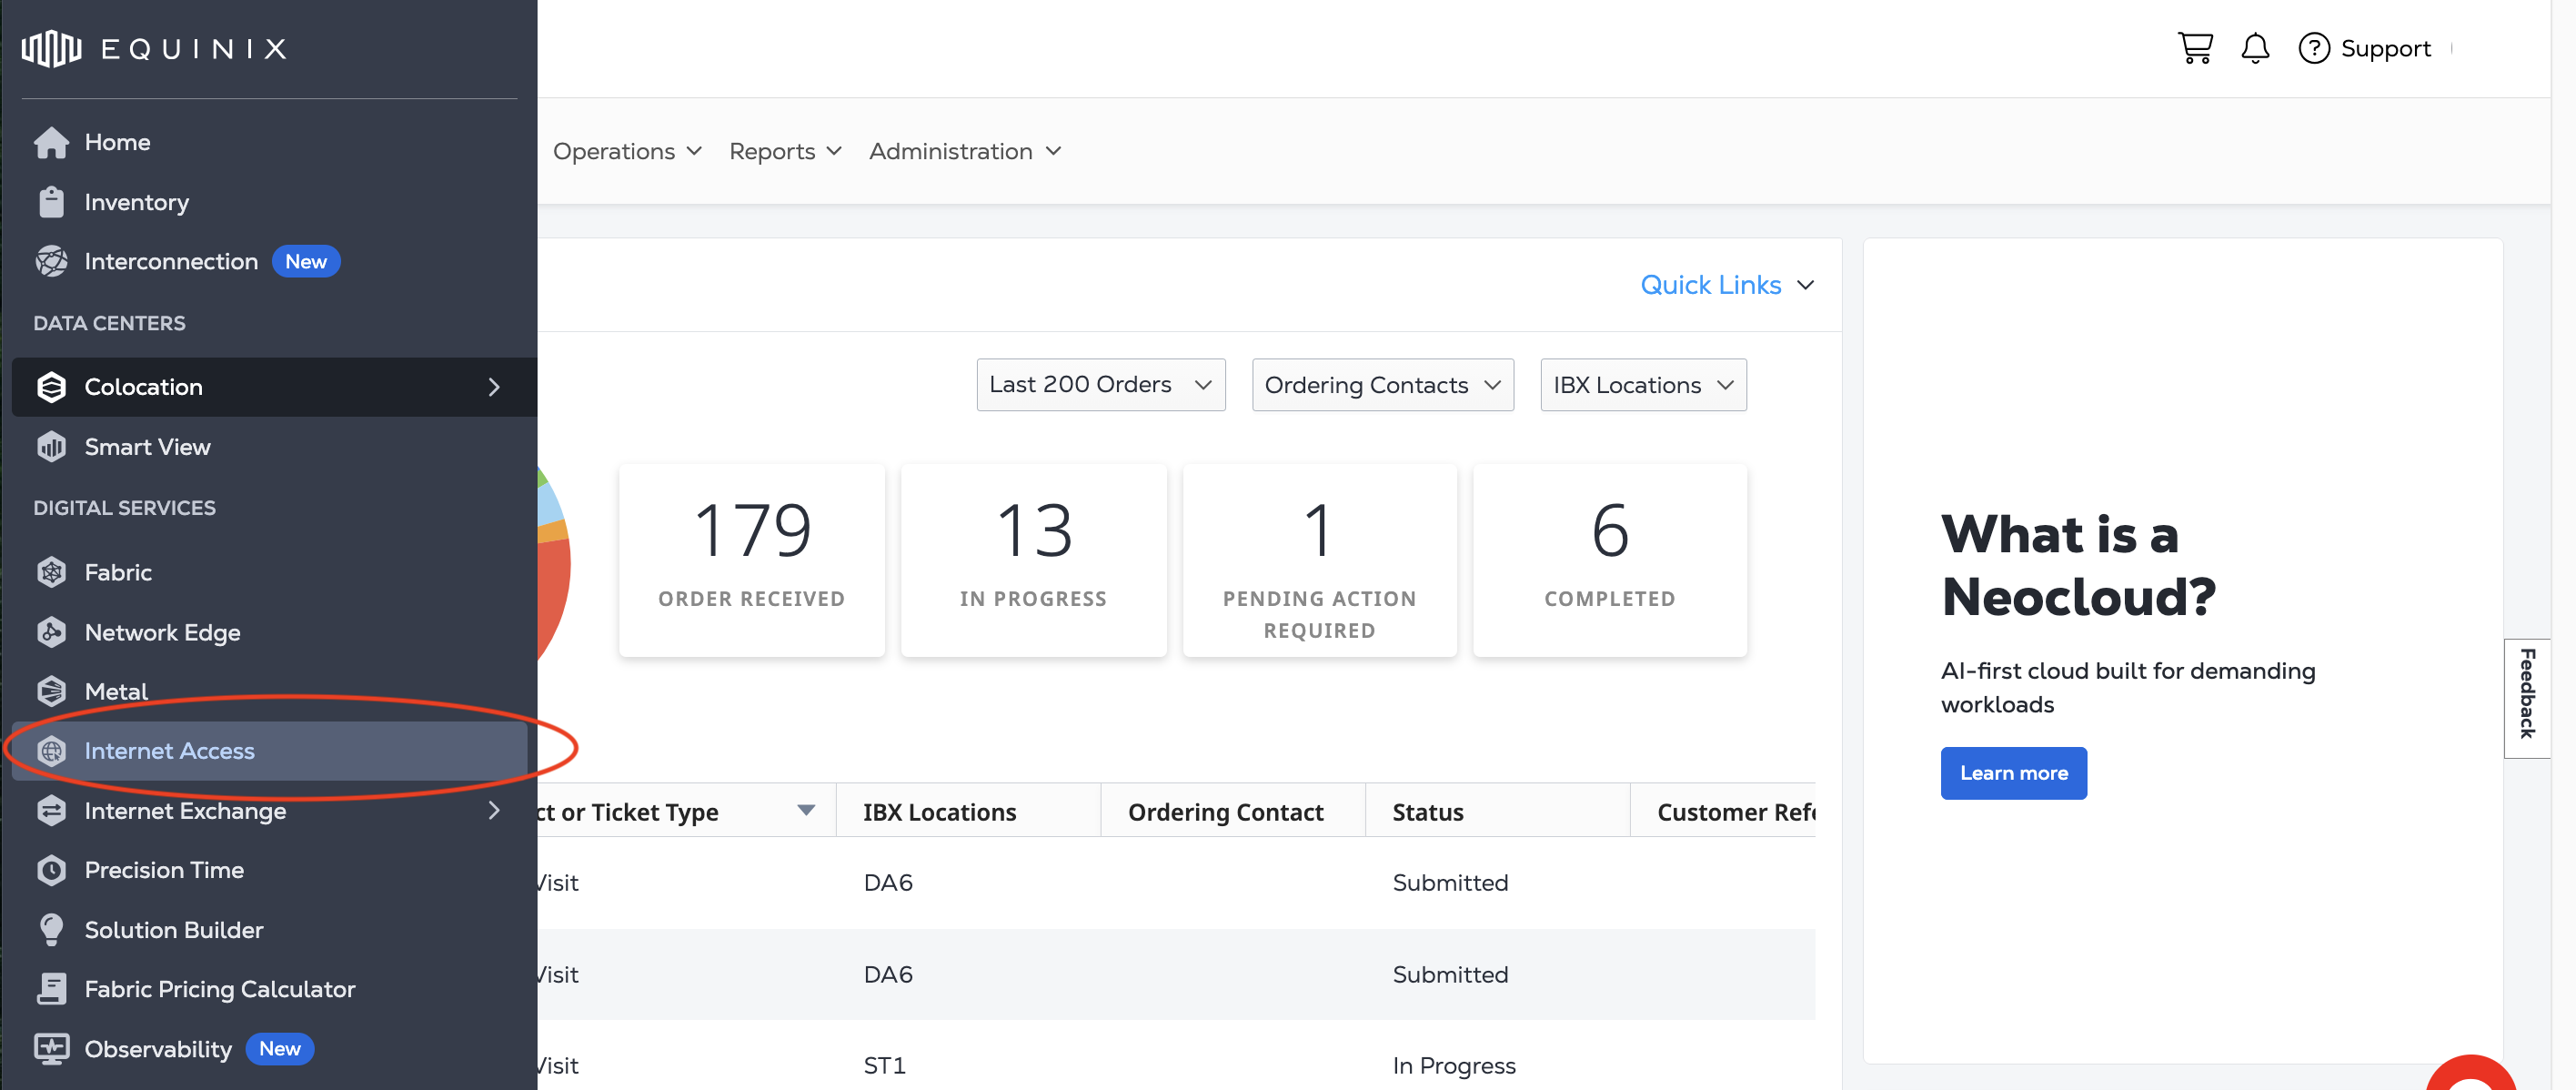
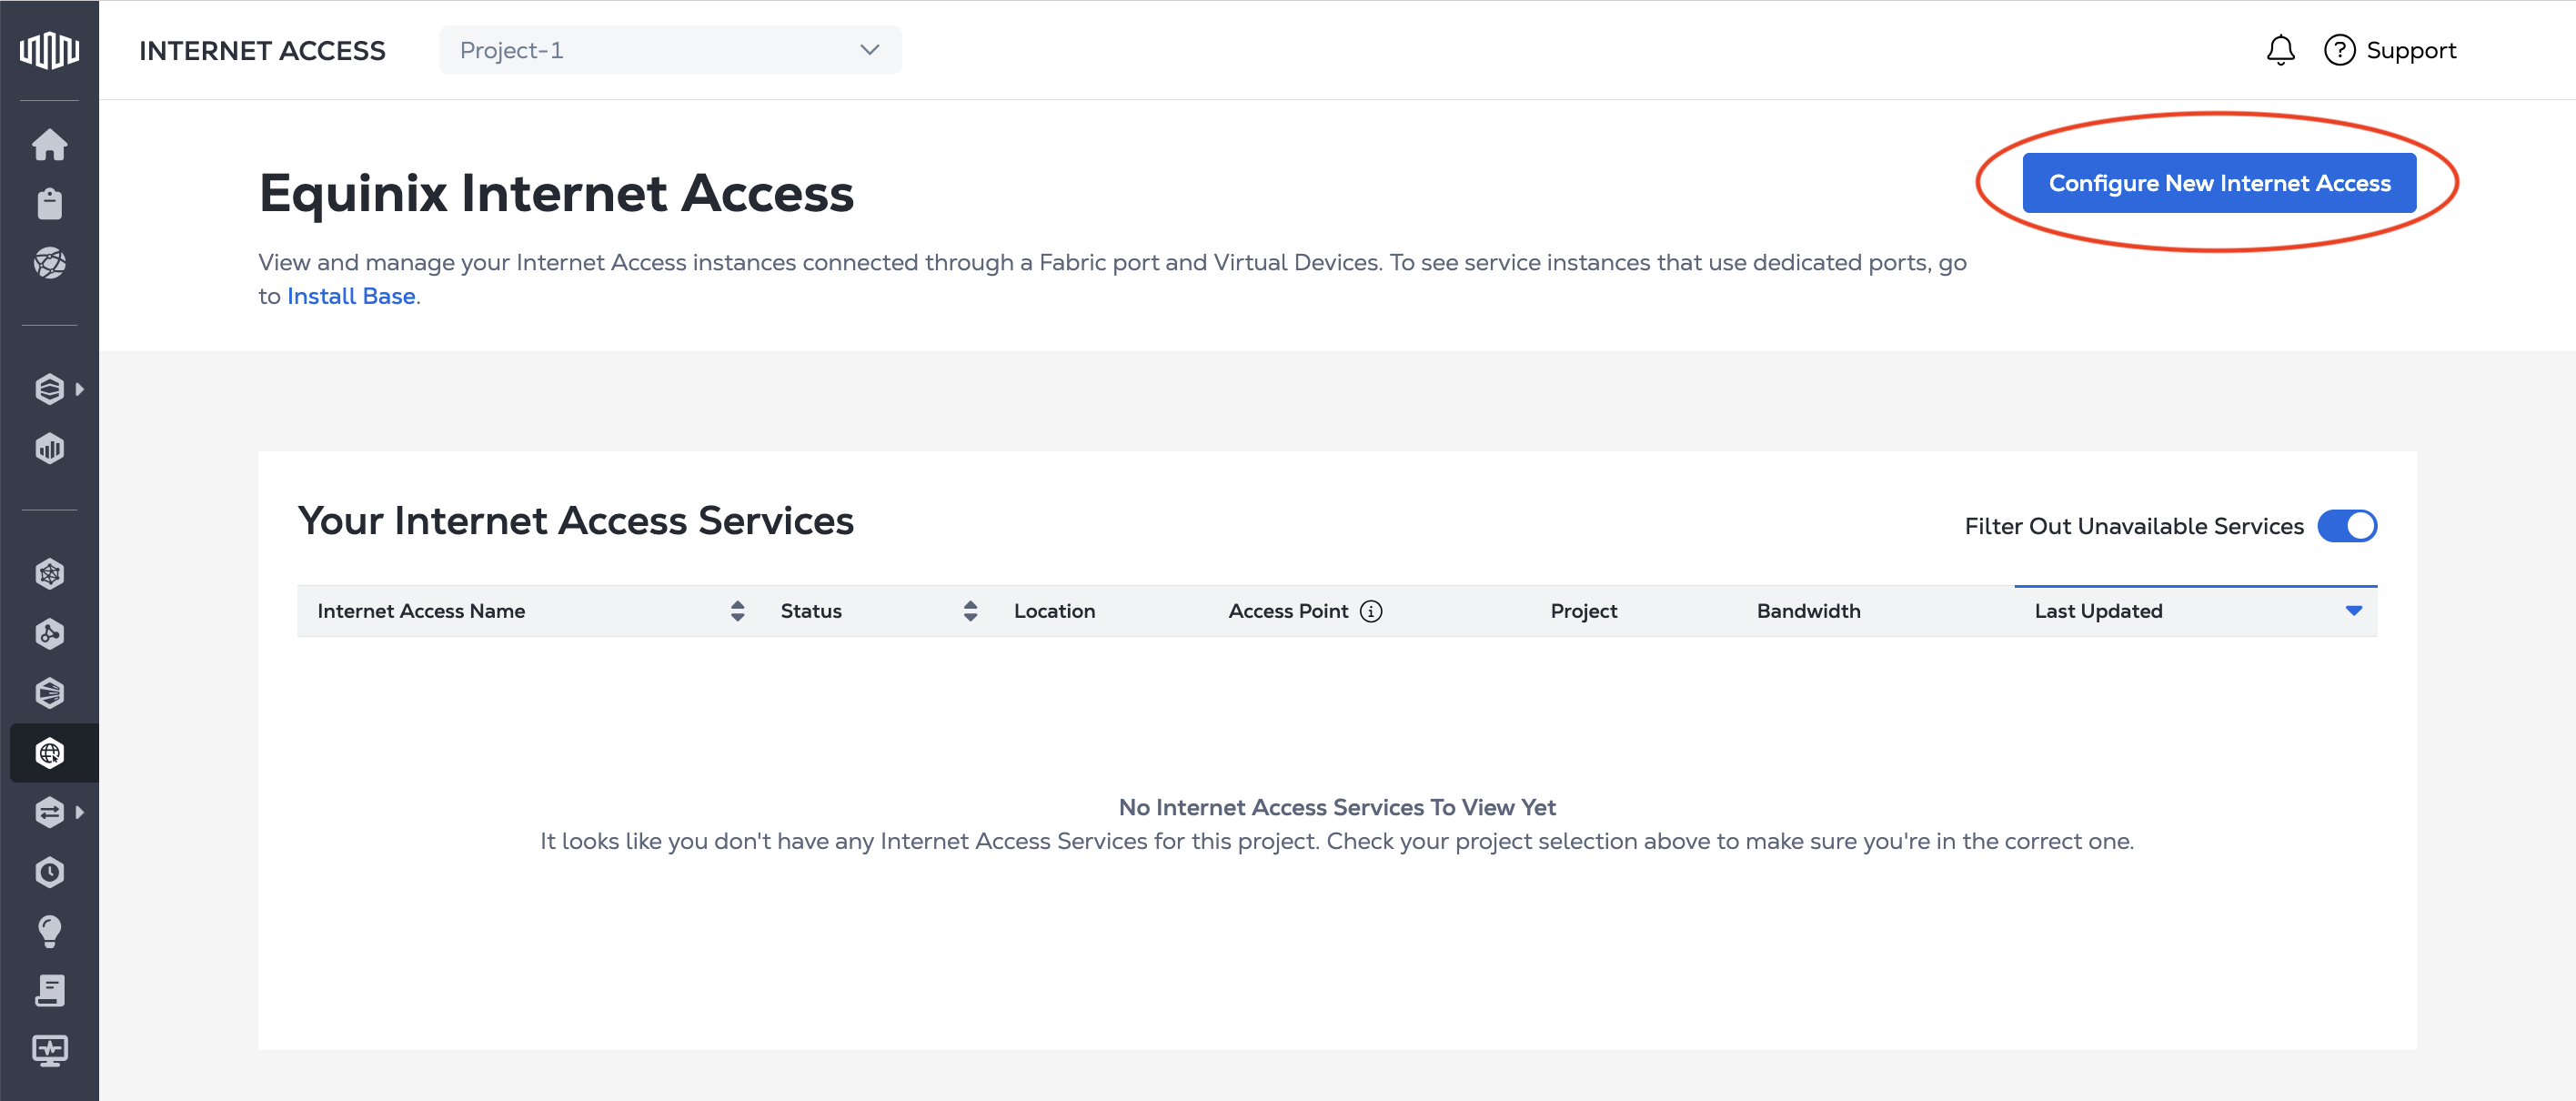
Sign in to the Customer Portal and navigate to Internet Access.
-
On the Internet Access page, click Configure New Internet Access.
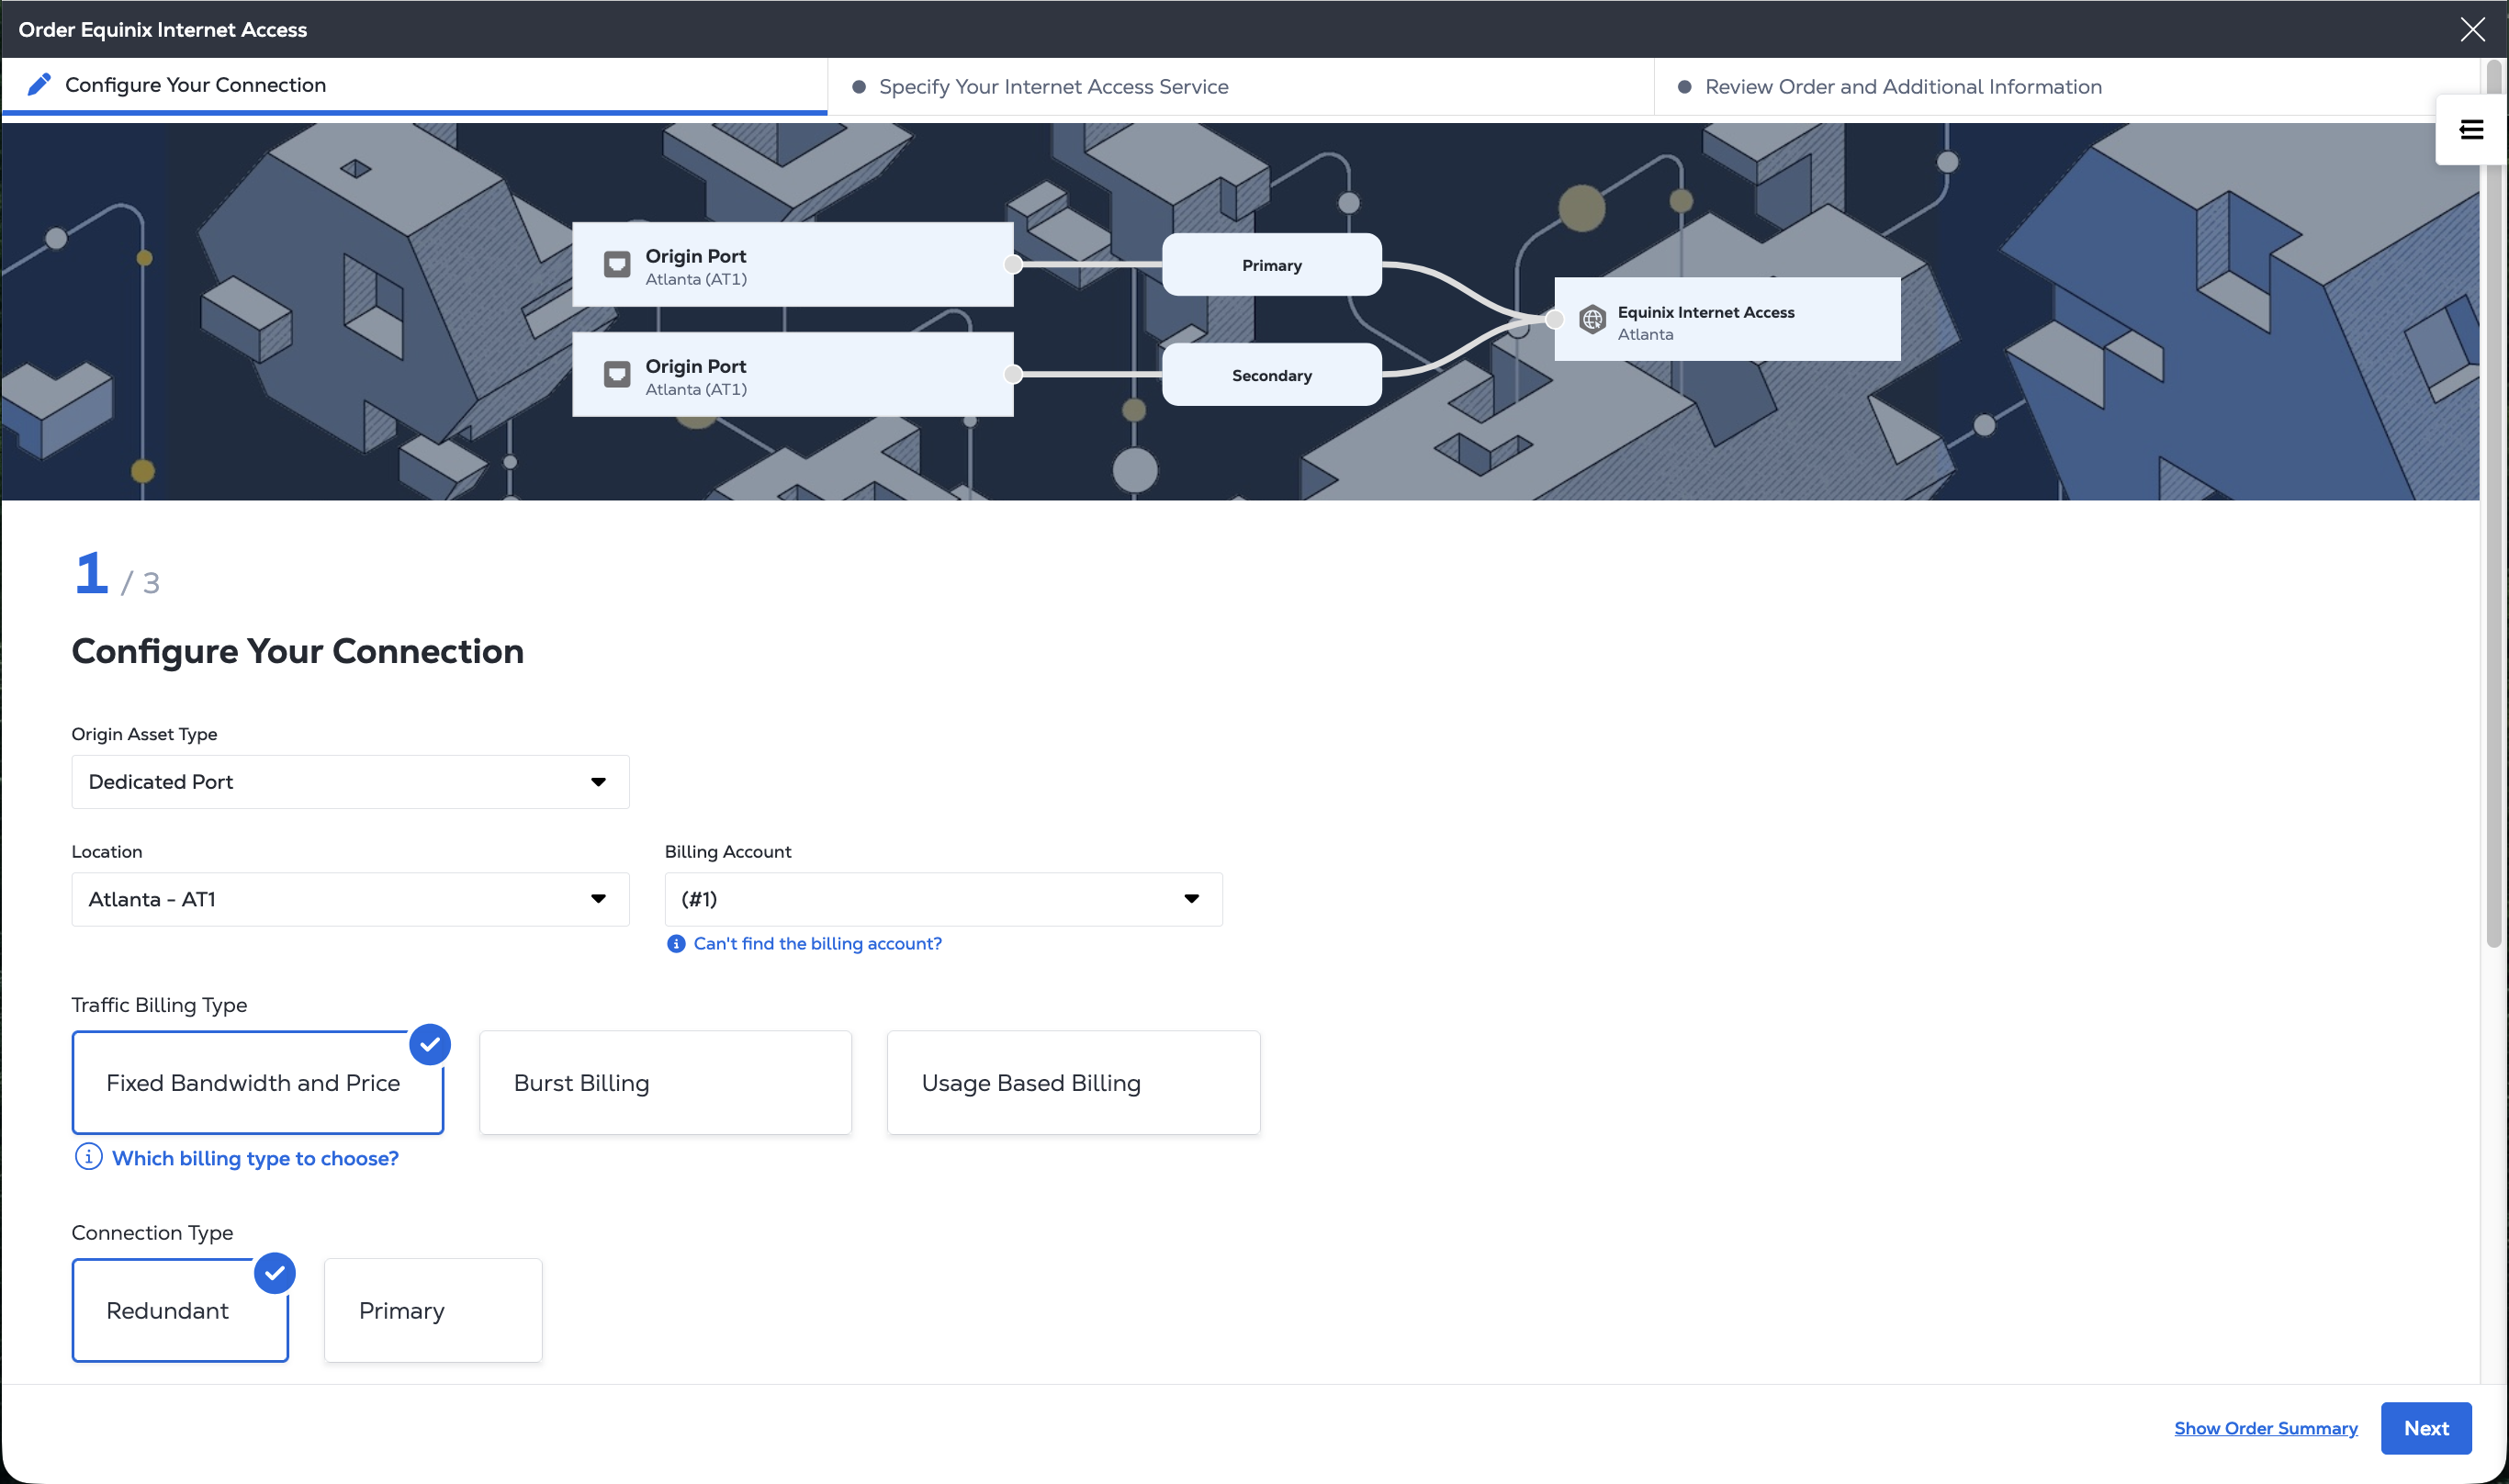
Configure Your Connection
Configure the connection that provides your Internet Access service.
-
From the Origin Asset Type drop-down, select Dedicated Port.
-
From the Location drop-down select the IBX location for the new port. Only IBX locations where you have assets are available.
-
From the Billing Account drop-down, select the billing account for the port.
-
Select the Traffic Billing Type:
- Fixed Bandwidth and Price – Traffic capped at selected bandwidth; fixed monthly price.
- Burst Billing – Allows bandwidth to exceed selected limit; price varies.
- Usage-Based Billing – Billed based on port speed and data usage.
More information on the differences between the billing types is available on the Internet Access Pricing and Billing page.
-
Choose the Connection Type:
-
Redundant Connection: A single Internet Access service with redundant connections to two Dedicated Ports within same Metro.

-
Primary Connection: A single Internet Access service with a primary connection to a Dedicated Port.

-
-
Assign the specific ports for the Primary and/or Secondary Connections. Click Configure Primary Port. From the Configure Primary Connection panel, configure the port attributes.
-
Port speed: 1G, 10G, 100G.
For 10G ports, choose whether to enable Link Aggregation Group (LAG) support. LAG combines multiple physical ports into one logical link for higher bandwidth and redundancy. Select the number of ports in the LAG.
-
Select the Cage, Cabinet, Patch Panel, Connector Type, Port A, and Port B from the drop-downs.
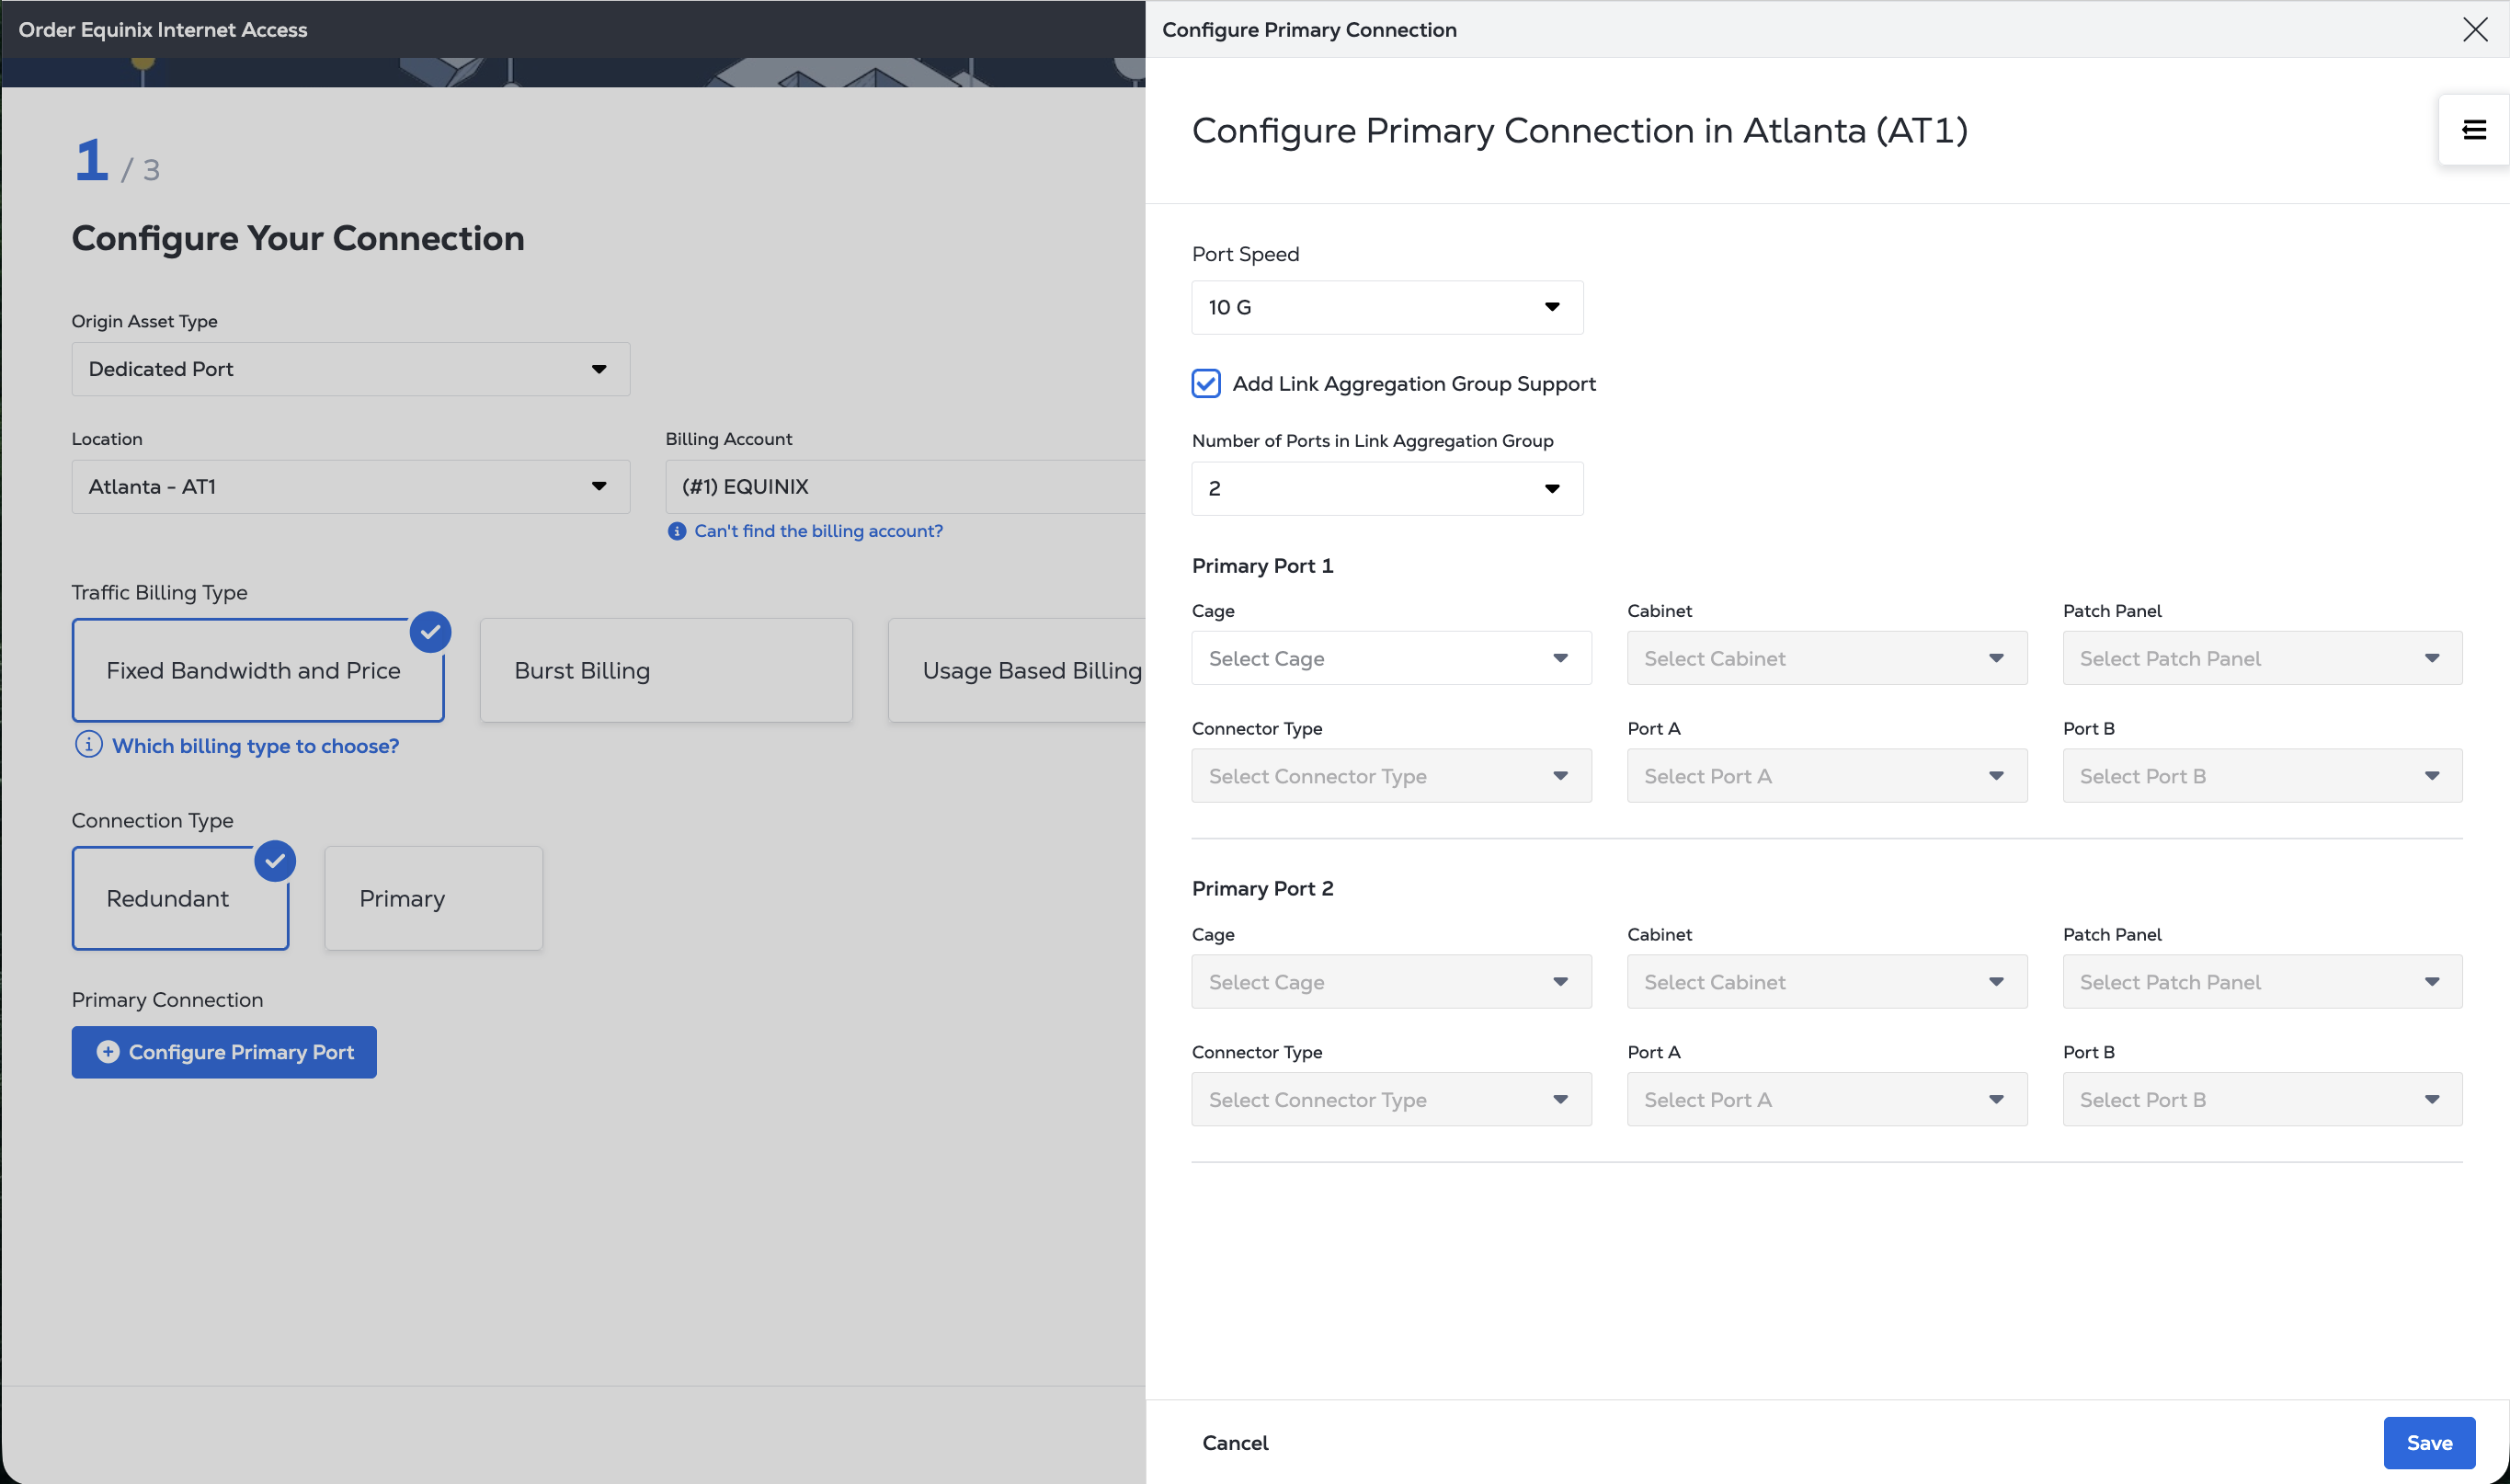
Click Save. If you are using a redundant connection, click Configure Secondary Port and repeat the process.
-
-
Choose the connection bandwidth. If you are using Fixed Bandwidth and Price, select the bandwidth from the drop-down. If you are using Burst Billing select the bandwidth minimum commit from the drop-down. You do not have to complete this step if you are using Usage Based Billing.

- Click Next.
Specify Your Internet Access Service
-
Choose a Routing Configuration.
-
Static Routing - Static routing is practical for a single network communicating with one or two other networks where you maintain the routing table manually. It is also commonly used for specific purposes, such as routing traffic to a default gateway or configuring specific routes for security or performance reasons. For more information, see Static Routing.
-
Direct Routing - Suitable for when devices on a network to communicate with each other directly and where all devices are connected to the same network segment or subnet. Direct Routing does not support Mixed IP addresses. For more information, see Direct Routing.
-
BGP Routing - Suitable for if you want to use BGP to manage your network routing. You also need to select your BGP Routing Policy and whether to use BGP Authentication. For more information, see BGP Routing.
-
-
Select your IP Address provider and configure the IP addresses and subnets.
-
Equinix-provided IPs - Equinix assigns and leases public IP addresses to you. This option is ideal if you do not have your own IP space or want a quick setup. From the drop-down menu, choose any combination of:
- IPv4 subnets from
/30to/24. - IPv6 subnets of
/64or/48.
To add subnets, click + Add Another.
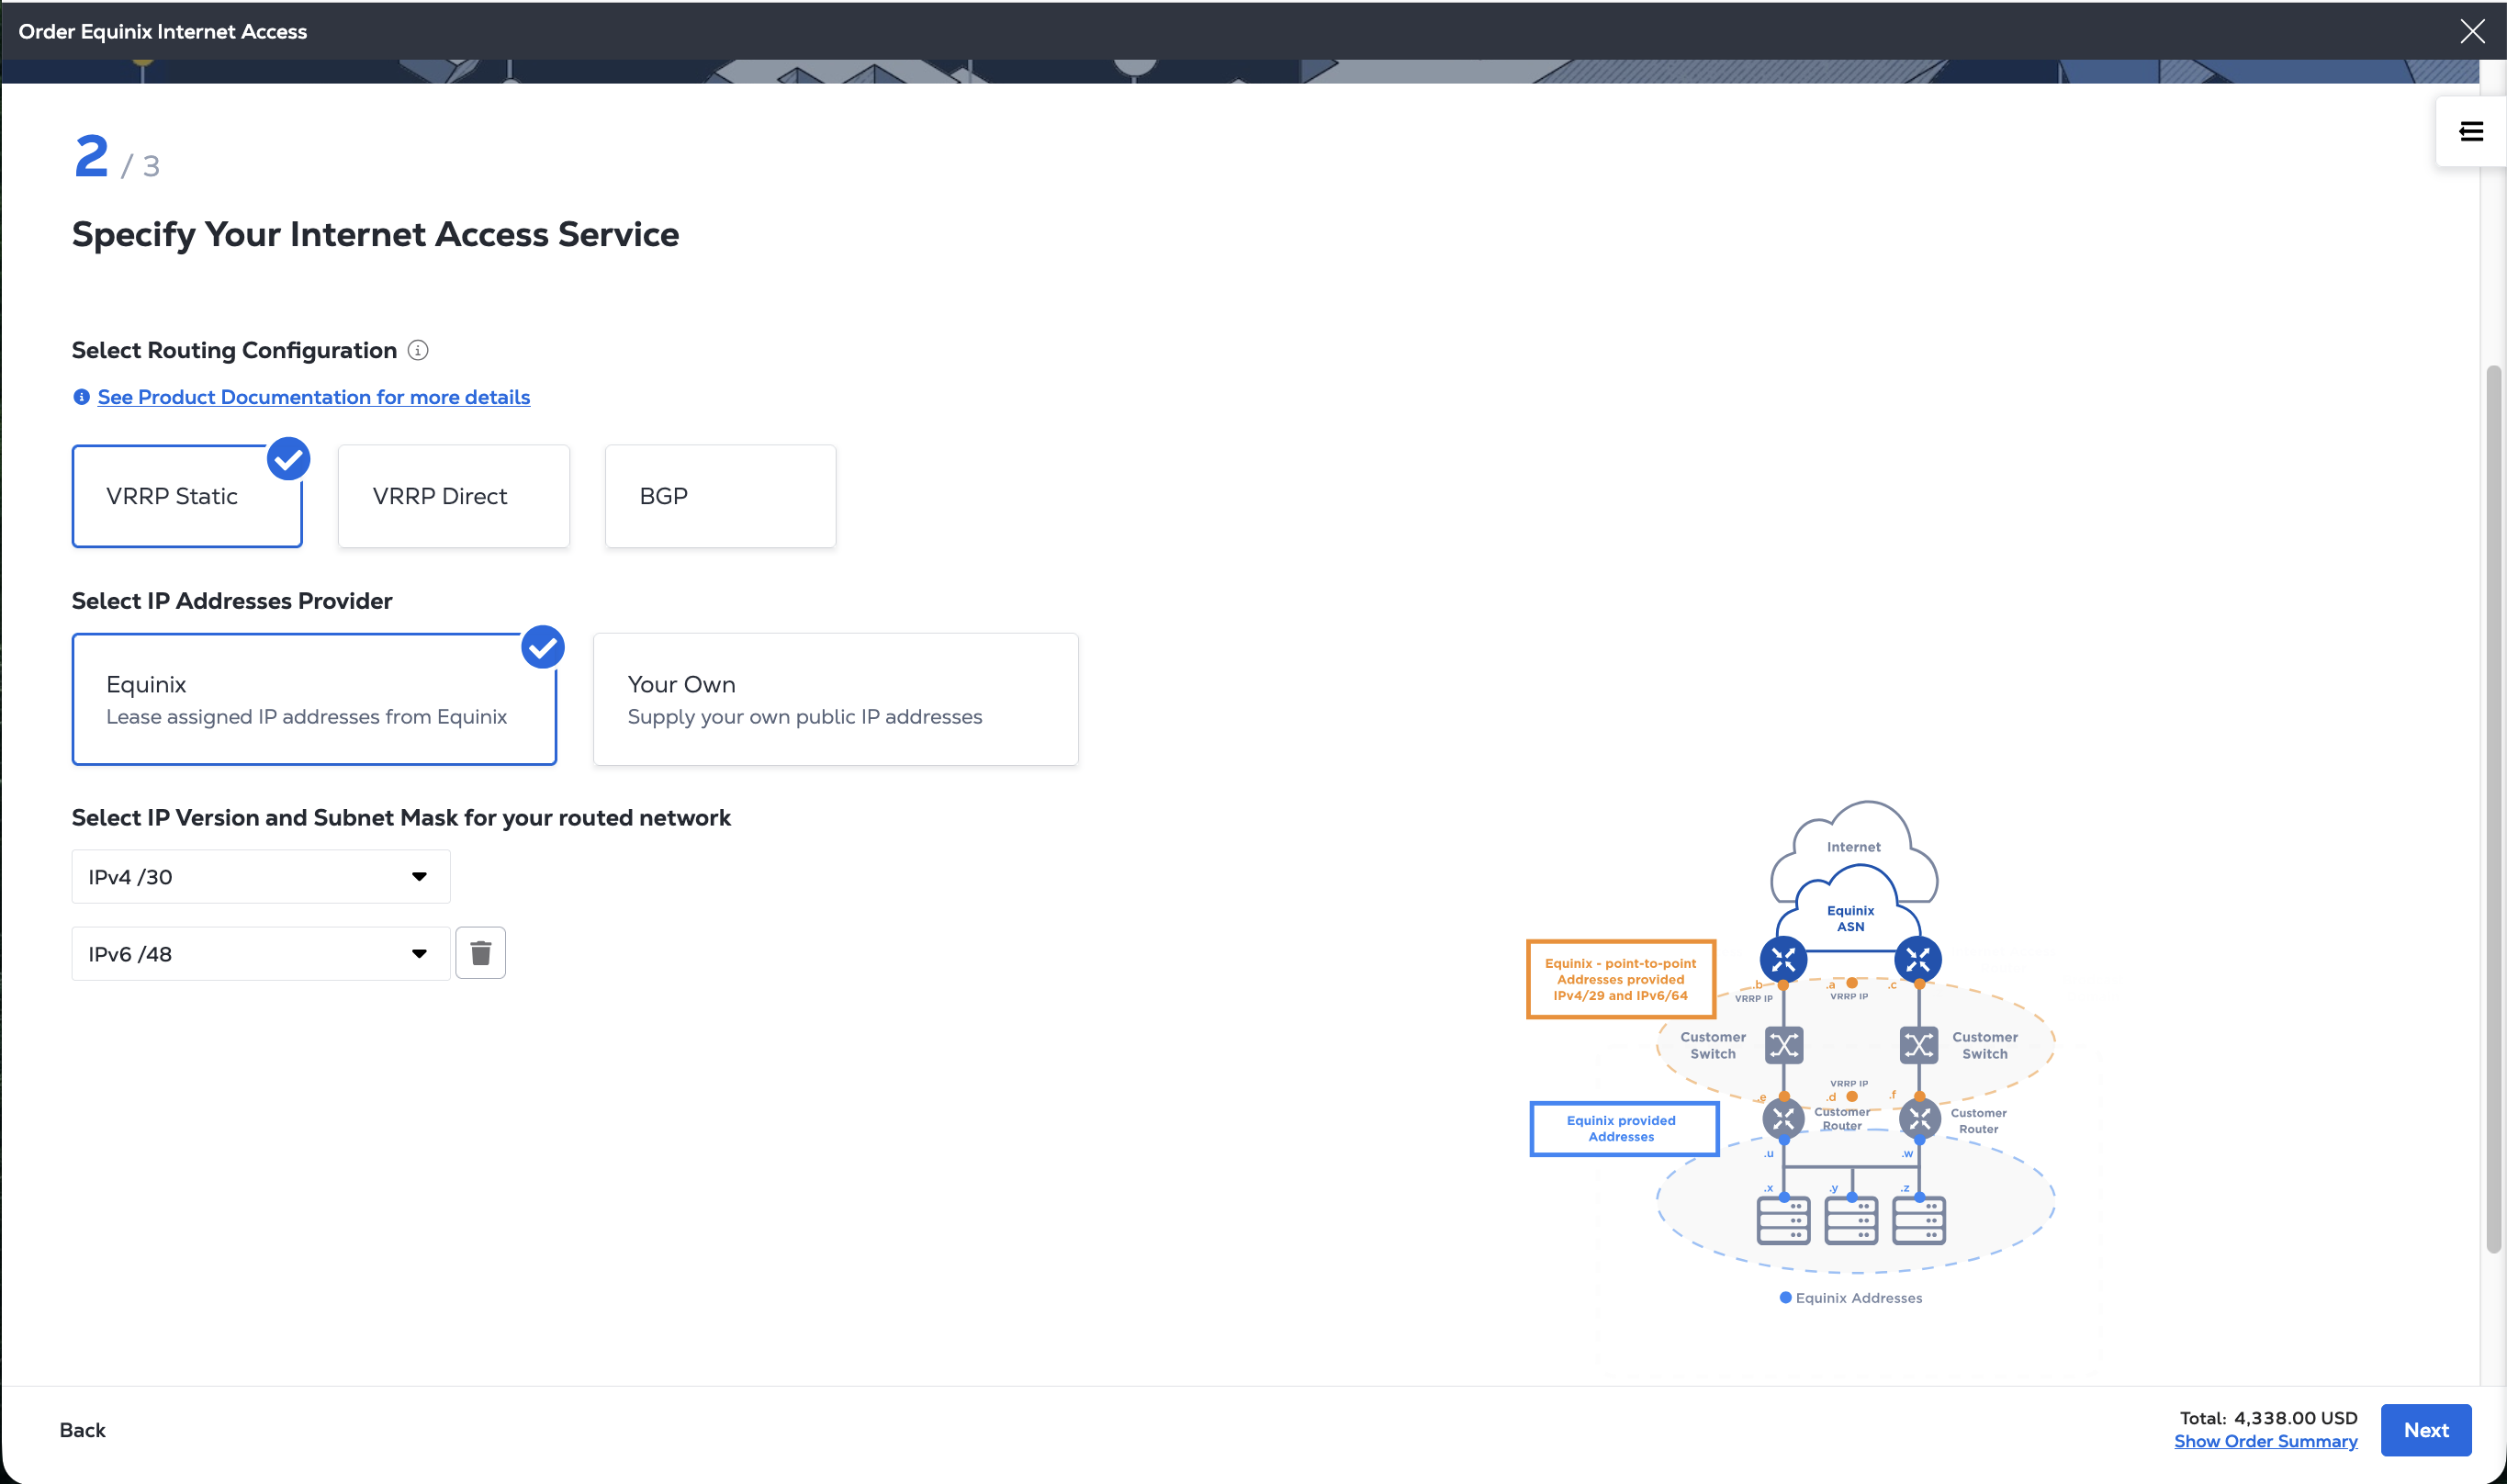
If you are in the APAC region leasing IPv4 subnets from Equinix, answer the IP Address Request questions and provide the details of your addressing plan.
- IPv4 subnets from
-
Your Own IPs - You supply your own public IP address ranges. This option is best for businesses that already own IP blocks and want to maintain control.
- Use the IPv4 Subnet Details and the IPv6 Subnet Details fields to list your subnets for either IPv4, IPv6, or both to continue.
To add a subnet, click + Add Another.
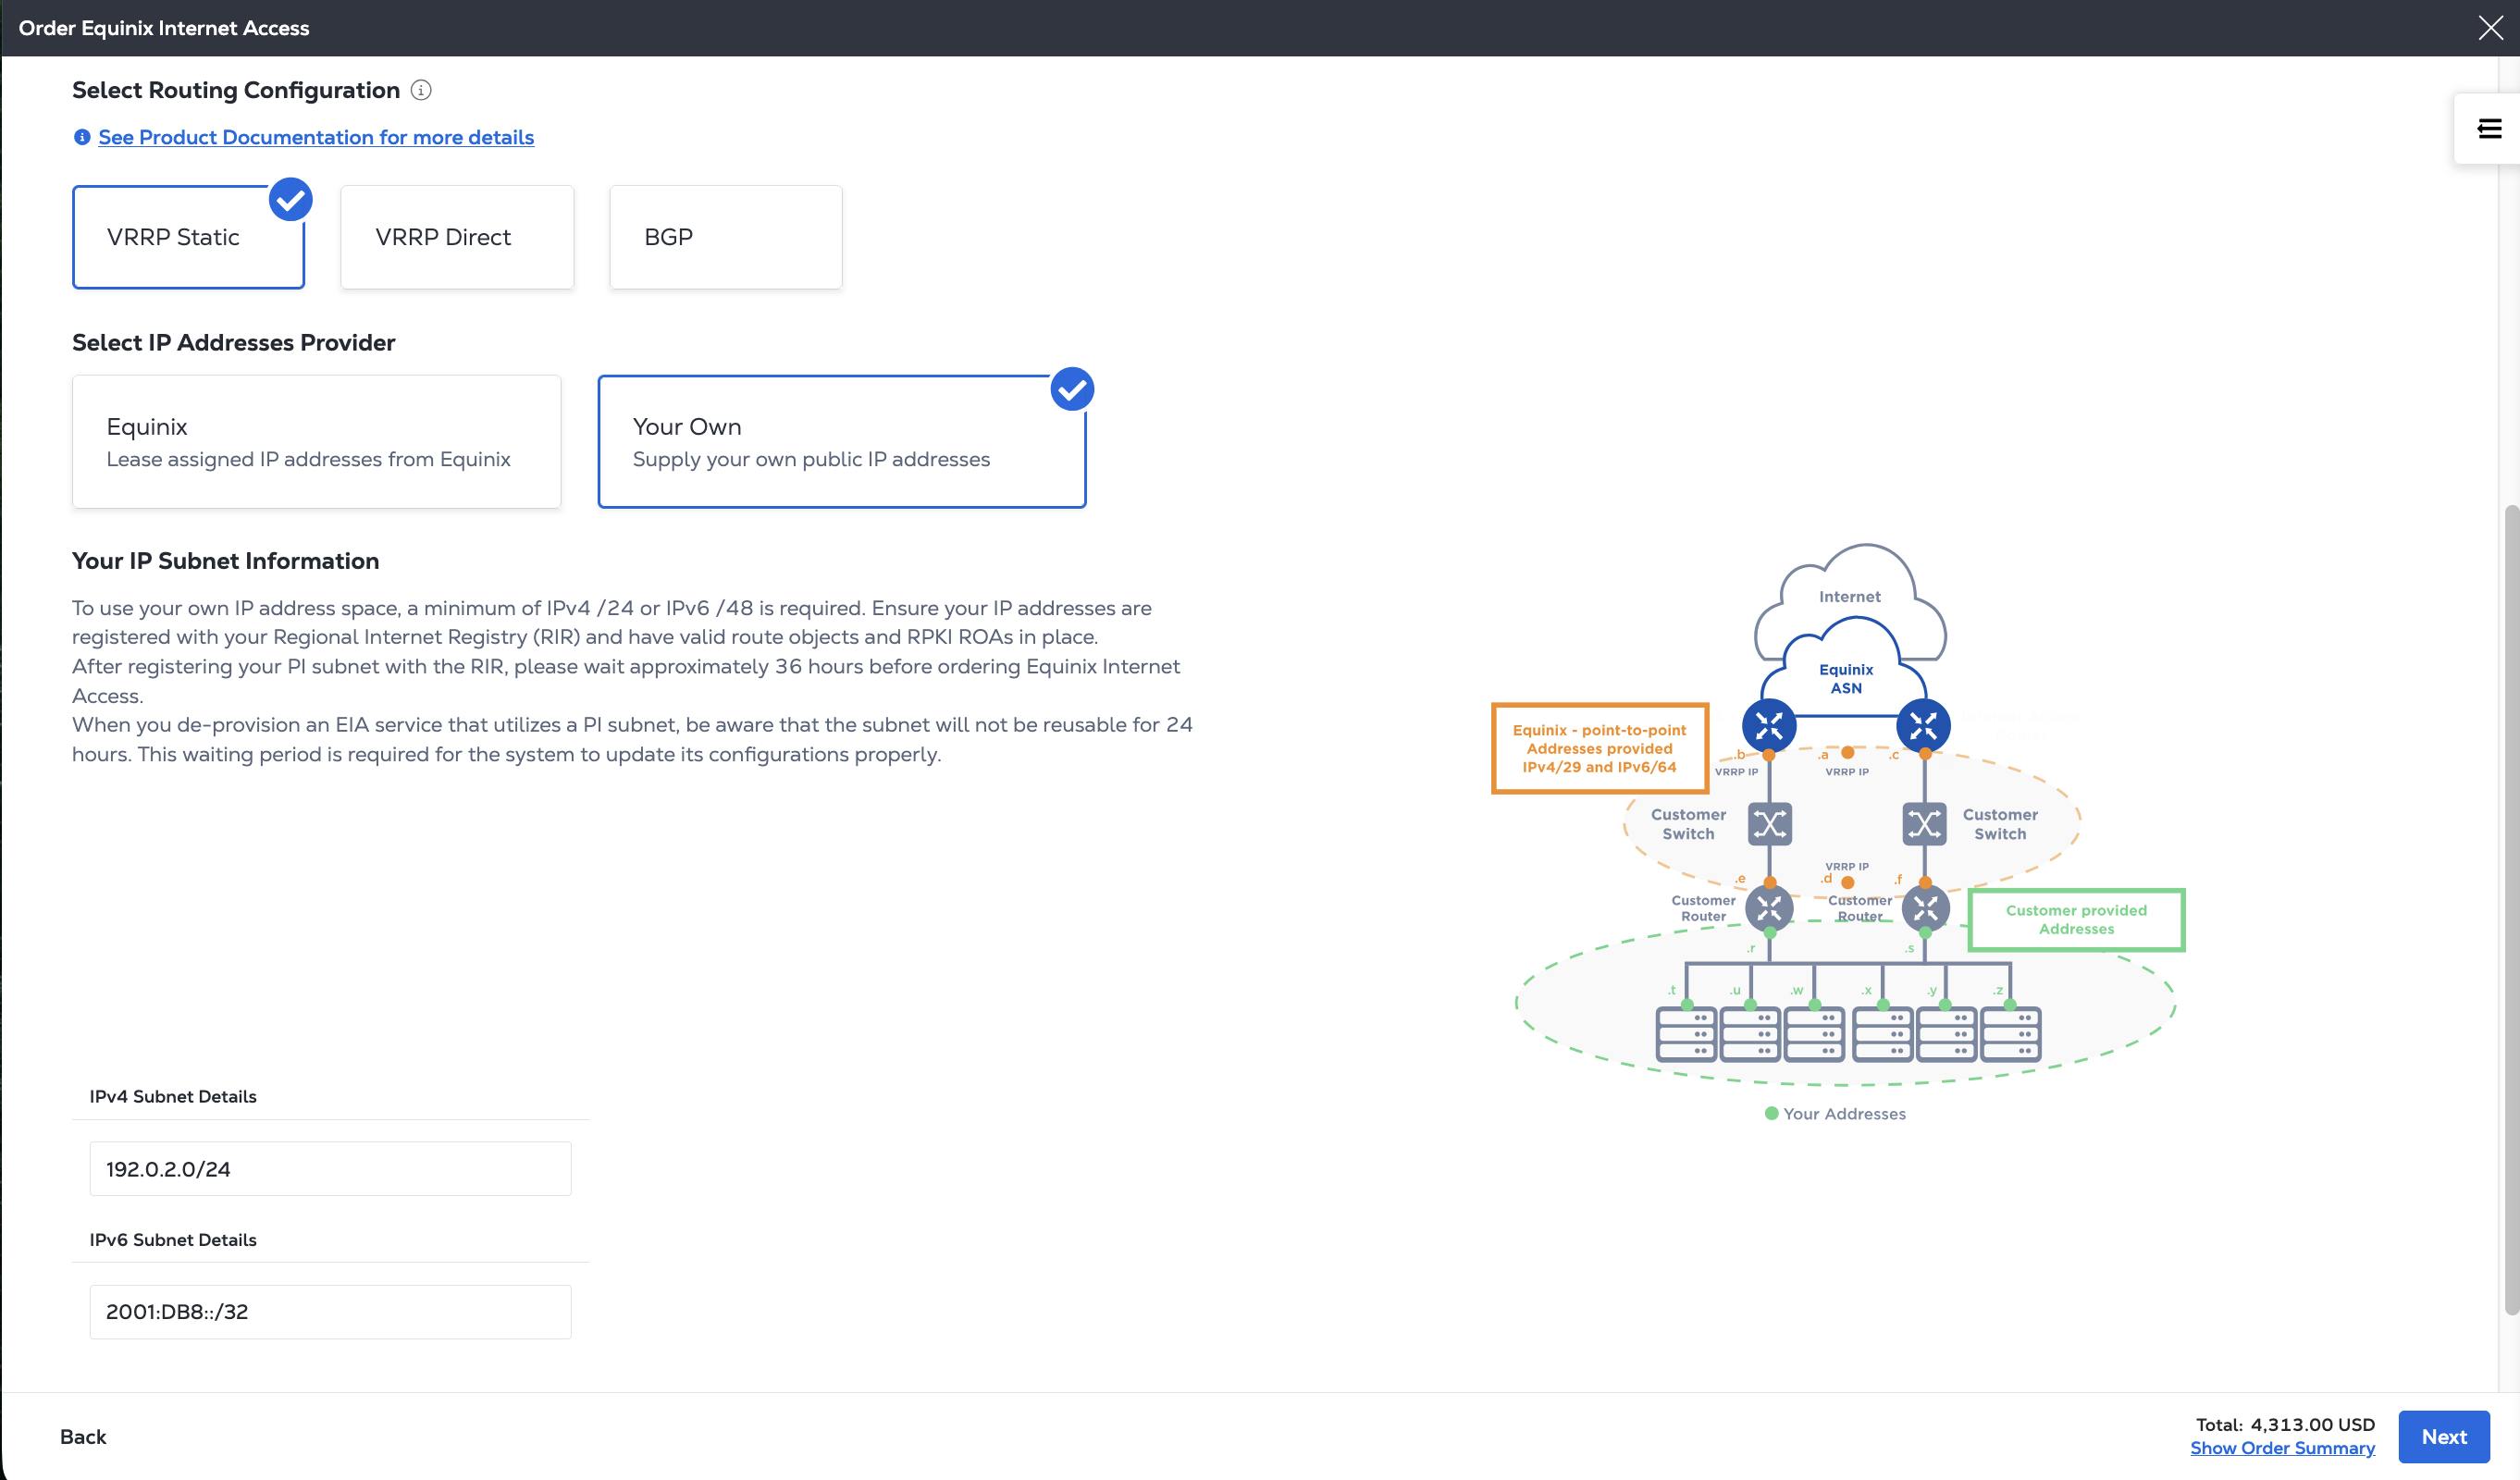
If you are using your own IP addresses and using BGP, select either a 32-bit or 16-bit private ASN range.
More information on these IP address options, including details for how to bring your own IPs, is on the IP Address Allocation page.
-
-
Click Next.
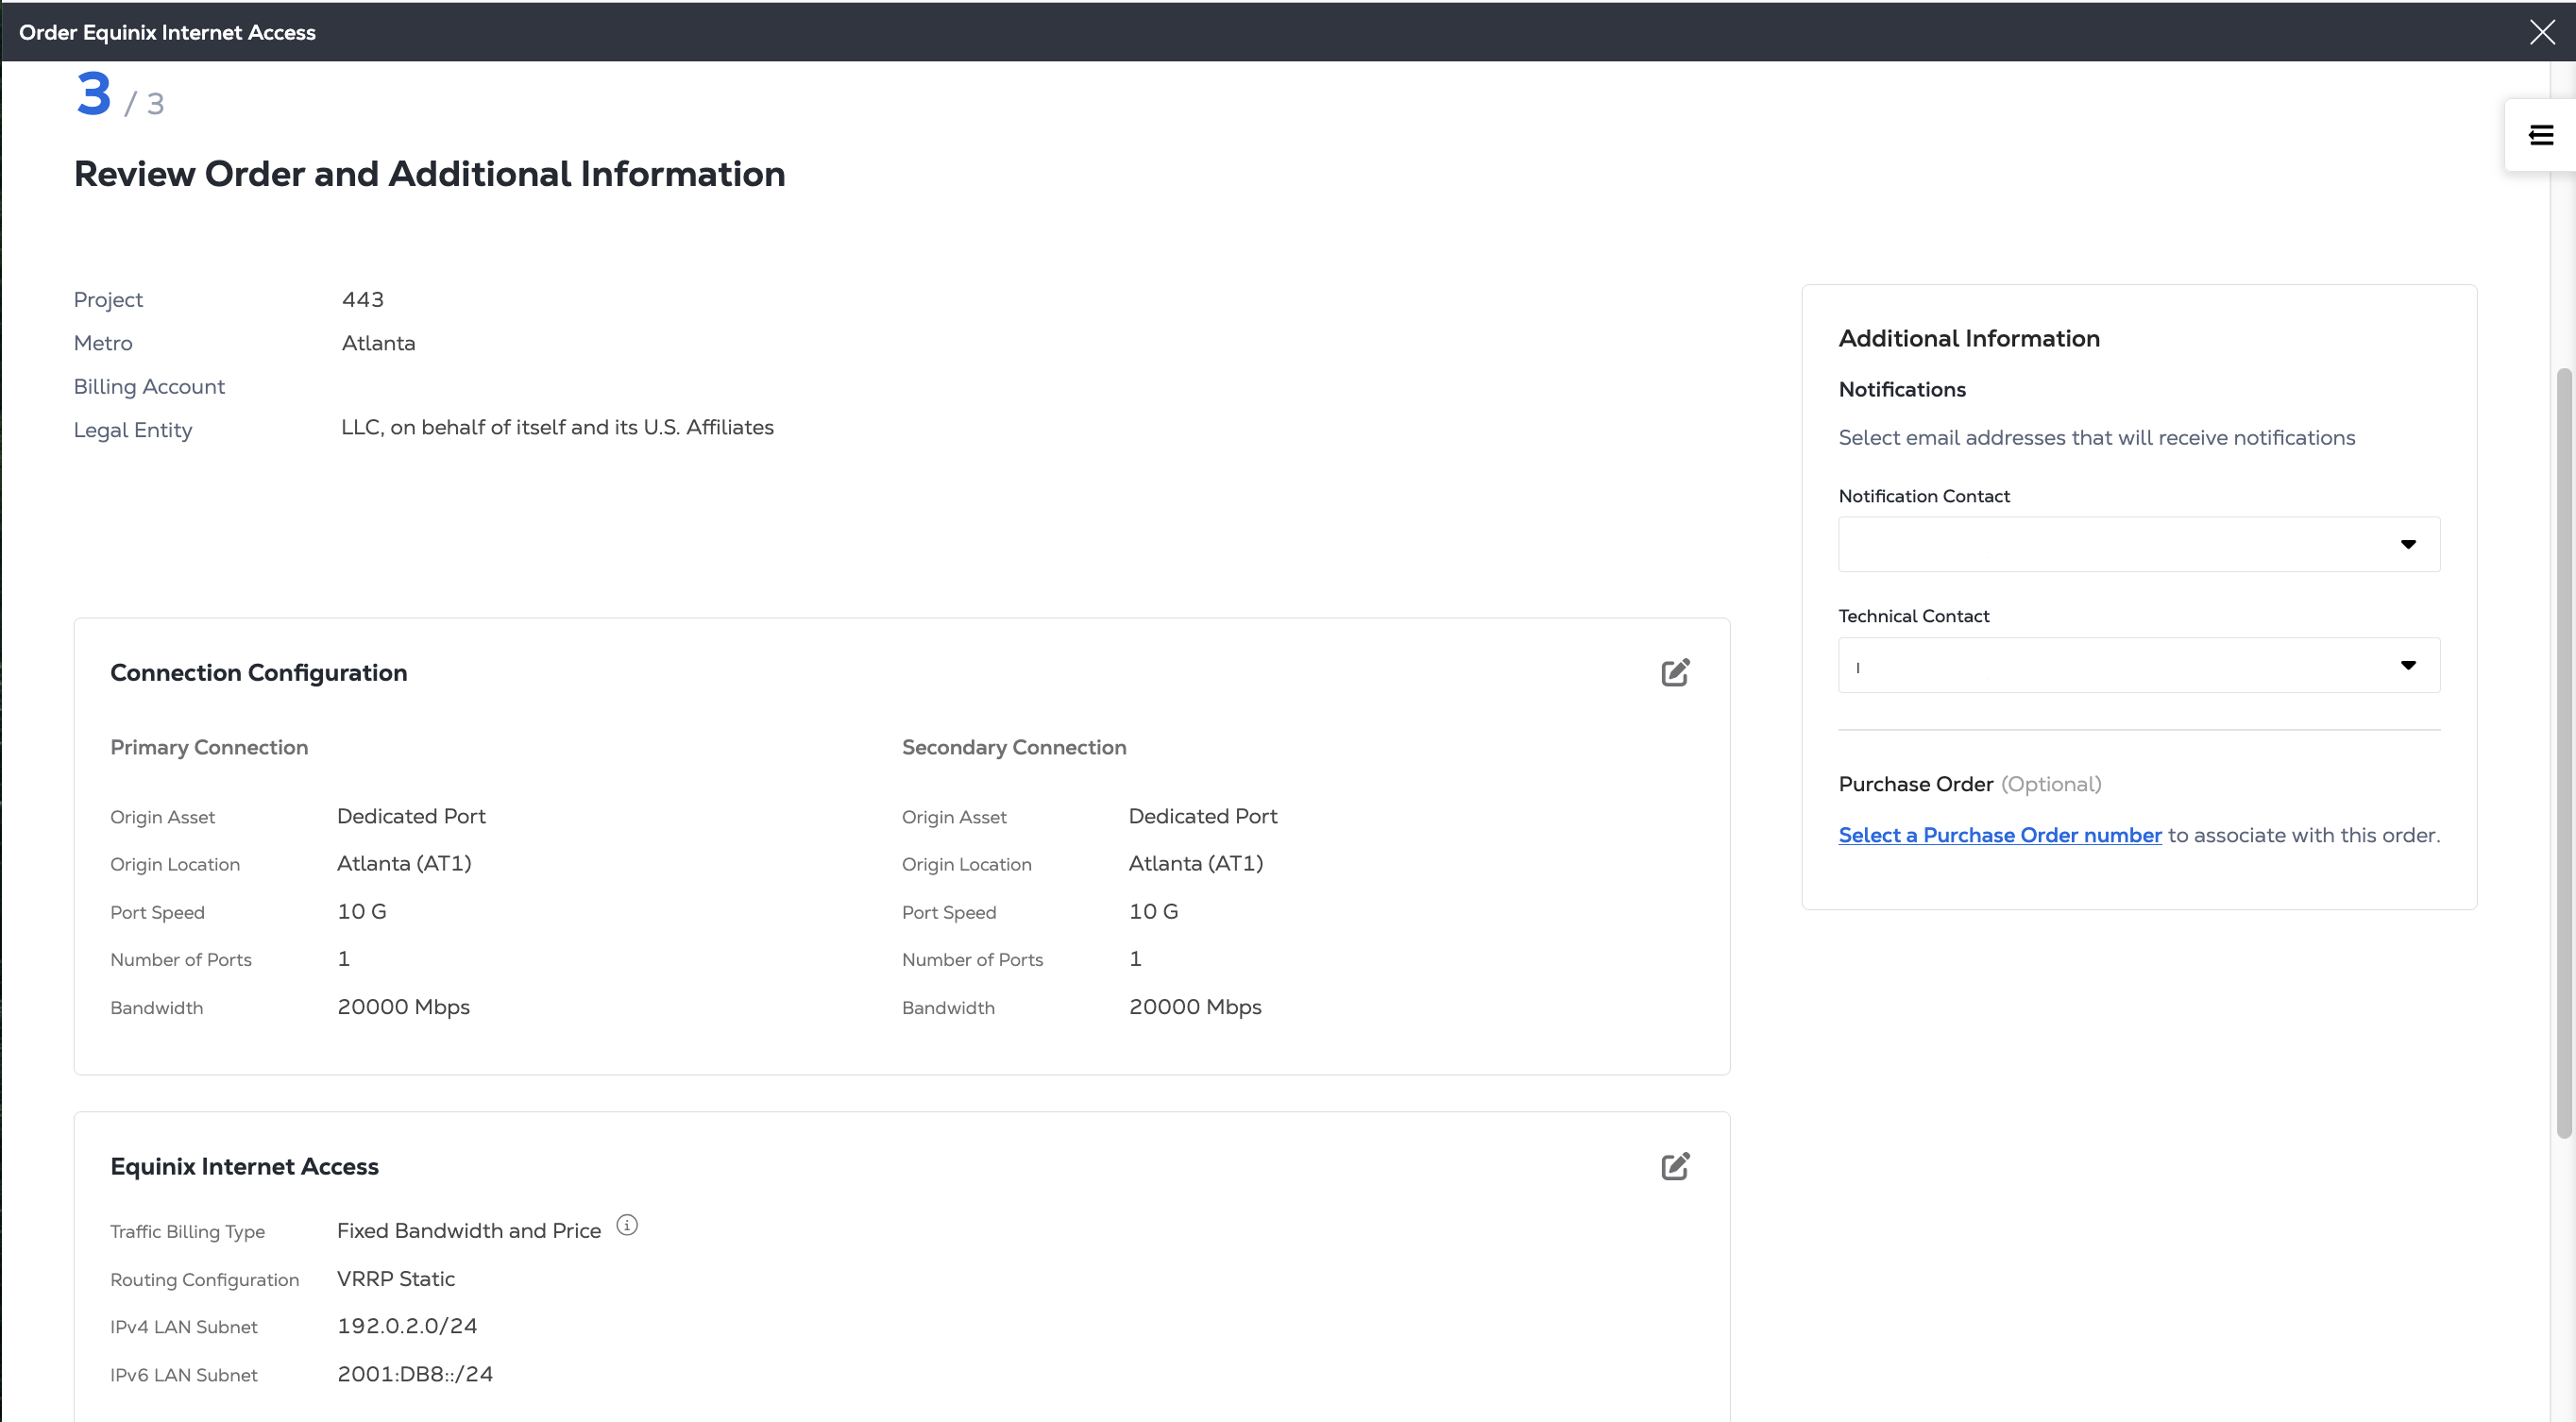
Review Order and Additional Information
-
Review the Project, Metro, and Billing Account information for this order.
-
Review the information in the Connection Configuration and Equinix Internet Access sections.
-
Review the email addresses in the Notifications section. You can enter up to 12 addresses to receive updates about this order.
-
To add a Purchase Order (PO) to this order, click Select a Purchase Order number in the Purchase Order section. Choose a PO from the list of valid numbers. If your billing account requires a PO (also known as a PO bearing account), you must complete this step.
Submit
-
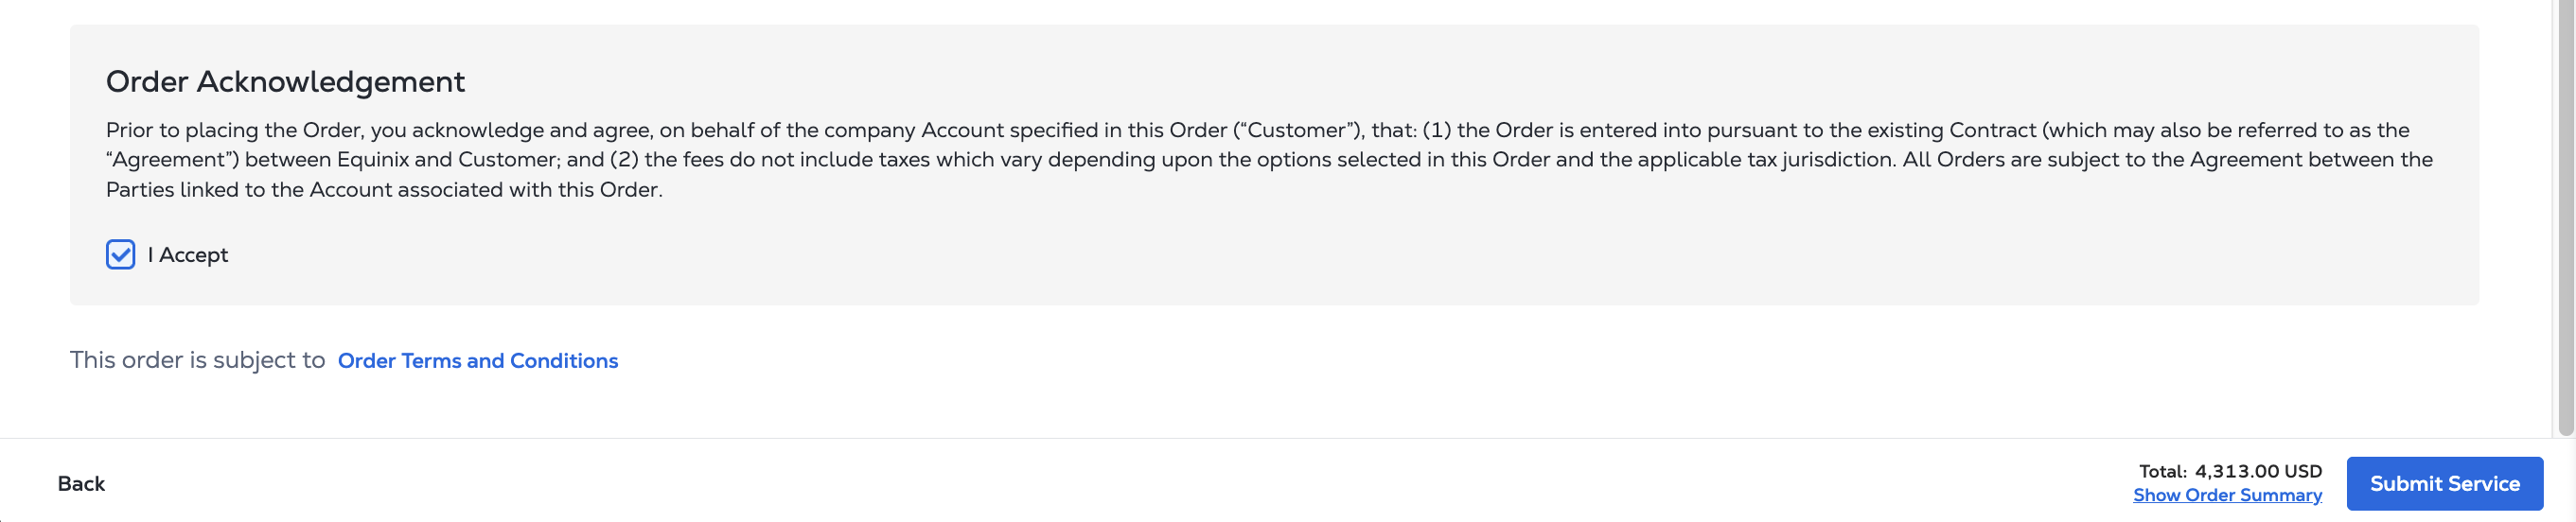
To review the terms for this order, click Review Terms and Conditions.
-
Read the text in the Order Acknowledgement section. Click I Accept.
-
Click Submit Service.
Once you have placed your order, you can track its progress in your Orders and Tickets History. Once your port is fully provisioned and the service is active, you can view it in your Install Base. For more information, see Managing Dedicated Port Services.
As part of the Platform Updates rolling out to all customers over the course of 2026, Internet Access services over a Dedicated Port will be visible and manageable in the Internet Access Inventory.
Once your account has been onboarded, any Dedicated Port Internet Access service created after your account migration can be managed in the Customer Portal.