Order Internet Access Using the Customer Portal
If you have an Equinix Fabric account, you can use the Customer portal to order Equinix Internet Access service. To review the conditions that apply, see Prerequisites.
The following steps guide you through the ordering flow based on the assets that are assigned to your organization, project, and account.
To order the Equinix Internet Access service using the Customer portal:
-
Sign in to the Customer Portal and navigate to Fabric.
-
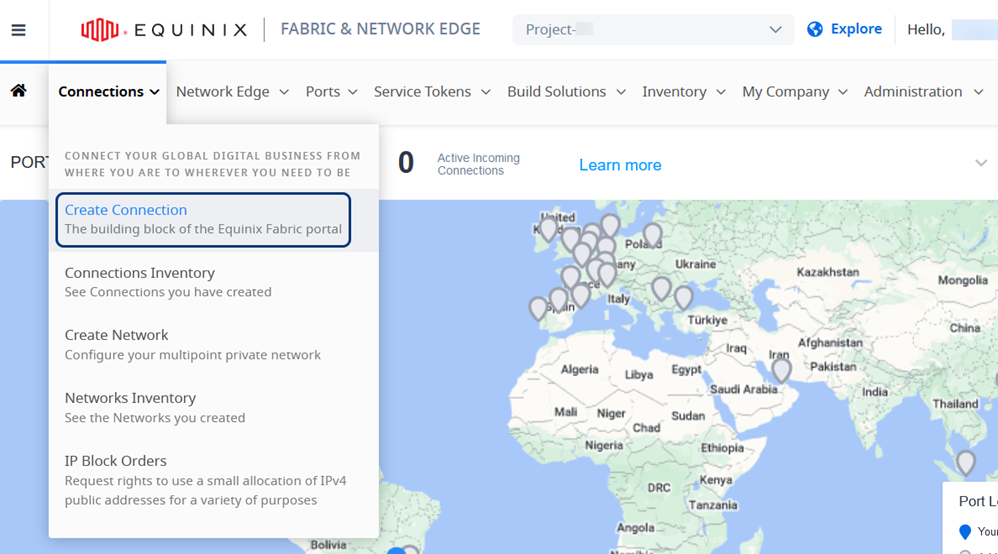
From the Connections menu, select Create Connection.
-
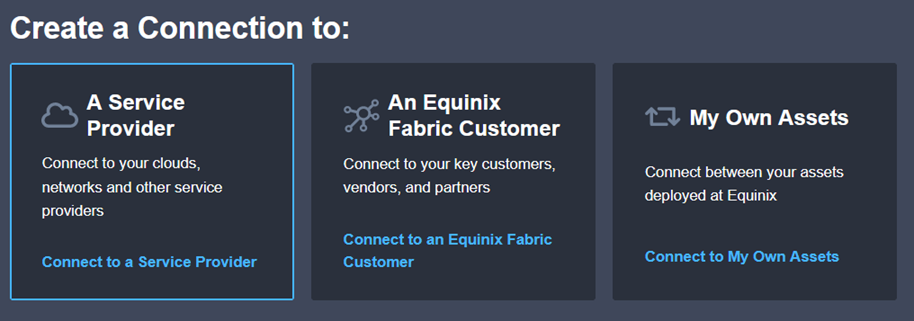
Click Connect to a Service Provider.
Select a Service Provider and Project
-
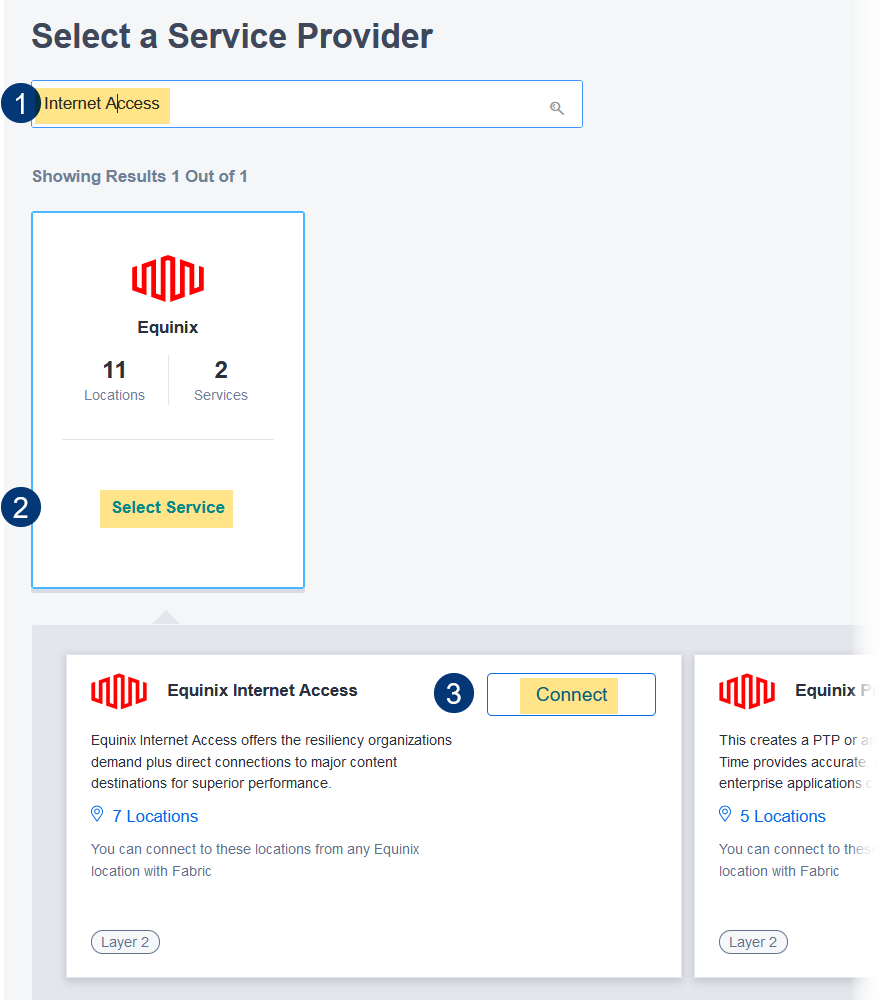
If the Equinix tile is not displayed, enter Internet Access in the search field.
-
Click Select Service in the Equinix tile.
-
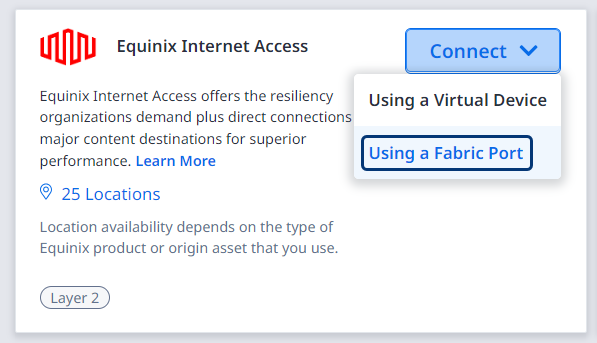
In the Equinix Internet Access tile, click Connect and select Using a Fabric Port from the drop-down list.
-
In the Select Project screen, select your project from the list. You can use the filter and search options to find the Project Name. Click Next.
To view the price update for each configuration selection, click Order Summary in the upper right of the form. Click it again to hide the summary.
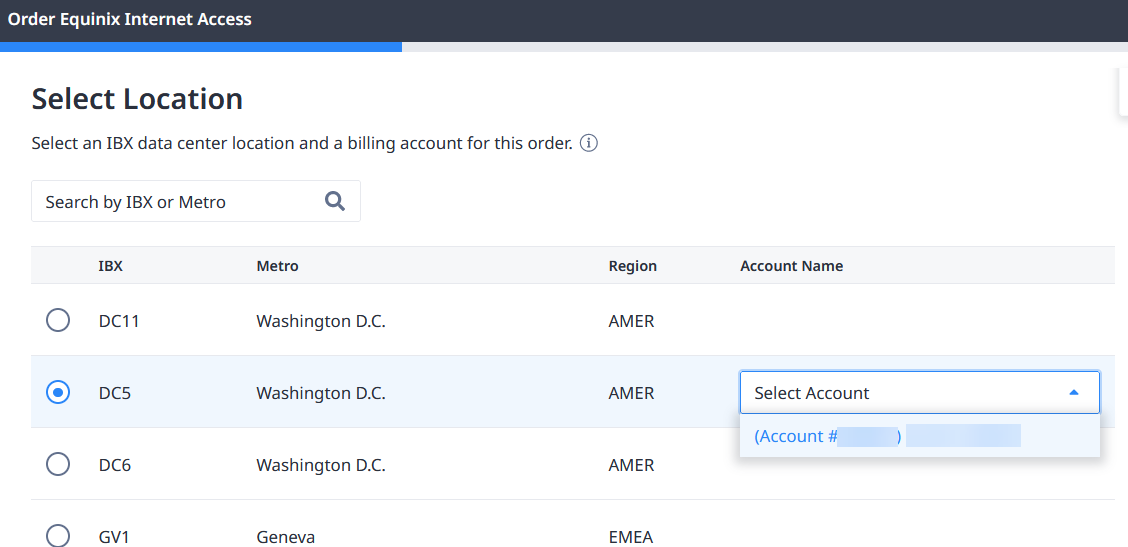
Select Location
-
In the Select Location section, click the IBX data center location for the new port. The list includes the locations where you have an active Fabric port and signed GTC/MCA agreements in place, and where Equinix Internet Access with Fabric is available.
-
Choose an Account Name from the drop-down list on the right side of the form.
-
Click Next.
Specify Internet Access Details
The options recommended by Equinix are highlighted in the form. While completing this form, you can click Restore Recommended Configuration in the Package Configuration section to reset your configuration to the recommended options.
-
Enter a name for your new Internet Access service.

-
Select a Use Case to identify the purpose of your new connection:
-
Main – Primary connection to the internet.
noteOnly this option is currently supported. Other options will be available in future releases.
-
Backup – Alternate connection to the internet
-
Management Access – Narrow channel connection to your physical or virtual assets at Equinix data centers.
-
-
Select the Traffic Billing Type.
-
Fixed Bandwidth and Price – Traffic is capped to your selected bandwidth, with no bursting. Price per month is fixed.
noteOnly this option is currently supported. Other options will be available in future releases.
-
Burst Billing – Traffic isn't capped, and your selected bandwidth can be exceeded. Price per month can vary.
-
Usage Based Billing – Traffic is billed based on port speed and data usage. Price and bandwidth are not fixed.
-
-
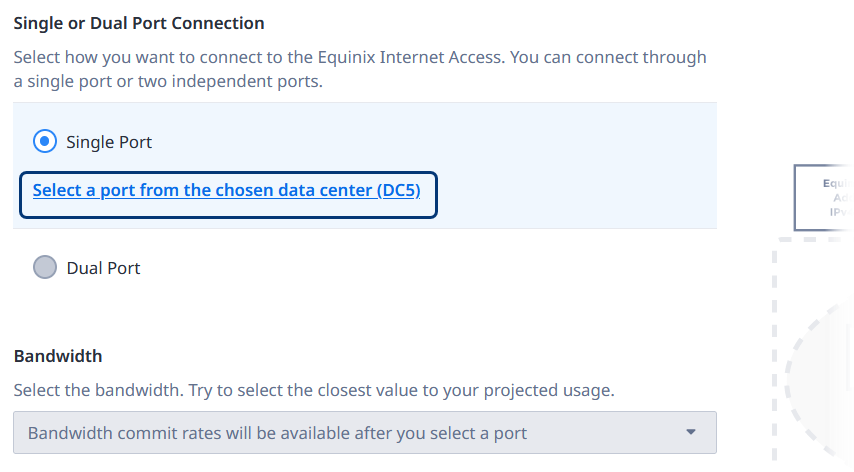
Select a Single Port or Dual Port connection to the Equinix Internet Access services.
-
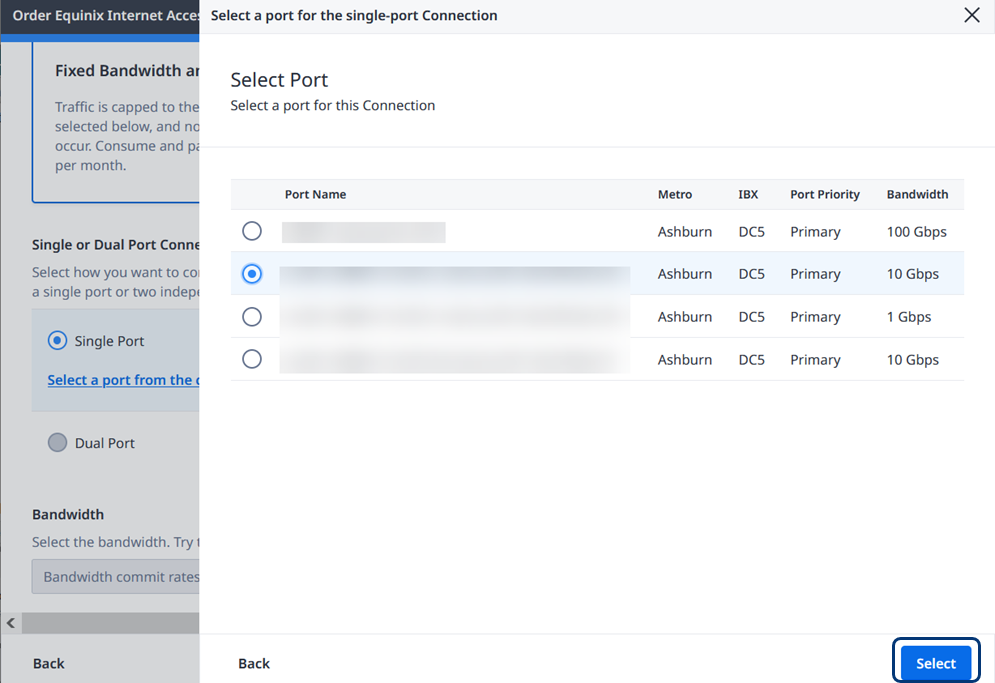
Click Select a port from the chosen data center.
-
In the form, select a Port Name and click Select.
-
Choose the Bandwidth value from the drop-down list that is closest to your projected usage. Bandwidth options do not apply to usage-based billing.
-
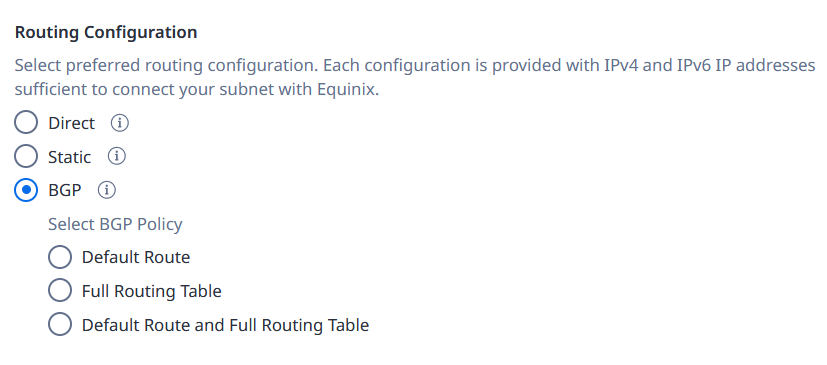
Select a Routing Configuration.
- Direct
- Static
- BGP – These policies are available: Default Route, Full Routing Table, or both Default Route and Full Routing Table.
-
Enter a VLAN ID between 2 and 4092. If the number that you enter is available, a confirmation is displayed.
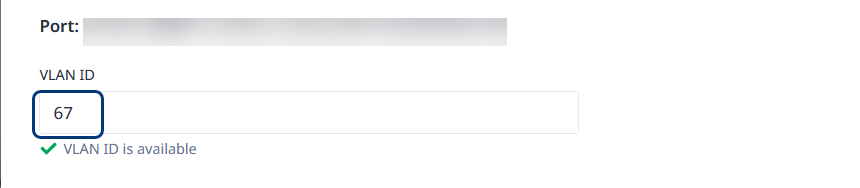
-
Click Next.
Provide IP Addresses
Select the provider of the IP addresses for the subnet behind your device.
-
Equinix-provided IP Addresses – Lease assigned IP addresses from Equinix. To order Additional IP Addresses:
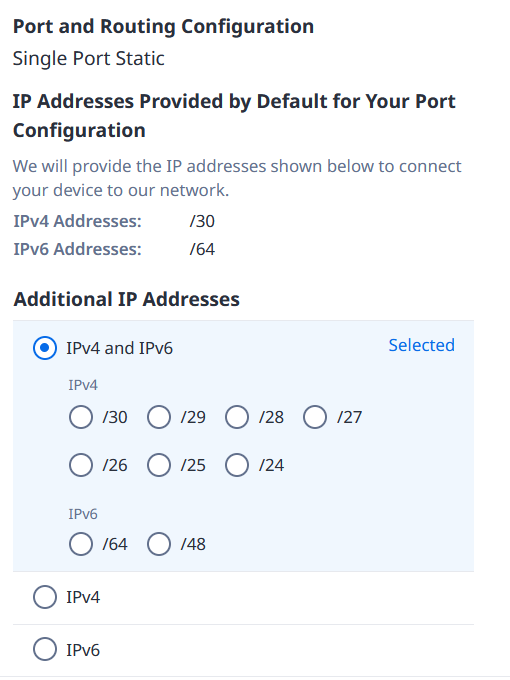
- IPv4 and IPv6 – Select a value for IPv4 (/30 to /24) and IPv6 (/64 or /48).
- IPv4 – Select a value from /30 to /24. The default is /30.
- IPv6 – Select /64 or /48. The default is /64.
-
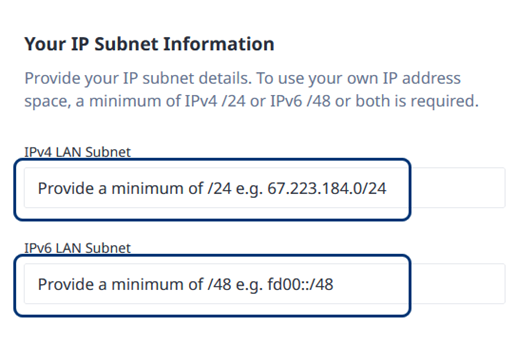
Customer-provided IP Addresses – To supply your own public IP address, enter an IPv4 LAN Subnet or an IPv6 LAN Subnet.
noteYou can’t use your own ASN when supplying your own IP addresses. Equinix doesn’t support customer-provided ASNs for provider-independent IP addresses.
Click Next.
Provide Contact Information
To make changes in a previous section, mouse over the blue progress bar at the top of the page. Completed sections are listed with check marks. Click a completed section to return and make changes.
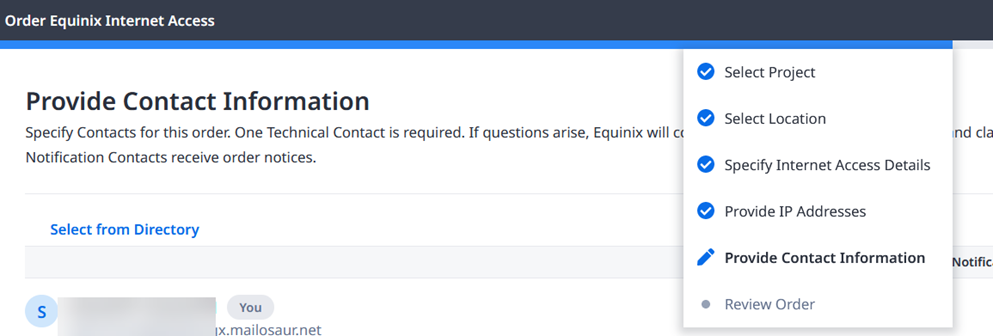
A technical contact and a notification contact are required. By default, you are designated as the Notification Contact to receive order updates.
-
To assign yourself as the Technical Contact, click this option so that Equinix can contact you if troubleshooting or clarification is needed.
-
To assign another user as the technical contact:
- Click Select from Directory. A panel displays a directory on the right side of your browser. Click a name in this directory, then click Select. The new name and contact information is added to the list of contacts.
- Click Technical Contact to assign this new name.
- Click Next.
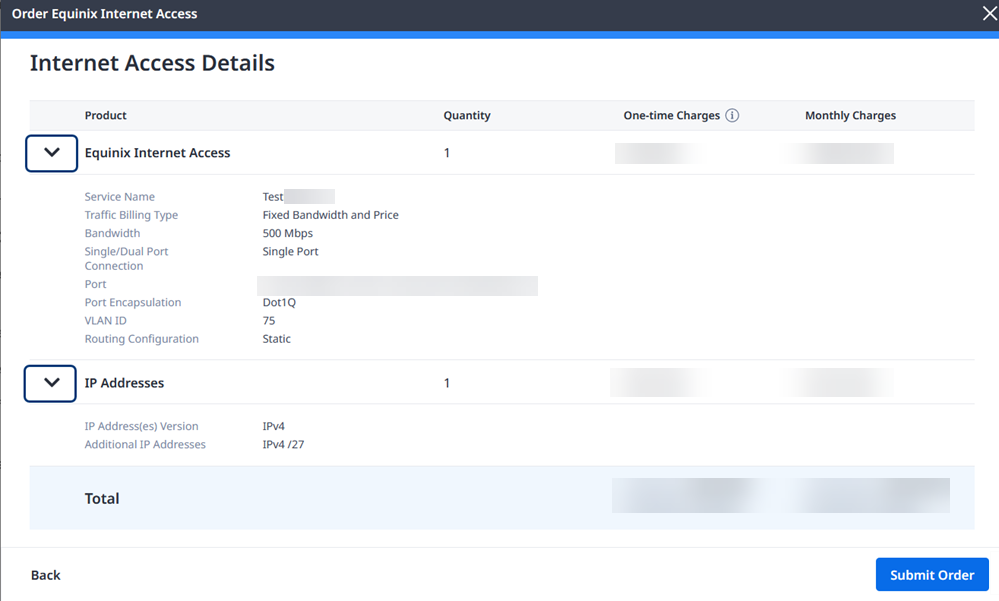
Review Order
-
Review the location and account summary.
-
In the Internet Access Details section, click Equinix Internet Access and IP Addresses to review the technical details and charges.
-
Review the Contact Information.
-
(Optional) In the Customer Reference field, enter the text or numbers that identify this order.
-
Select the checkbox to accept the Pricing Information.
-
Click View and Accept. In the form that displays on the right, review and click to confirm the Terms and Conditions, and click Accept. A confirmation message is displayed.

-
Click Submit Order. An order confirmation is displayed with a brief survey to provide feedback. You will also receive an email confirmation.
-
To view your order status in the dashboard, click Track in the Internet Access Inventory.
Internet Access with Fabric Using API
You can use Equinix Internet Access API to automate this procedure and integrate it with your internal systems. For details, see Order Equinix Internet Access with Fabric.