Multi-factor Authentication - MFA
To prevent unauthorized access to Equinix accounts, mandatory multi-factor authentication (MFA) is being introduced for all non-SSO customers accessing the Equinix Customer Portal. If MFA is already enabled, the login experience will not change. MFA does not apply to SSO users, so no action is required.
Why: Cybersecurity threats have increased in sophistication and frequency. Research shows that MFA prevents 99% of account access attacks.
When: Beginning March 2026, users will be prompted at login to set up and enable MFA for access to the Customer Portal. This will be rolled out in phases, so some users may see the prompts in March, while others may see them in April or May.
How: Follow the prompts at login to set up MFA. Once MFA is enabled, identity verification using an additional authentication step will be required when logging in.
Need help: Log a Support Case for assistance.
Multi-factor authentication introduces another layer of security to the authentication process. The second authentication factor can be either a text message sent to your phone number or a one-time code generated by an authenticator application.
You can self-enable MFA on your account for extra security. If you are part of an Organization that uses Equinix, MFA may be required by the Organization. See IAM Security Policies for more information.
Equinix does not support email as an MFA factor because it creates a single point of failure and is vulnerable to phishing and account takeover. Supported MFA methods are authenticator apps and SMS, with recovery codes available as a backup sign‑in option.
Enabling Multi-factor Authentication
Phone Number - Text Message
SMS-based one-time passwords are available only to customers with an active Equinix billing account. Customers on trial or without active billing can still enable multi-factor authentication using an authenticator application.
Enable multi-factor authentication with one-time passwords sent in a text message:
-
Sign in to the Customer Portal.
-
Click your user name and select User Account.
infoThe User Account page is currently available to customers using email-based login. For information on how to enable email-based login, see Enable Email-based Login.
-
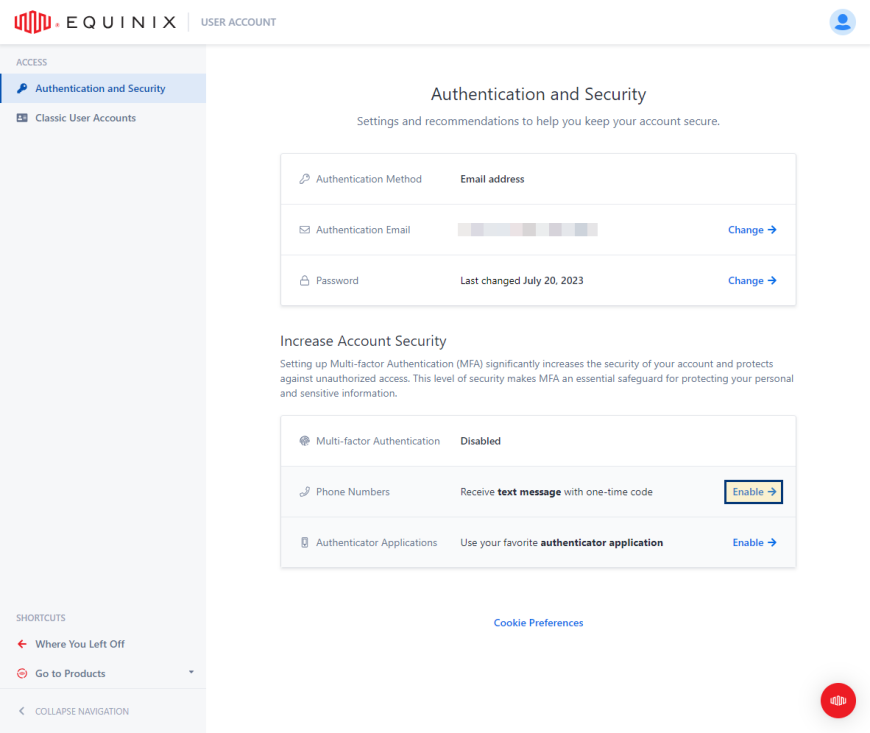
From the left menu, select Authentication and Security.
-
In the Phone Numbers section, click Enable.
-
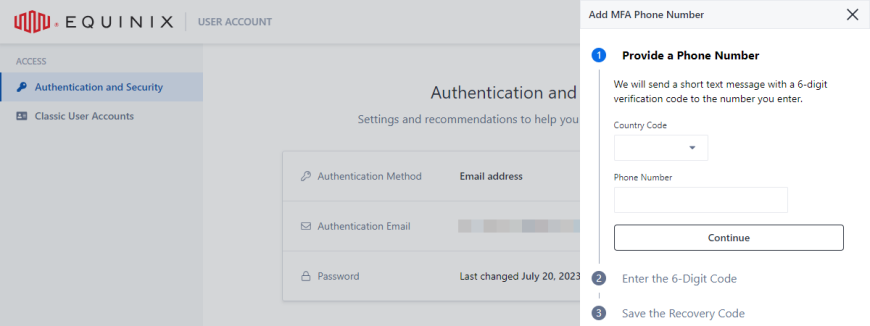
Select country code, enter your phone number, then click Continue.
 tip
tipFor the country code you can either type in the name of the country or the country code to limit the number of items on the list.
-
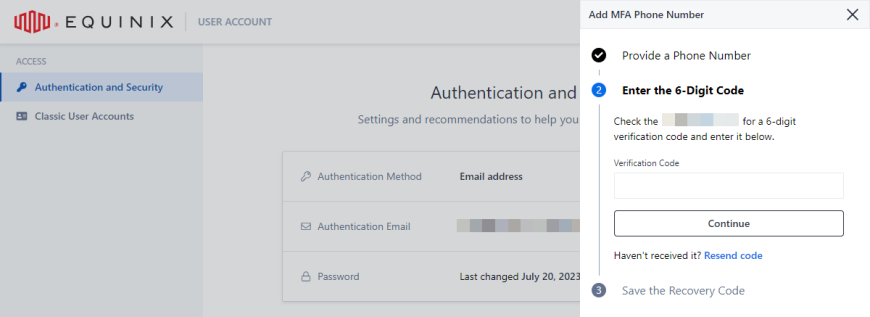
Enter the verification code and click Continue.
-
Copy and store the recovery code, then confirm that you have stored the recovery code, and click Finish.
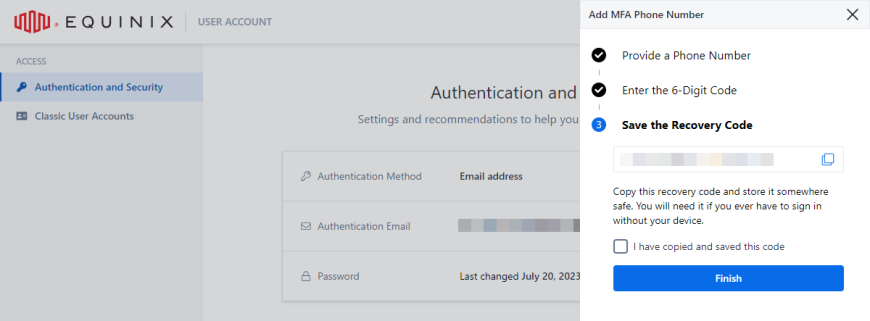 note
noteApplicable when setting up first MFA method.
Authenticator Application
If SMS is not available for the account, an authenticator application can be used as the second factor. Authenticator applications are supported for all account types and are generally more secure than SMS.
To enable multi-factor authentication and use an authenticator application as the second authentication factor:
-
Sign in to the Customer Portal.
-
Click your user name and select User Account.
infoThe User Account page is currently available to customers using email-based login. For information on how to enable email-based login, see Enable Email-based Login.
-
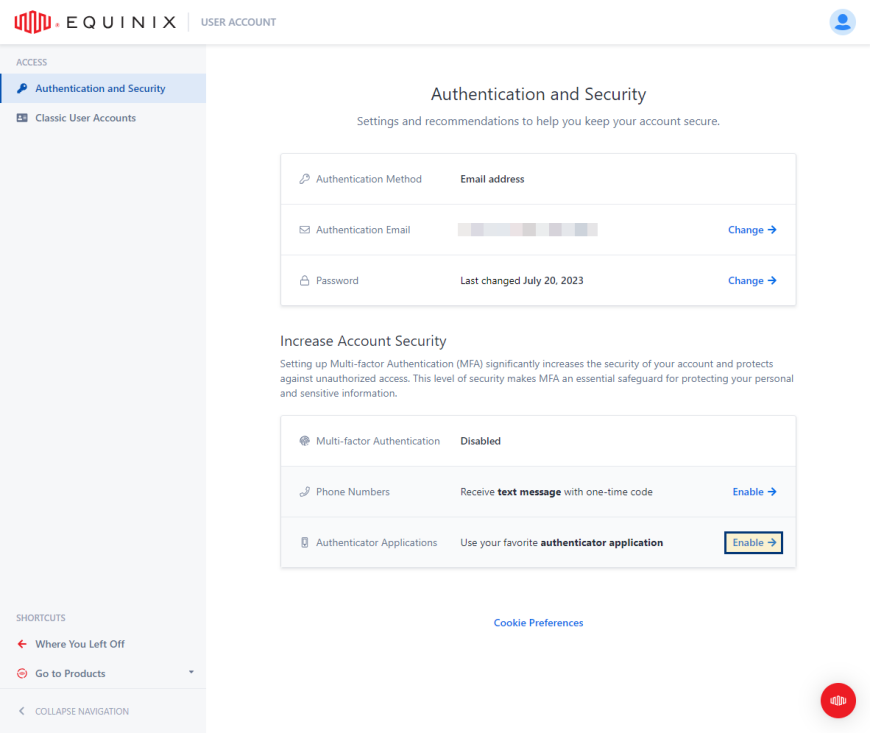
From the left menu, select Authentication and Security.
-
In the Authenticator Applications section, click Enable.
-
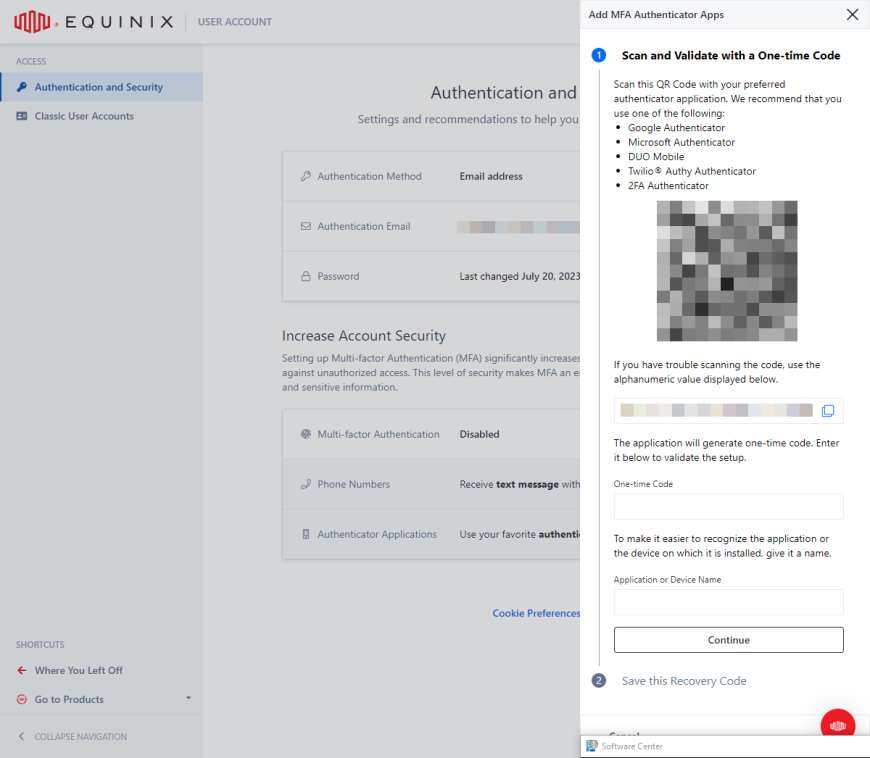
Set up your authenticator application instance:
- Open authenticator application on your phone.
- Scan the QR code or enter the code displayed on the screen.
- Enter the one-time code generated by the authenticator application.
- Enter name for the given authenticator application.
- Click Continue.
-
Copy and store the recovery code, then confirm that you have stored the recovery code, and click Finish.
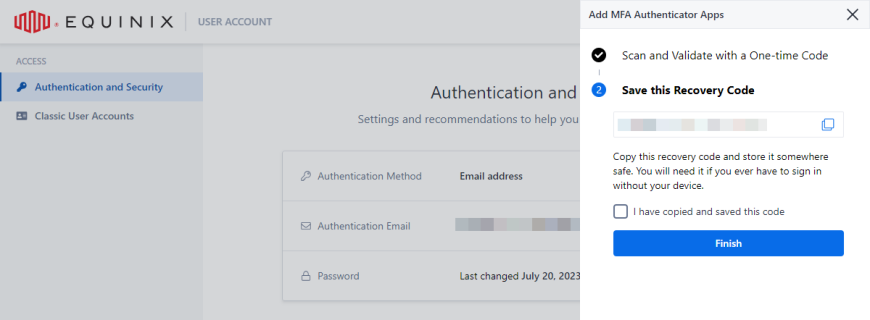 note
noteApplicable when setting up first MFA method.
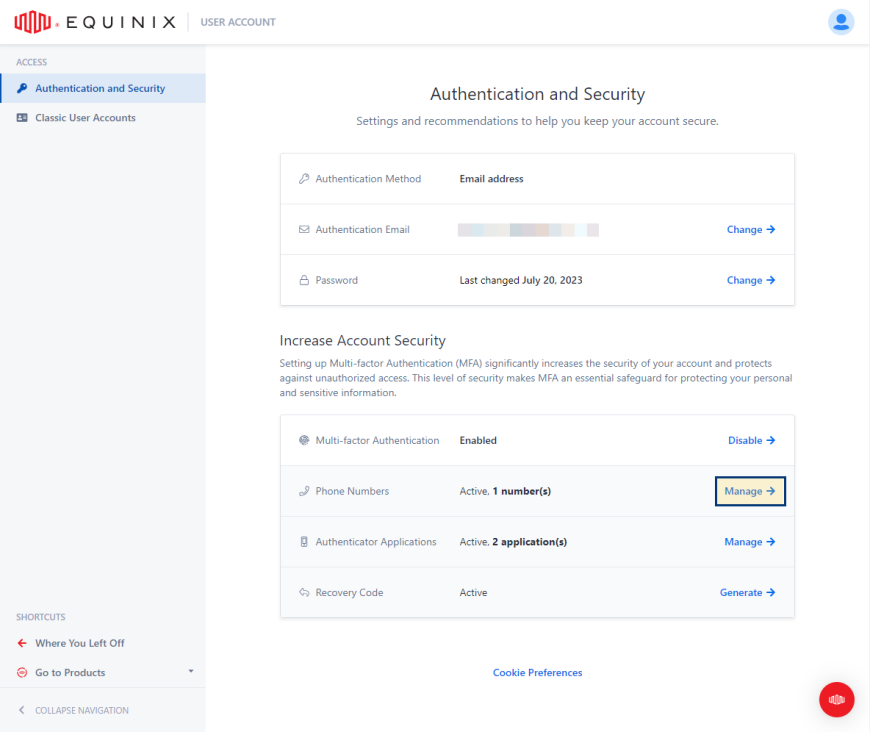
Managing Multi-factor Authentication
Add or change your multi-factor authentication method, generate a new recovery code, or deactivate multi-factor authentication for your account.
-
Sign in to the Equinix portal.
-
Click your user name and select User Account.
-
From the left menu, select Authentication and Security.
You must use your current MFA method to unlock the MFA settings. Click Unlock MFA Section to authenticate.
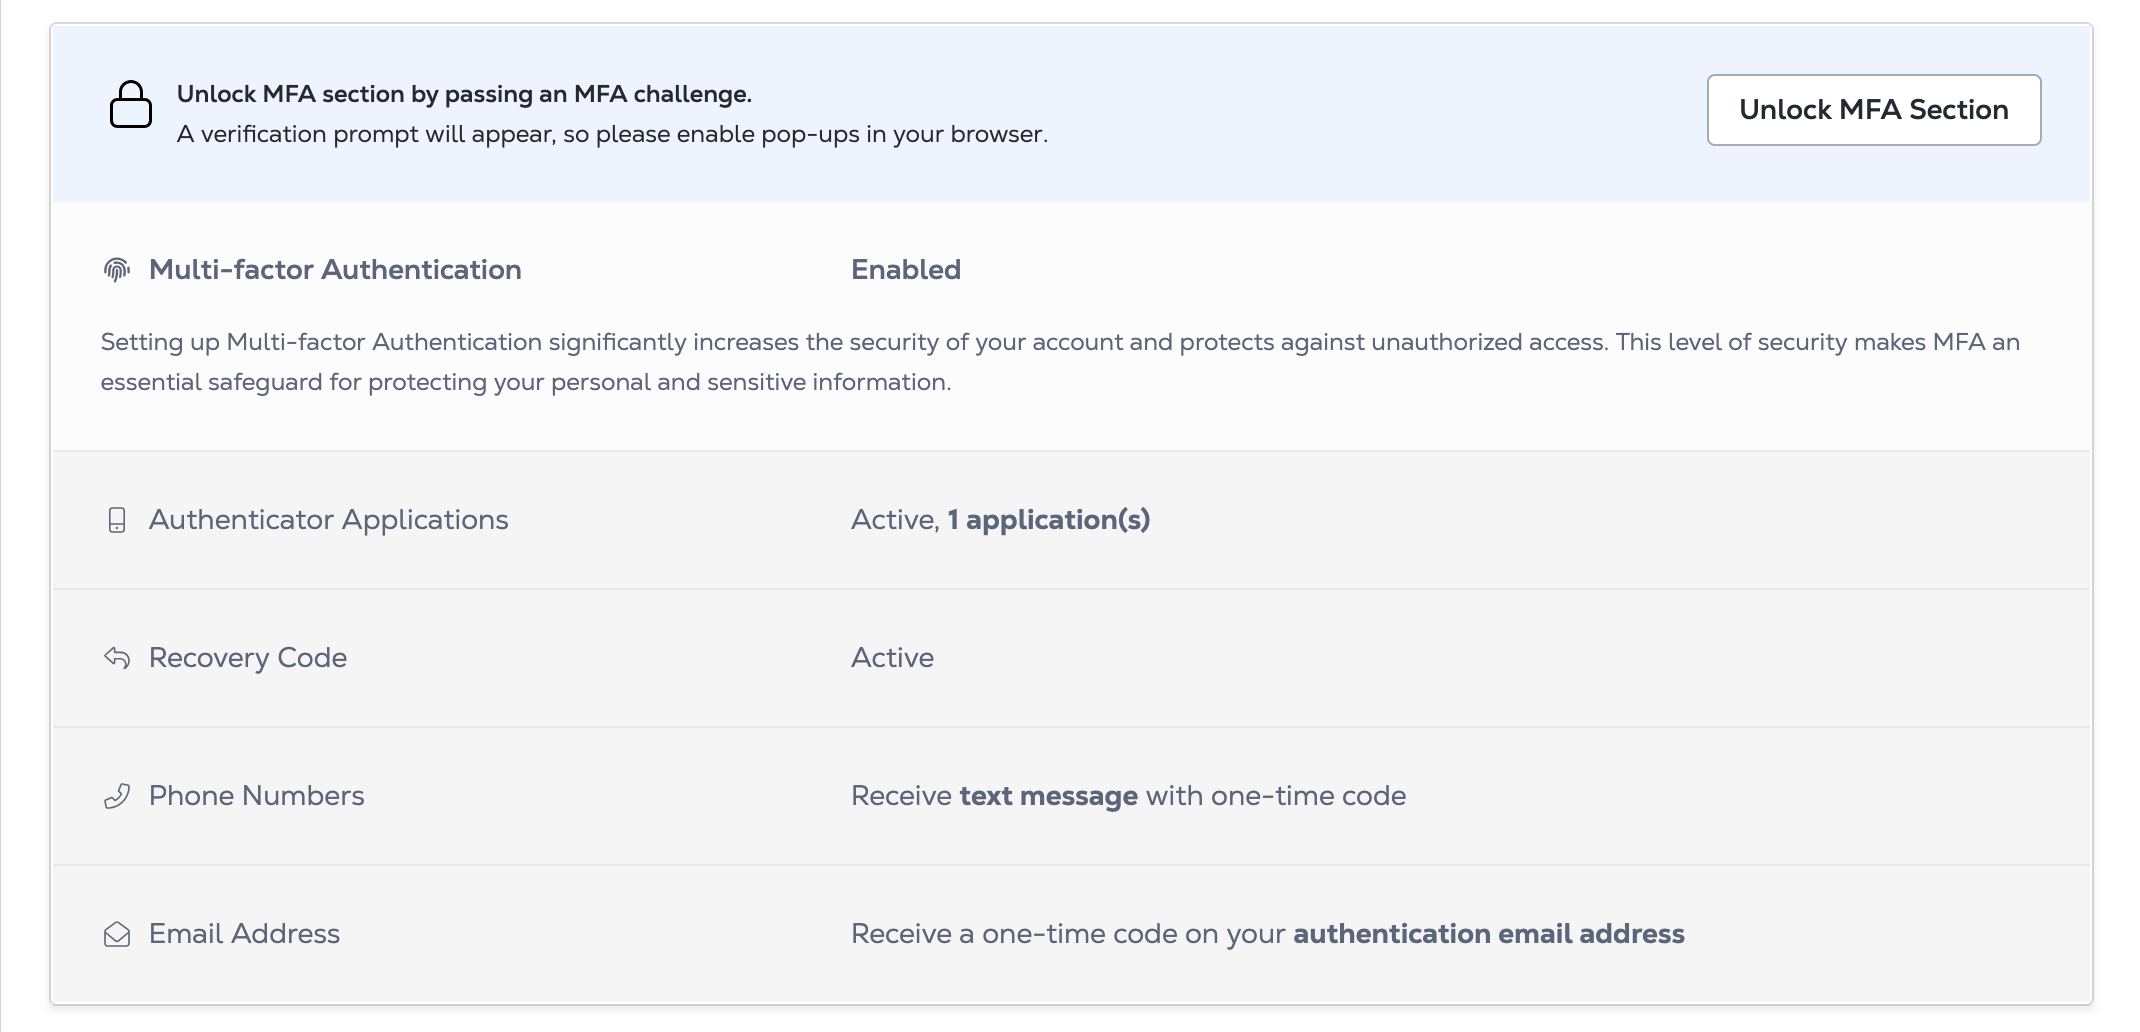
Once unlocked, the MFA settings are available for a limited time period (10 minutes) after which you’ll need to re-authenticate.
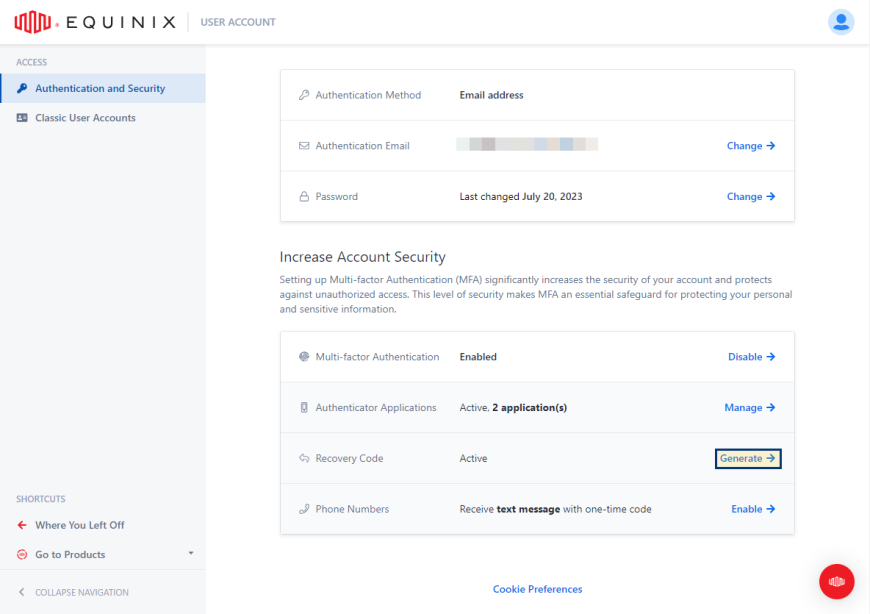
Generate a New Recovery Code
A recovery code enables you to log in to Equinix portals when the second authentication factor is not available.
To generate a new recovery code:
-
In the Multi-factor Authentication section, under Recovery Code, click Generate.
-
Select I understand to acknowledge that generating a new recovery code invalidates the current one, then click Continue.

-
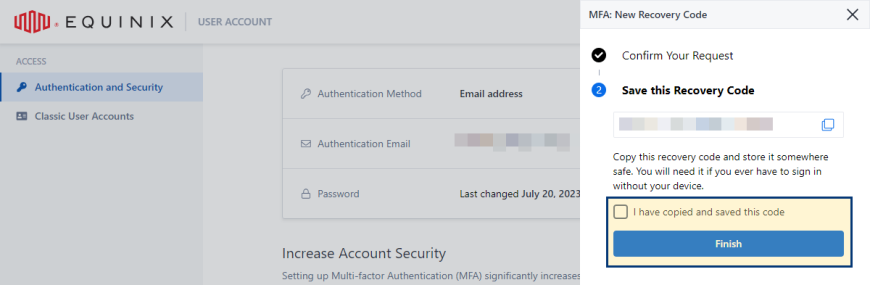
Copy and store the recovery code.
-
Confirm you have copied and saved the recovery code and click Finish.
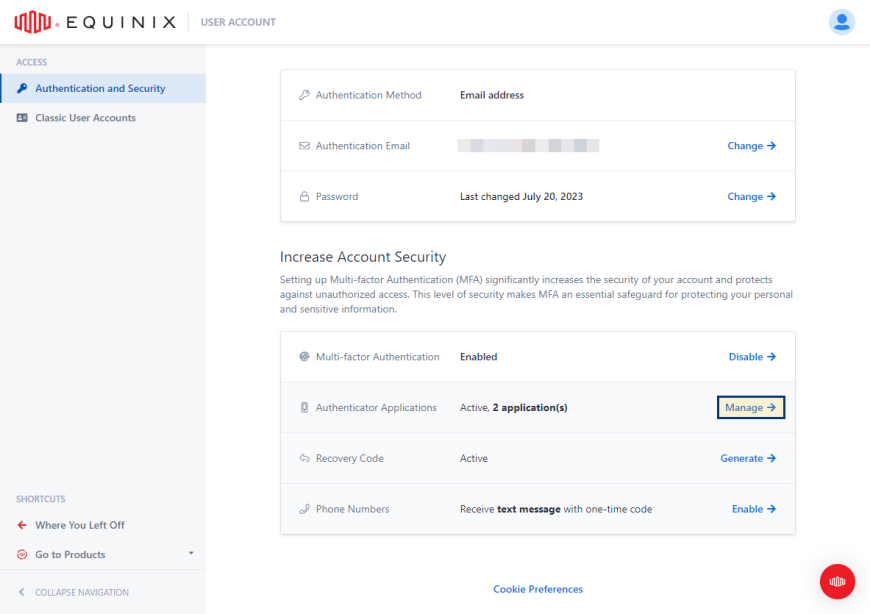
Add an Authenticator Application
To add an authenticator application:
-
In the Authenticator Applications section, click Manage.
-
Click Add New +.
-
Set up your authenticator application instance:
- Open authenticator application on your phone.
- Scan the QR code or enter the code displayed on the screen.
- Enter the one-time code generated by the authenticator application.
- Enter name for the given authenticator application.
- Click Finish.
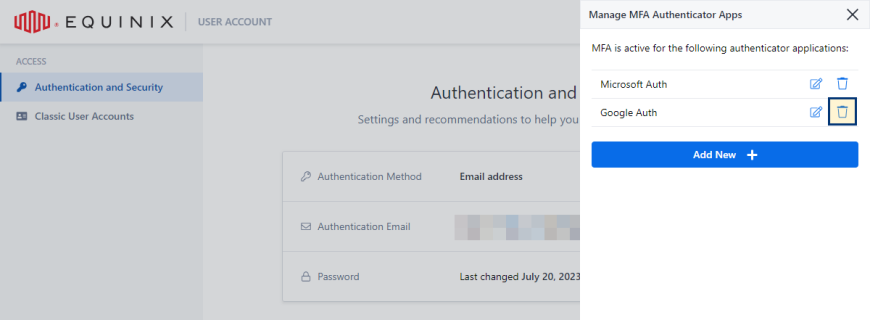
Delete an Authenticator Application
To remove an authenticator application:
-
In the Authenticator Applications section, click Manage.
-
Locate the authenticator application instance that you want to remove and click the trash can.
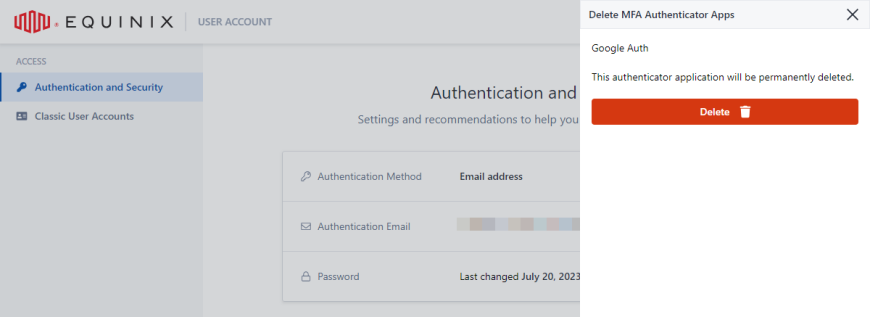
-
Click Delete to confirm.
Add a Phone Number
To add a phone number:
-
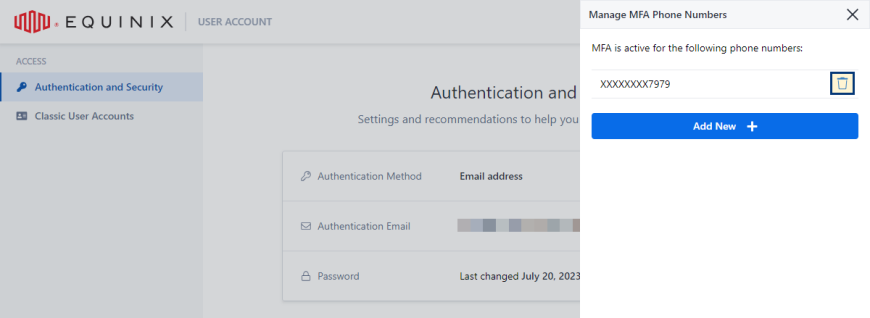
In the Phone Numbers section, click Manage.
-
Click Add New +.
-
Select country code, enter your phone number, then click Continue.
tipFor the country code you can either type in the name of the country or the country code to limit the number of items on the list.
-
Enter the verification code you received in a text message and click Verify.
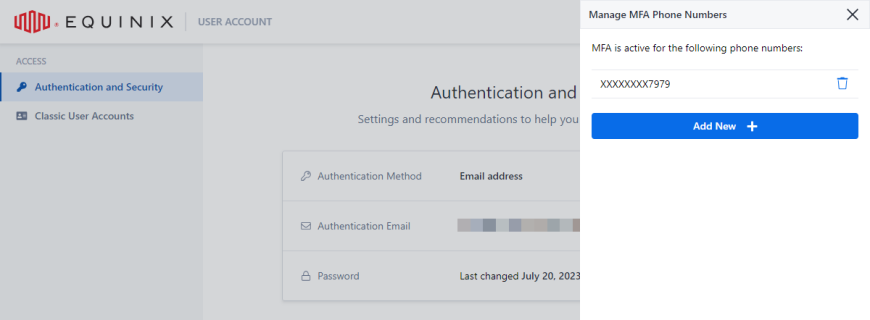
Delete Phone Number
To remove a phone number:
-
In the Phone Numbers section, click Manage.
-
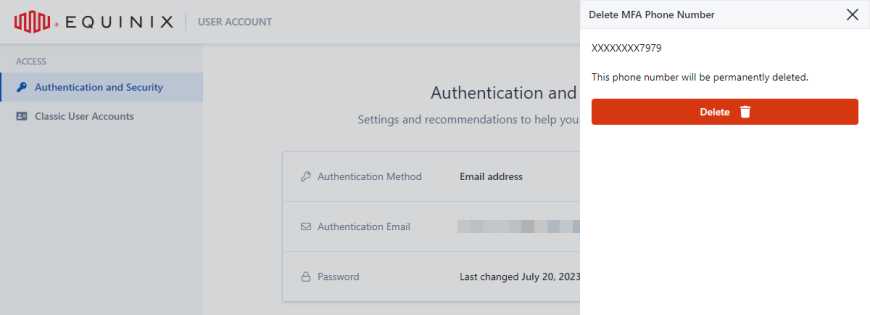
Locate the phone number that you want to remove and click the trash can.
-
Click Delete to confirm.
Setting a Default Authentication Method
If you have multiple methods of multi-factor authentication enabled, you can set a default method. To set your default authentication method:
-
In the Multi-factor Authentication section, locate the appropriate authentication method and click the manage icon.
-
Select Set as Default.
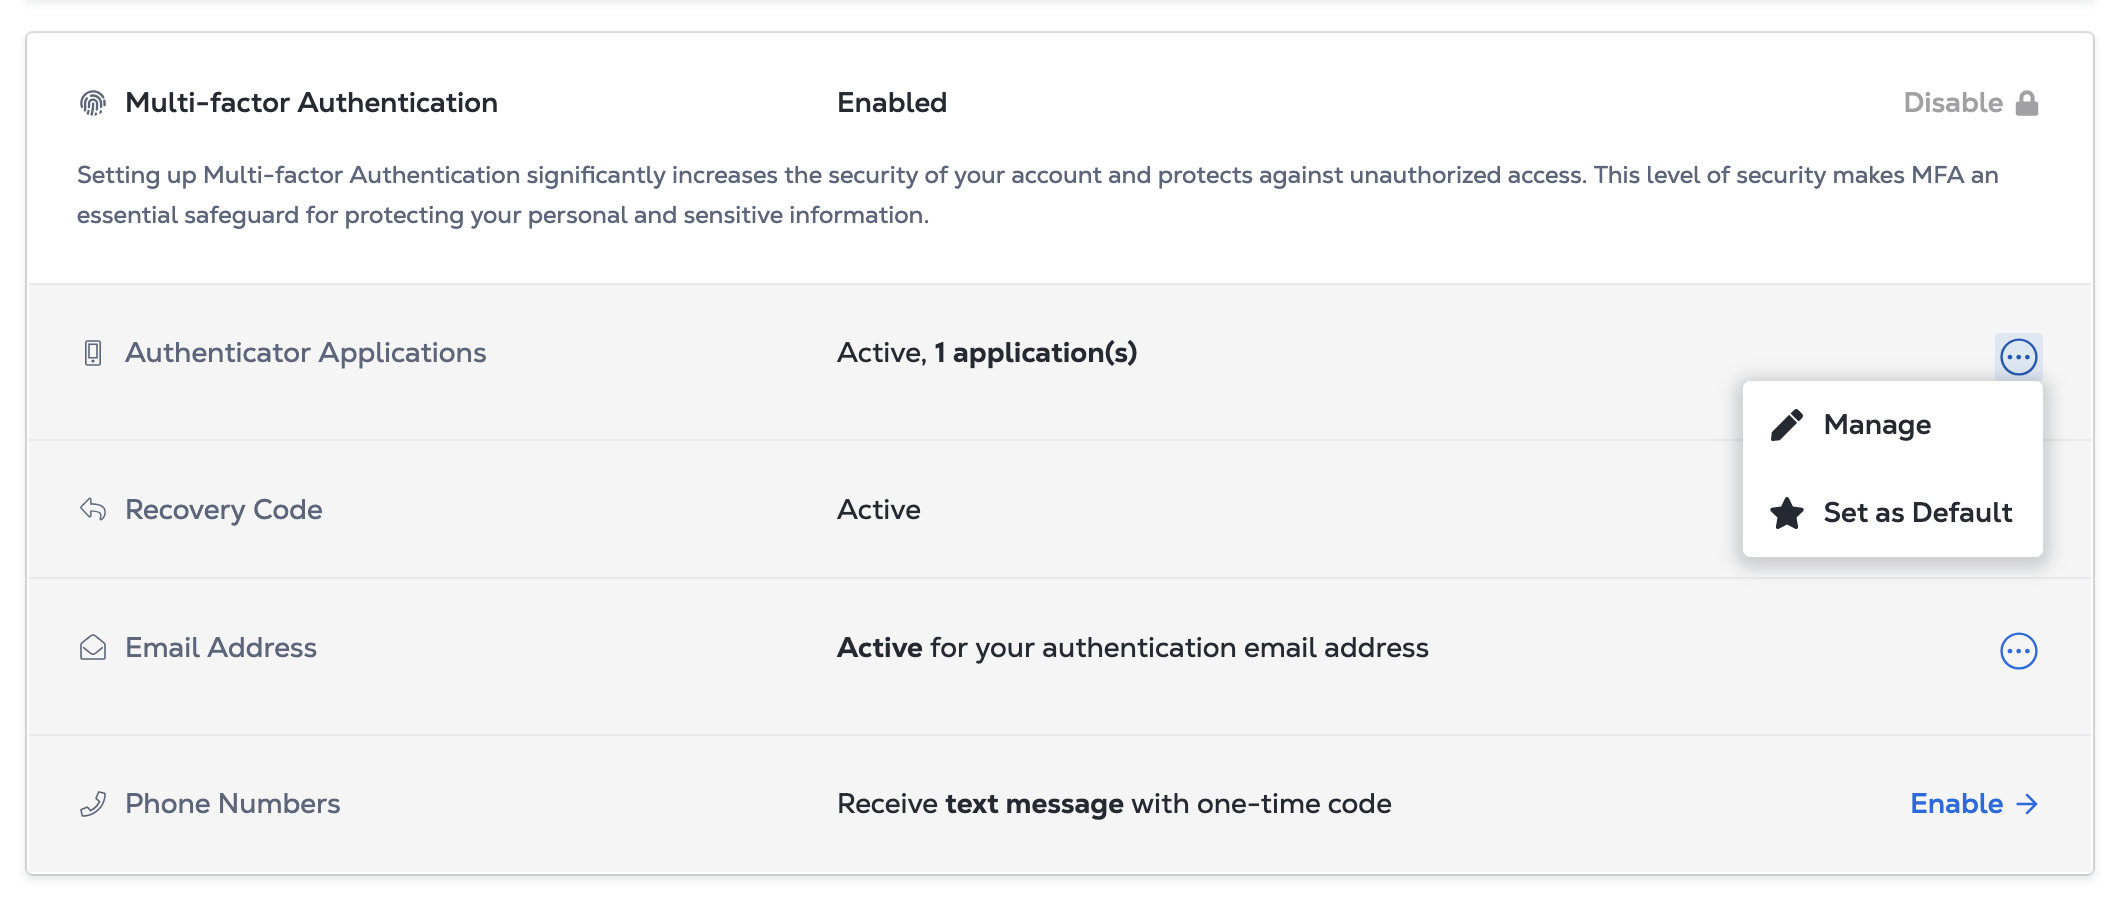
Default authentication methods are indicated by the Default label. To remove the default status for an authentication method, click the manage icon again and select Remove as Default.
Disabling Multi-factor Authentication
To deactivate multi-factor authentication:
-
Sign in to the Equinix portal.
-
Click your user name and select User Account.
-
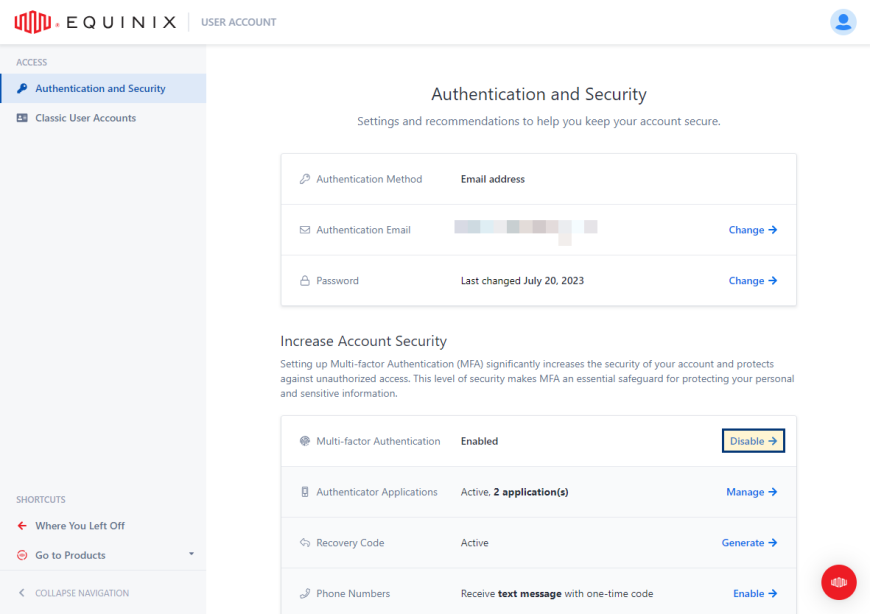
From the left menu, select Authentication and Security.
-
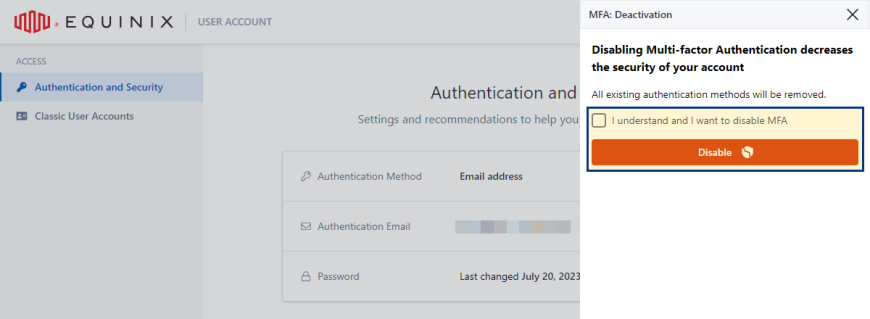
In the Multi-factor Authentication section, click Disable.
noteYou are not able to disable MFA if your organization mandates its use. In such instances, it is not possible to disable MFA.
-
Select I understand and I want to disable MFA and click Disable.