Scheduling a Work Visit
On-site policies are subject to change. For full policy information, refer to our Global IBX Policies. Share IBX Health and Safety Guide with the other visitors listed on the ticket.
If you need to access your space at the IBX, you can schedule a work visit at no cost. For example, work visits can be used to:
- Allow a vendor to do maintenance work on your servers
- Take readings from your servers
- Install a camera or other equipment
Supervision and escort during Work Visits
Equinix staff can escort customers to their space during a work visit. Additional fees apply. If staff are required to remain onsite and supervise the visit or to provide access to rooftop or antenna spaces, a separate Smart Hands order for Cage/Roof Access Supervision Escort is required. To ensure staff availability, scheduling the Supervision/Escort order in advance is recommended.
Using recording equipment in the IBX
Recording equipment (including photo, video, and audio devices) is not allowed inside the IBX without prior approval from Equinix.
If you need photos or recordings of your cage or equipment, Equinix can take them for you. Submit a Smart Hands order for Request Photos.
If you plan to use your own recording equipment, include the reason for the recording in your visit request so it can be reviewed for approval.
For full details, see Global IBX Policies.
Schedule a Work Visit
-
From the Orders and Tickets menu in the Customer Portal, select Work Visit.
-
On the Work Visit screen, under Locations, select the IBX data center you want to visit.
Once you select a location, the screen displays the location details (including the street address, hours of operation, and a link to a map of the surrounding area).
-
Select the cage/suite and cabinet (optional) where the work will be performed.
-
Under Visitors, add everyone who will attend the tour, minimum = 1, maximum = 10.
infoAll attendees must show a government-issued photo ID to enter an IBX. For more information, see Entering and Exiting an IBX.
-
To find a contact by name or email address, use the Search box. In the search results, click the person's name to add them to the attendee list.
-
For additional search/filter options, or to add multiple users, click User Directory. Then you can use the search box, sort the columns, and/or use the filters at the top. Click the checkbox for the chosen contact(s) and click Done.
tipFor frequently used contacts, click the star beside the name. Then you can use the Favorites filter to quickly find these contacts.
-
To add someone who doesn't have a Customer Portal account (such as a vendor), click Add a non-listed attendee. Add their contact details and click Add.
infoBe sure to include an accurate email address and/or mobile phone number for the non-listed attendee. This information is used to send a unique QR code to the attendee. The attendee will use the QR code for check-in at the IBX. For details, see Show Your QR Code at Security.
tipFor each visitor you added, you can click the arrow beside their name to view their permissions and account status.
-
-
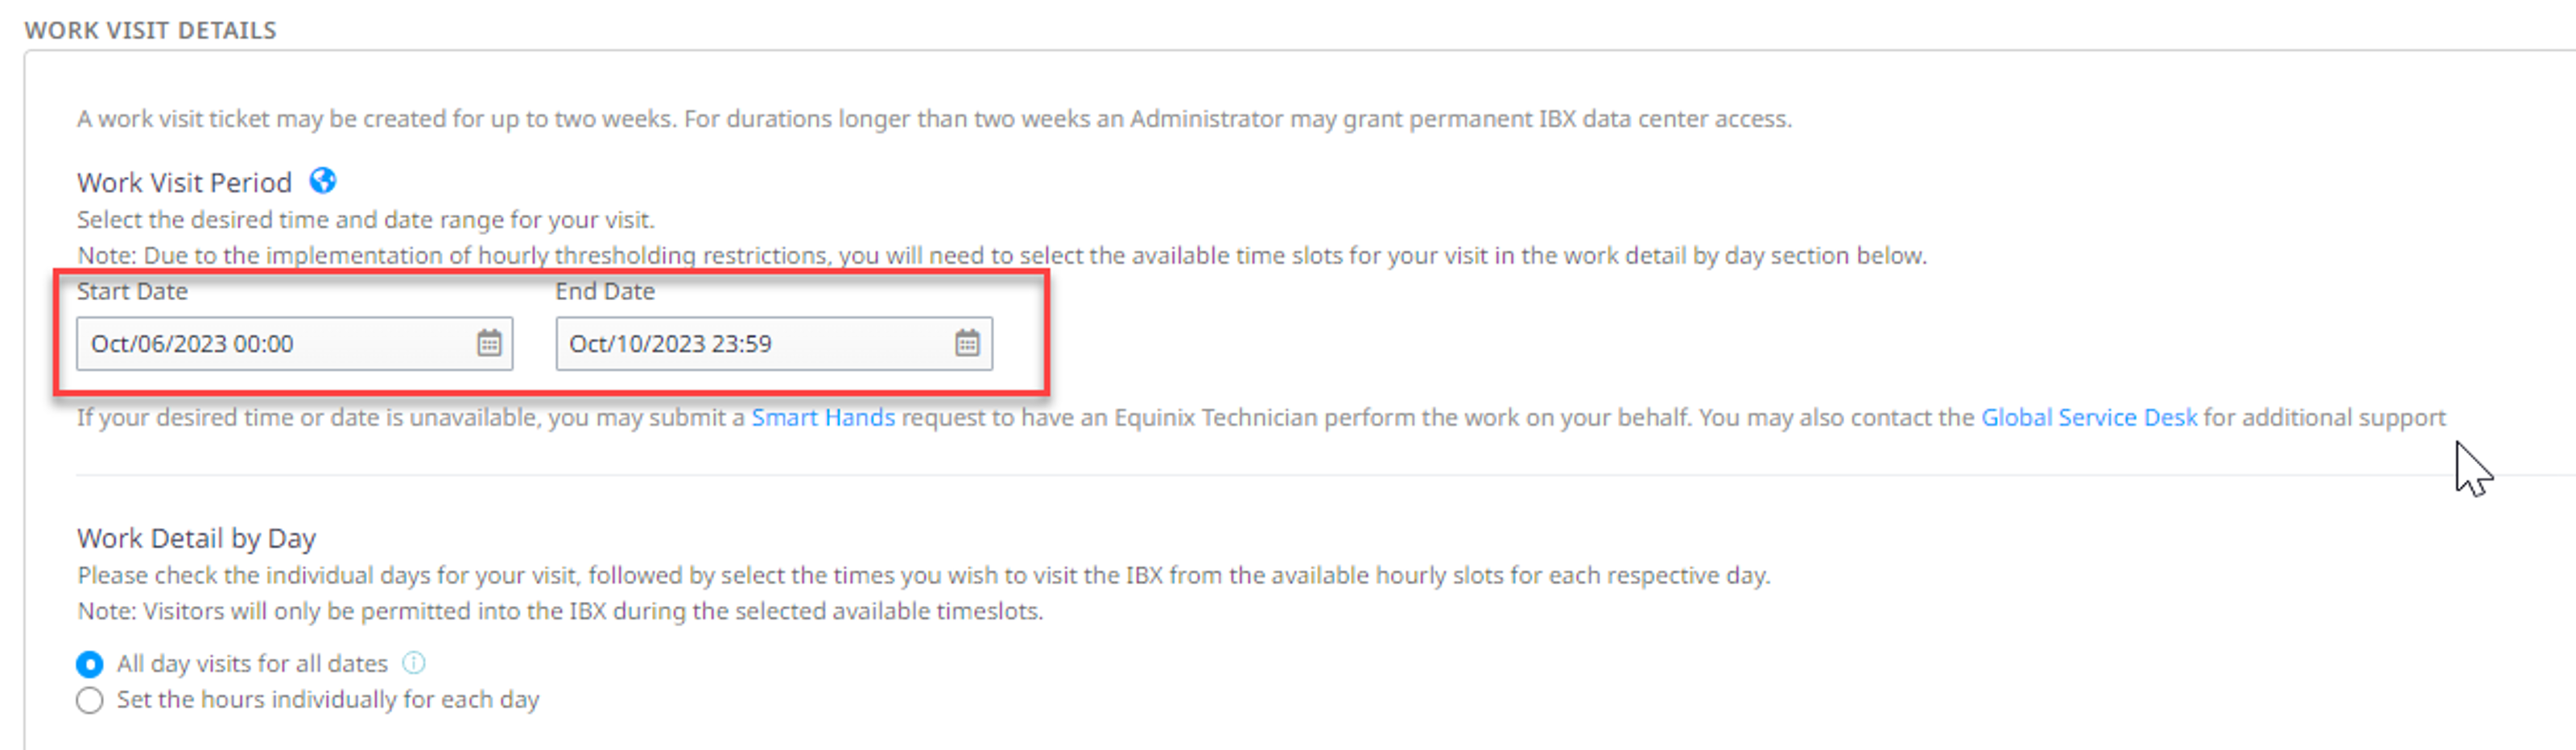
Under Work Visit Details > Work Detail by Day, select the proposed Start Date and End Date for your visit using the IBX's local time zone.
 note
noteThe maximum duration for a work visit is 14 days. If a longer visit is needed, contact your Customer Portal administrator to request permanent IBX data center access.
-
For IBXs in AMER or EMEA, under Work Visit Details > Work Detail by Day, you can do the following:
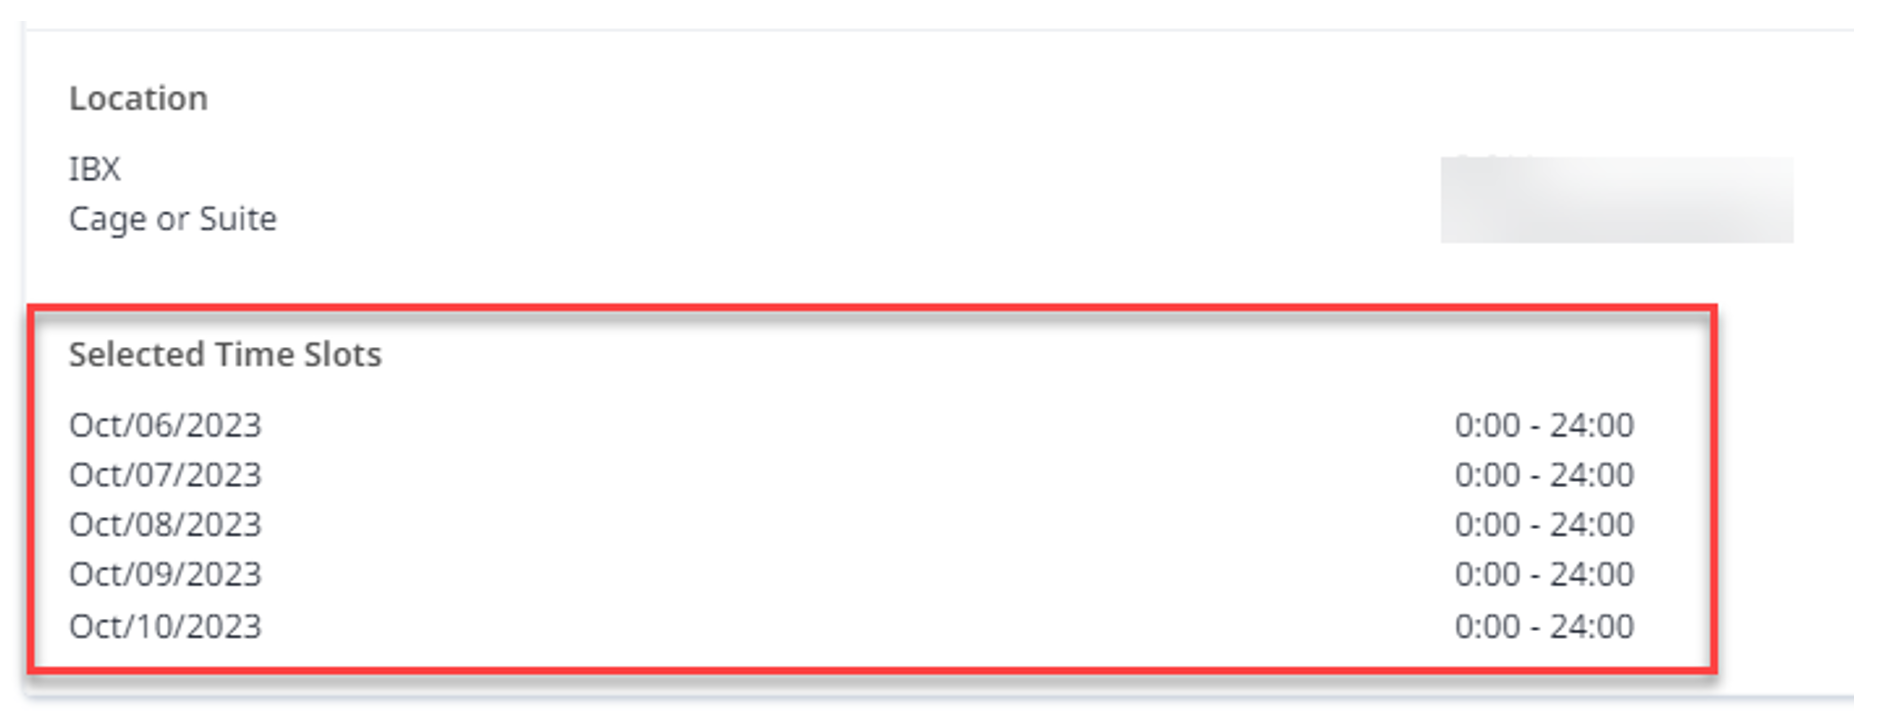
- Select the All day visit for all dates checkbox for full day access to the IBX. This will grant you 24 hour access for the dates selected. It will enable same day access starting from the time the work visit request is submitted.
-
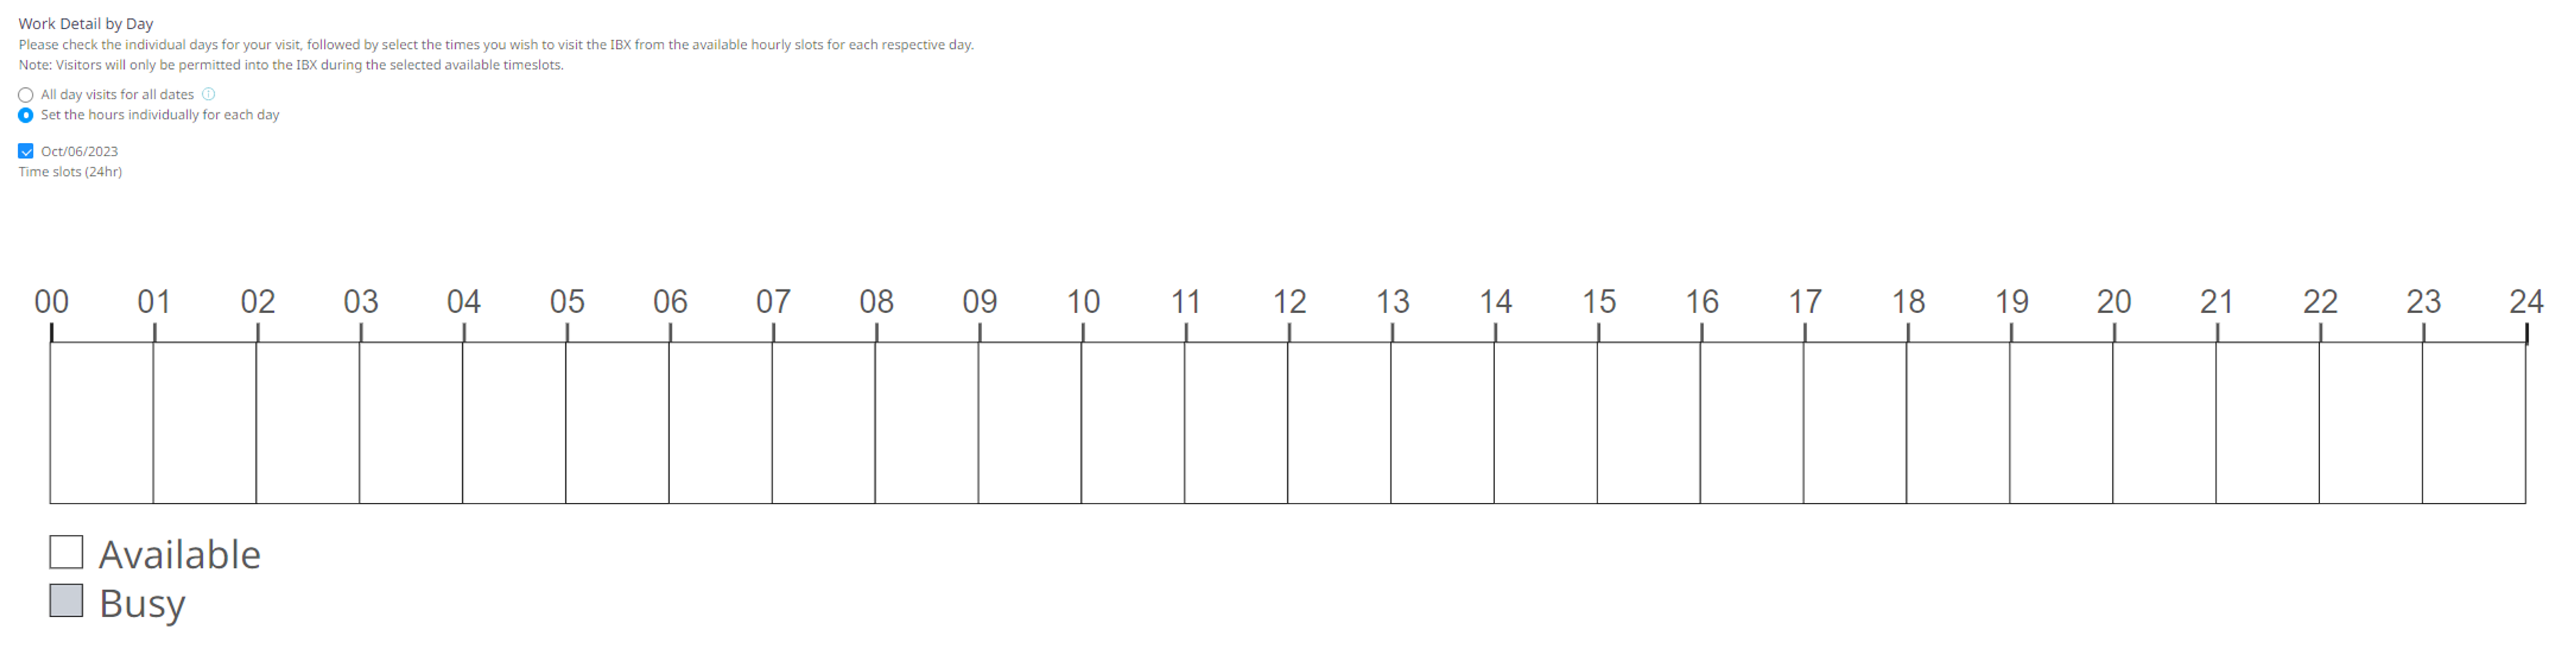
The Set the hours individually for each day option will enable you to set work visit times for each day you are accessing the IBX. Once you select a day, a 24-hour timeline shows the available time slots that day Available times are shown in white; unavailable times and any times outside your specified start/end range are shown in gray. Click the hour(s) you want to be on-site each day. Your selected hours are shown in blue.
 tip
tipTo increase or decrease your reserved time, use your mouse to grab the edge of the blue shaded area and drag it left or right.
-
Under Scope of Work, enter details about the work to be done that day.
noteIf there are no available time slots on your chosen date, you can submit a Smart Hands order for an Equinix technician to perform the work for you (additional fees apply). Or if you have an urgent need to access the IBX during the unavailable time slots, contact the Global Service Desk (GSD).
-
At no charge, Equinix staff can escort you to your space and open your private cage or secure cabinet for the visit. Under Open Cage or Cabinet Assistance, enable Allow Equinix to open cage or cabinet.
noteThis option is only available if you selected a cabinet under the Locations section of the ticket.
-
Under Additional Information and File Attachment:
-
Use Additional Details to add any other information you want communicated to the IBX staff such as any specific areas of the IBX you would like to view.
infoIf you plan to take photos or videos during the tour, you must request permission first. State your detailed purpose under Additional Details. Equinix will review your request.
-
Use Upload File(s) to add any relevant attachments to your request. Your attachments are sent to the IBX on-site staff.
- Add up to 5 files.
- The maximum size for each file is 2MB.
- The files can be any of the following formats: bmp, jpg, jpeg, gif, png, tif, tiff, txt, doc, docx, xls, xlsx, ppt, pps, ppsx, pdf, vsd, and vsdx.
-
-
Enter Customer Reference Information. Many companies have an internal ticketing system to track issues or track items ordered from Equinix. This field provides a place to enter your internal reference information, such as P.O. numbers, ticket numbers, or descriptive text.
tipThis information can be searched for on the Orders and Tickets History screen, and will also appear on any related invoices.
-
Under Add Contact Information, you are listed as the Ordering Contact and the Notification Contact. Optionally, you can add more Notification Contacts and/or a Technical Contact.
Note:
- The Technical Contact and the Notification Contact can be the same person.
- You can select multiple Notification Contacts, but only one Technical Contact.
- Notification Contacts receive email notices about the status (and pricing, if applicable) of the ticket.
- Technical Contacts do not receive booking or completion notifications.
- To remove a Notification Contact from the ticket, click the
Xicon.
-
Read and acknowledge the Disclaimer statement and the IBX Visit Safety Rules & Precautions.
-
Review the Work Visit Summary, then click Submit.
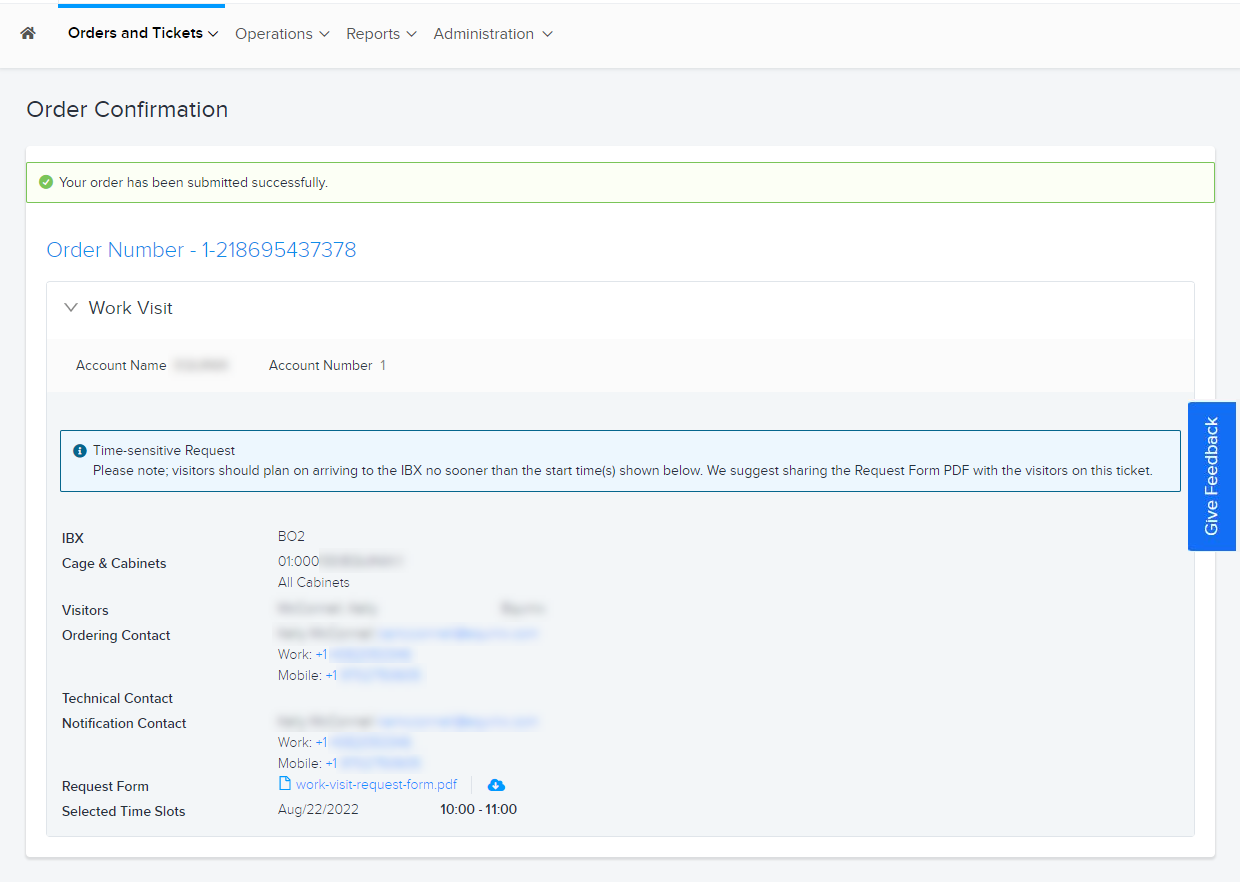
Following your IBX visit, you’ll receive a survey email inviting you to share feedback about your experience.