Visiting an IBX
What to know before arrival
Before visiting an IBX data center, please review the IBX Health and Safety Guide to understand essential procedures, responsibilities, and site-specific safety protocols.
Schedule an on-site visit
To schedule an on-site visit to an Equinix IBX data center, there are several options under the Orders and Tickets menu in the Customer Portal:
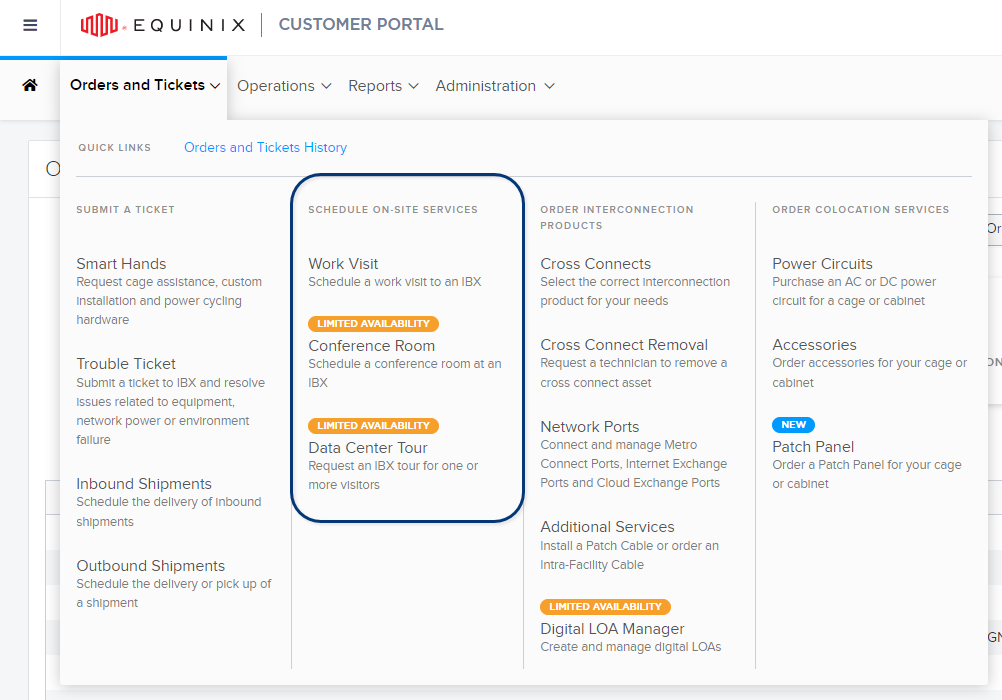
These on-site services are offered at no cost to customers, employees, vendors, and resellers.
Permanent Badge Request and Access Process
The following steps outline how to request a permanent IBX badge and use it for facility access.
Request a permanent badge
- Ask the customer’s Customer Portal administrator to assign the necessary access.
- Complete the security profile in the Customer Portal account.
- During the next visit to the IBX, request a permanent badge from the on-site security team.
- Security will enroll biometrics and issue the permanent access card.
Use a permanent badge to access an IBX
- Travel to the IBX and enter the facility. Some locations may require the use of an intercom to gain access.
- Check in at the kiosk by:
- Scanning the Customer Portal QR code, or
- Using the Customer Portal mobile app.
- Proceed through the mantrap/turnstiles, using the permanent badge and/or biometric verification.
Access for minors (under 18 years old)
- Contact the IBX security office and request an approval form to be submitted to the IBX manager.
- Access will only be granted when the IBX manager approves the form.
- Follow either the visitor access process, or the guest access process.
Access for visitors and guests
This process applies only when the permanent contact has privileges to bring guests.
- Contact signs in on the kiosk and clicks the ‘add guest’ button. A contact may have up to five guests signed in at a time.
- Guest fills out their name and company info, then signs the Global IBX Access Form. If the kiosk is down or security manually signs the guest in, a paper copy of the Global IBX Access Form must be signed.
- Proceed to security, where a name badge with no access is issued to the guest.
- Access to the IBX is managed through the permanent contact under whom the guest is registered.
Work visitor access
- Customer Portal administrator schedules a work visit ticket. The name on the ticket must match the government issued ID.
- The visitor travels to the IBX. Access to the Security Lobby will not be granted if they arrive more than one hour before the scheduled start time.
- The visitor uses the intercom to notify security of their arrival.
- The visitor checks in at the kiosk using a QR code or by entering the order number manually.
- Proceed to security and present a government-issued ID to sign in.
- Security processes the work visit ticket. Where applicable, security enrolls the visitor in the access control system.
- The visitor is escorted to the space listed on the work visit ticket or, where applicable, uses the issued access card to enter the space.
- If an access card was issued, the visitor returns the card to security at the end of the visit, and security clears all information from the card.
For detailed instructions, see:
- Schedule a Work Visit to an IBX
- Schedule an IBX Conference Room
- Schedule a Data Center Tour
- Entering and Exiting an IBX
Provided there is a valid business purpose for the visit, access to an IBX may be granted in the following ways:
- Have a user account in the Customer Portal with access permissions for the IBX (assigned by an administrator).
- Be included in a Work Visit or Data Center Tour request created by your company’s Customer Portal administrator.
- Be an escorted guest of a Customer Portal user who has the Allow Guests permission for the IBX.
On-site policies are subject to change. For full policy information, refer to our Global IBX Policies.
Permissions Needed
If you don’t have a Customer Portal account with the necessary permissions to arrange a visit, you can contact the Global Service Desk (GSD) to arrange the visit for you.
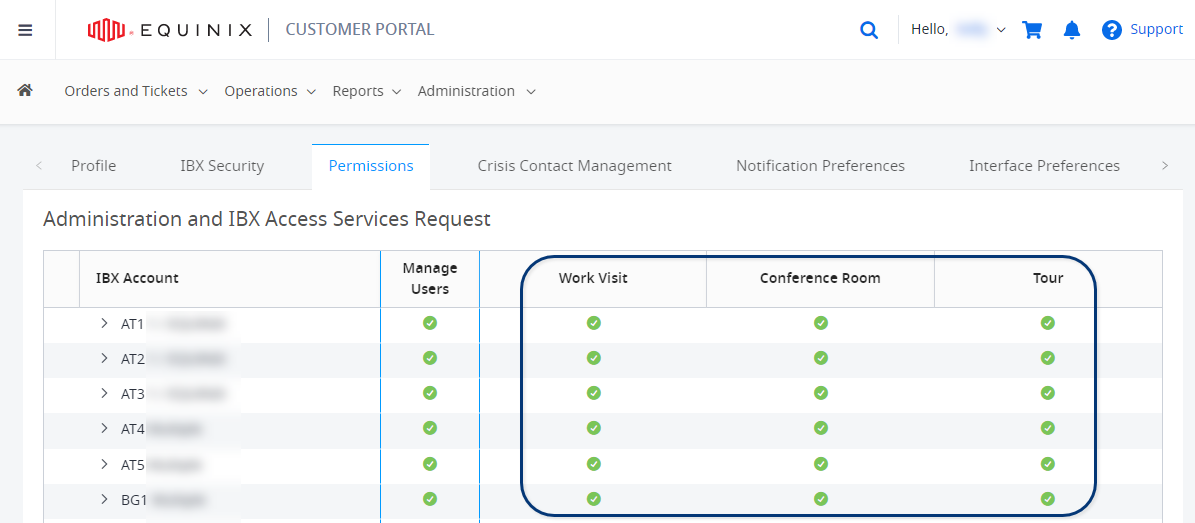
Your ability to schedule on-site visits in the Customer Portal is governed by the following permissions on the Administration and IBX Access Services Request screen:
The allowed actions at the IBX (once you arrive on-site) are governed by the following permissions on the IBX Data Center Access screen:

Visitors must be 18 years of age or older, must be accompanied by the registered visitor, and must present a valid government-issued photo ID.
To see your current permissions in the Customer Portal:
-
Click your user name (at the upper-right corner of the portal screen) and select User Settings:

-
Click the Permissions tab.
-
Verify that the Administration and IBX Access Services Request and/or the IBX Data Center Access tiles say "Permissions Granted". If you don't see these tiles, look under the Request Permissions section of the screen.
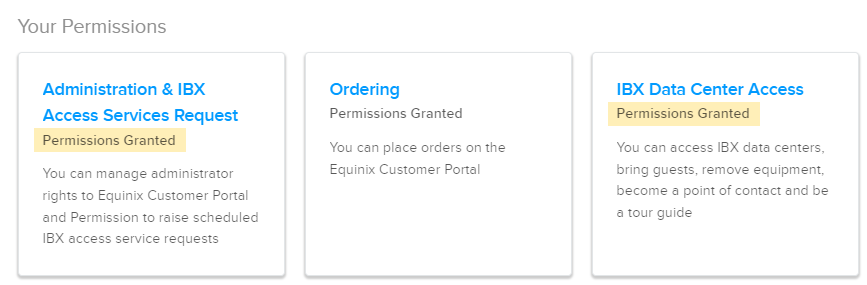
-
Click each tile to see your specific IBX permissions.

Symbols on the Administration and IBX Access Services Request screen:
| Icon | Meaning |
|---|---|
| Full permission | |
| No permission | |
| Partial permission |
If you don't have the permissions you need, contact your company's Customer Portal administrator, or see IBX Access Permissions in the IAM Documentation.