Creating a Billing Account
A billing account is required to order Equinix products or services. You can create multiple billing accounts for your organization to enable you to order and manage Equinix products and services across the world. A local billing account is required for Colocation products and services. If you are ordering Digital products and services, you can use either a local or global account.
To create a new billing account:
-
Sign in to the Customer Portal and navigate to Fabric.
-
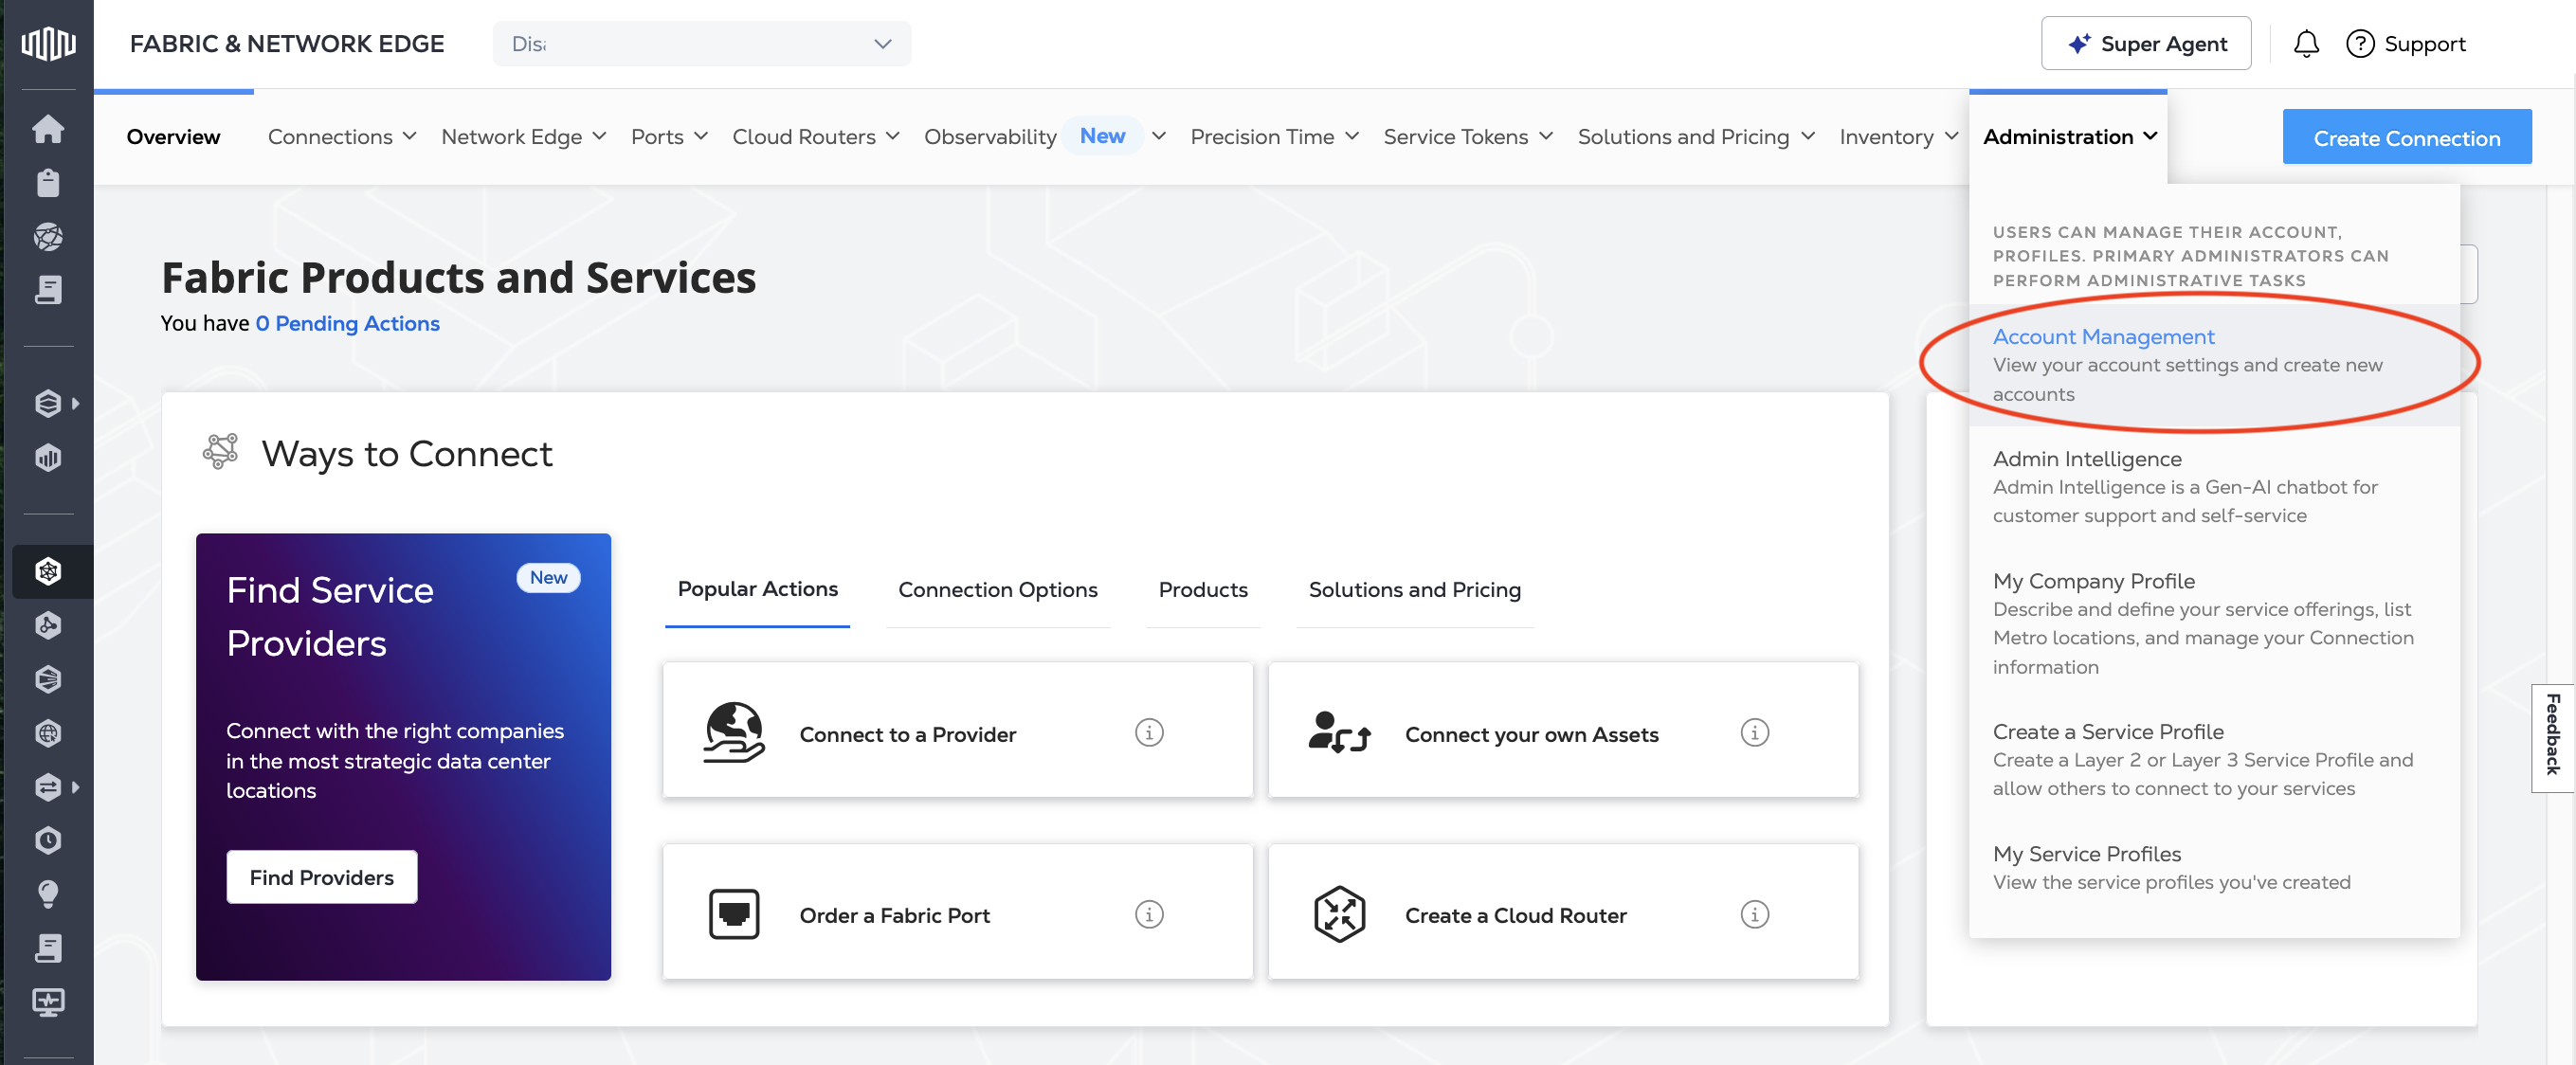
From the Administration menu, click Account Management.
-
Click Create Billing Account.
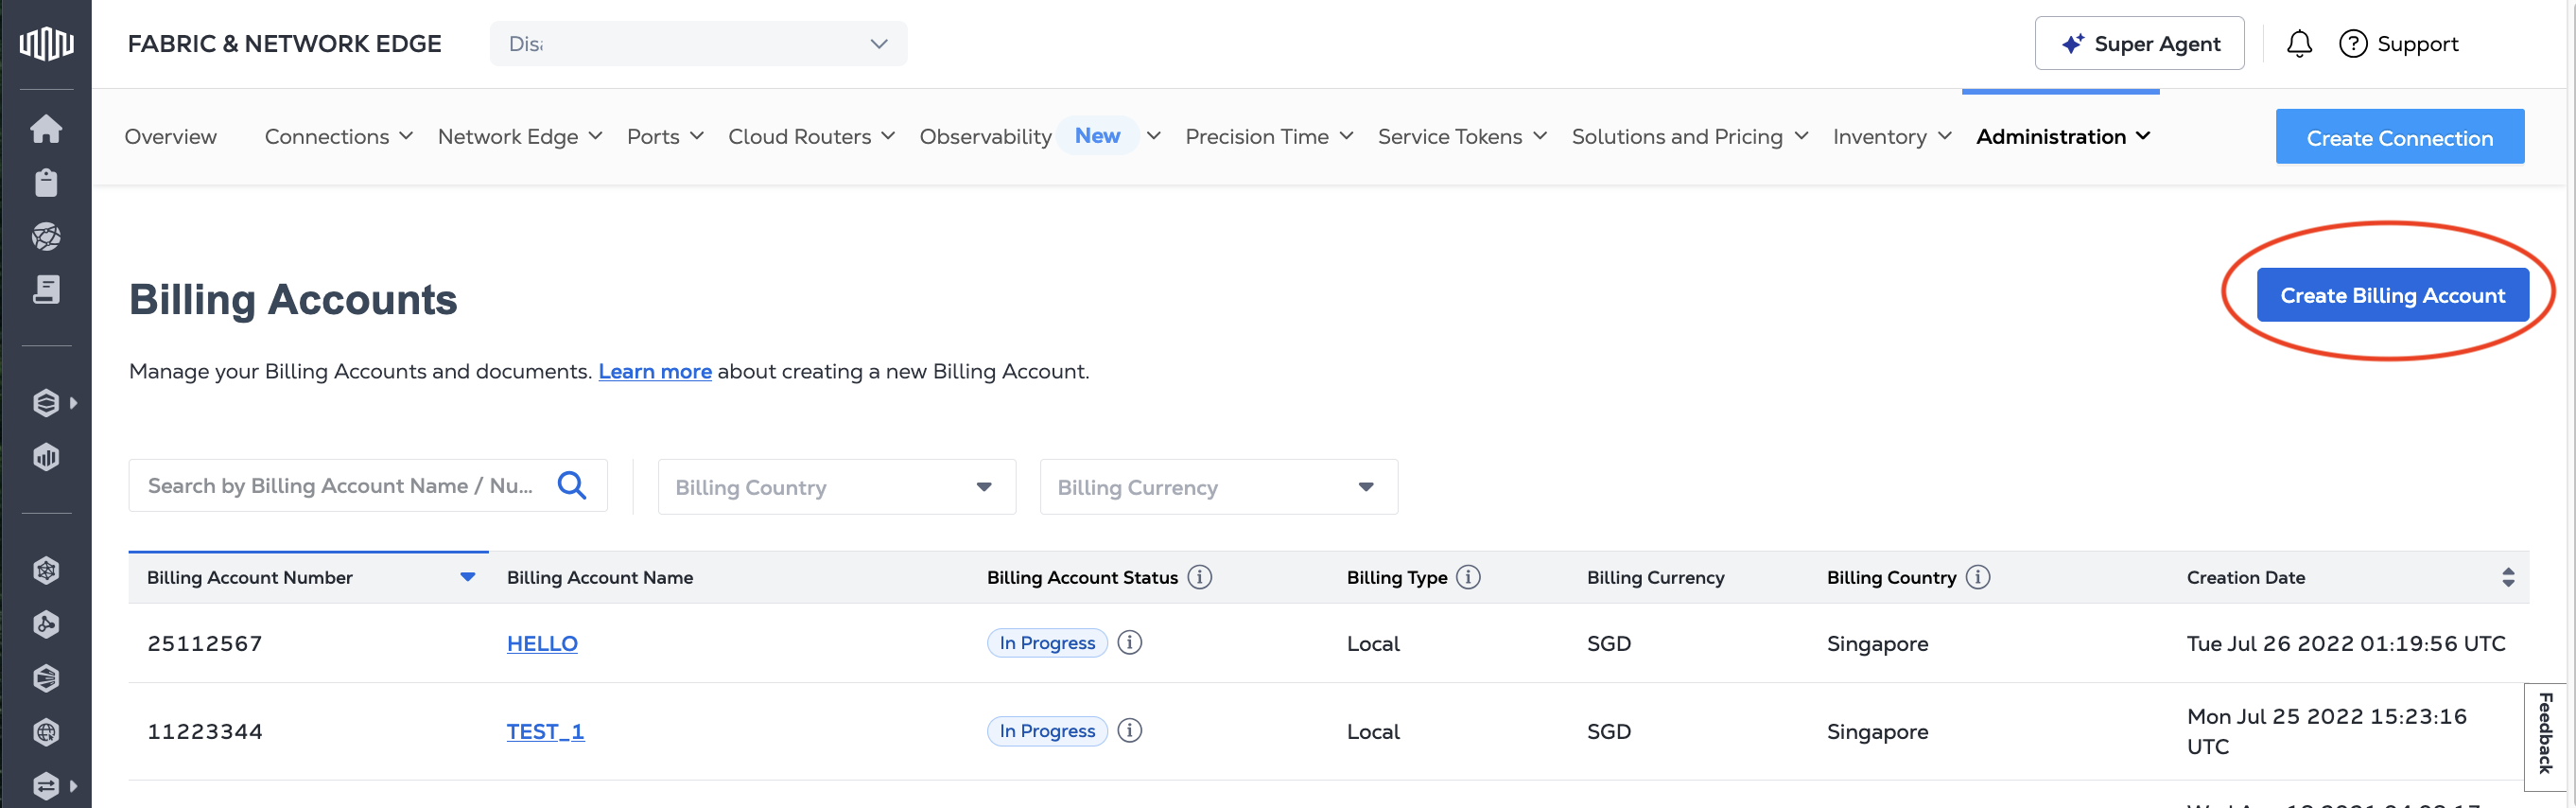
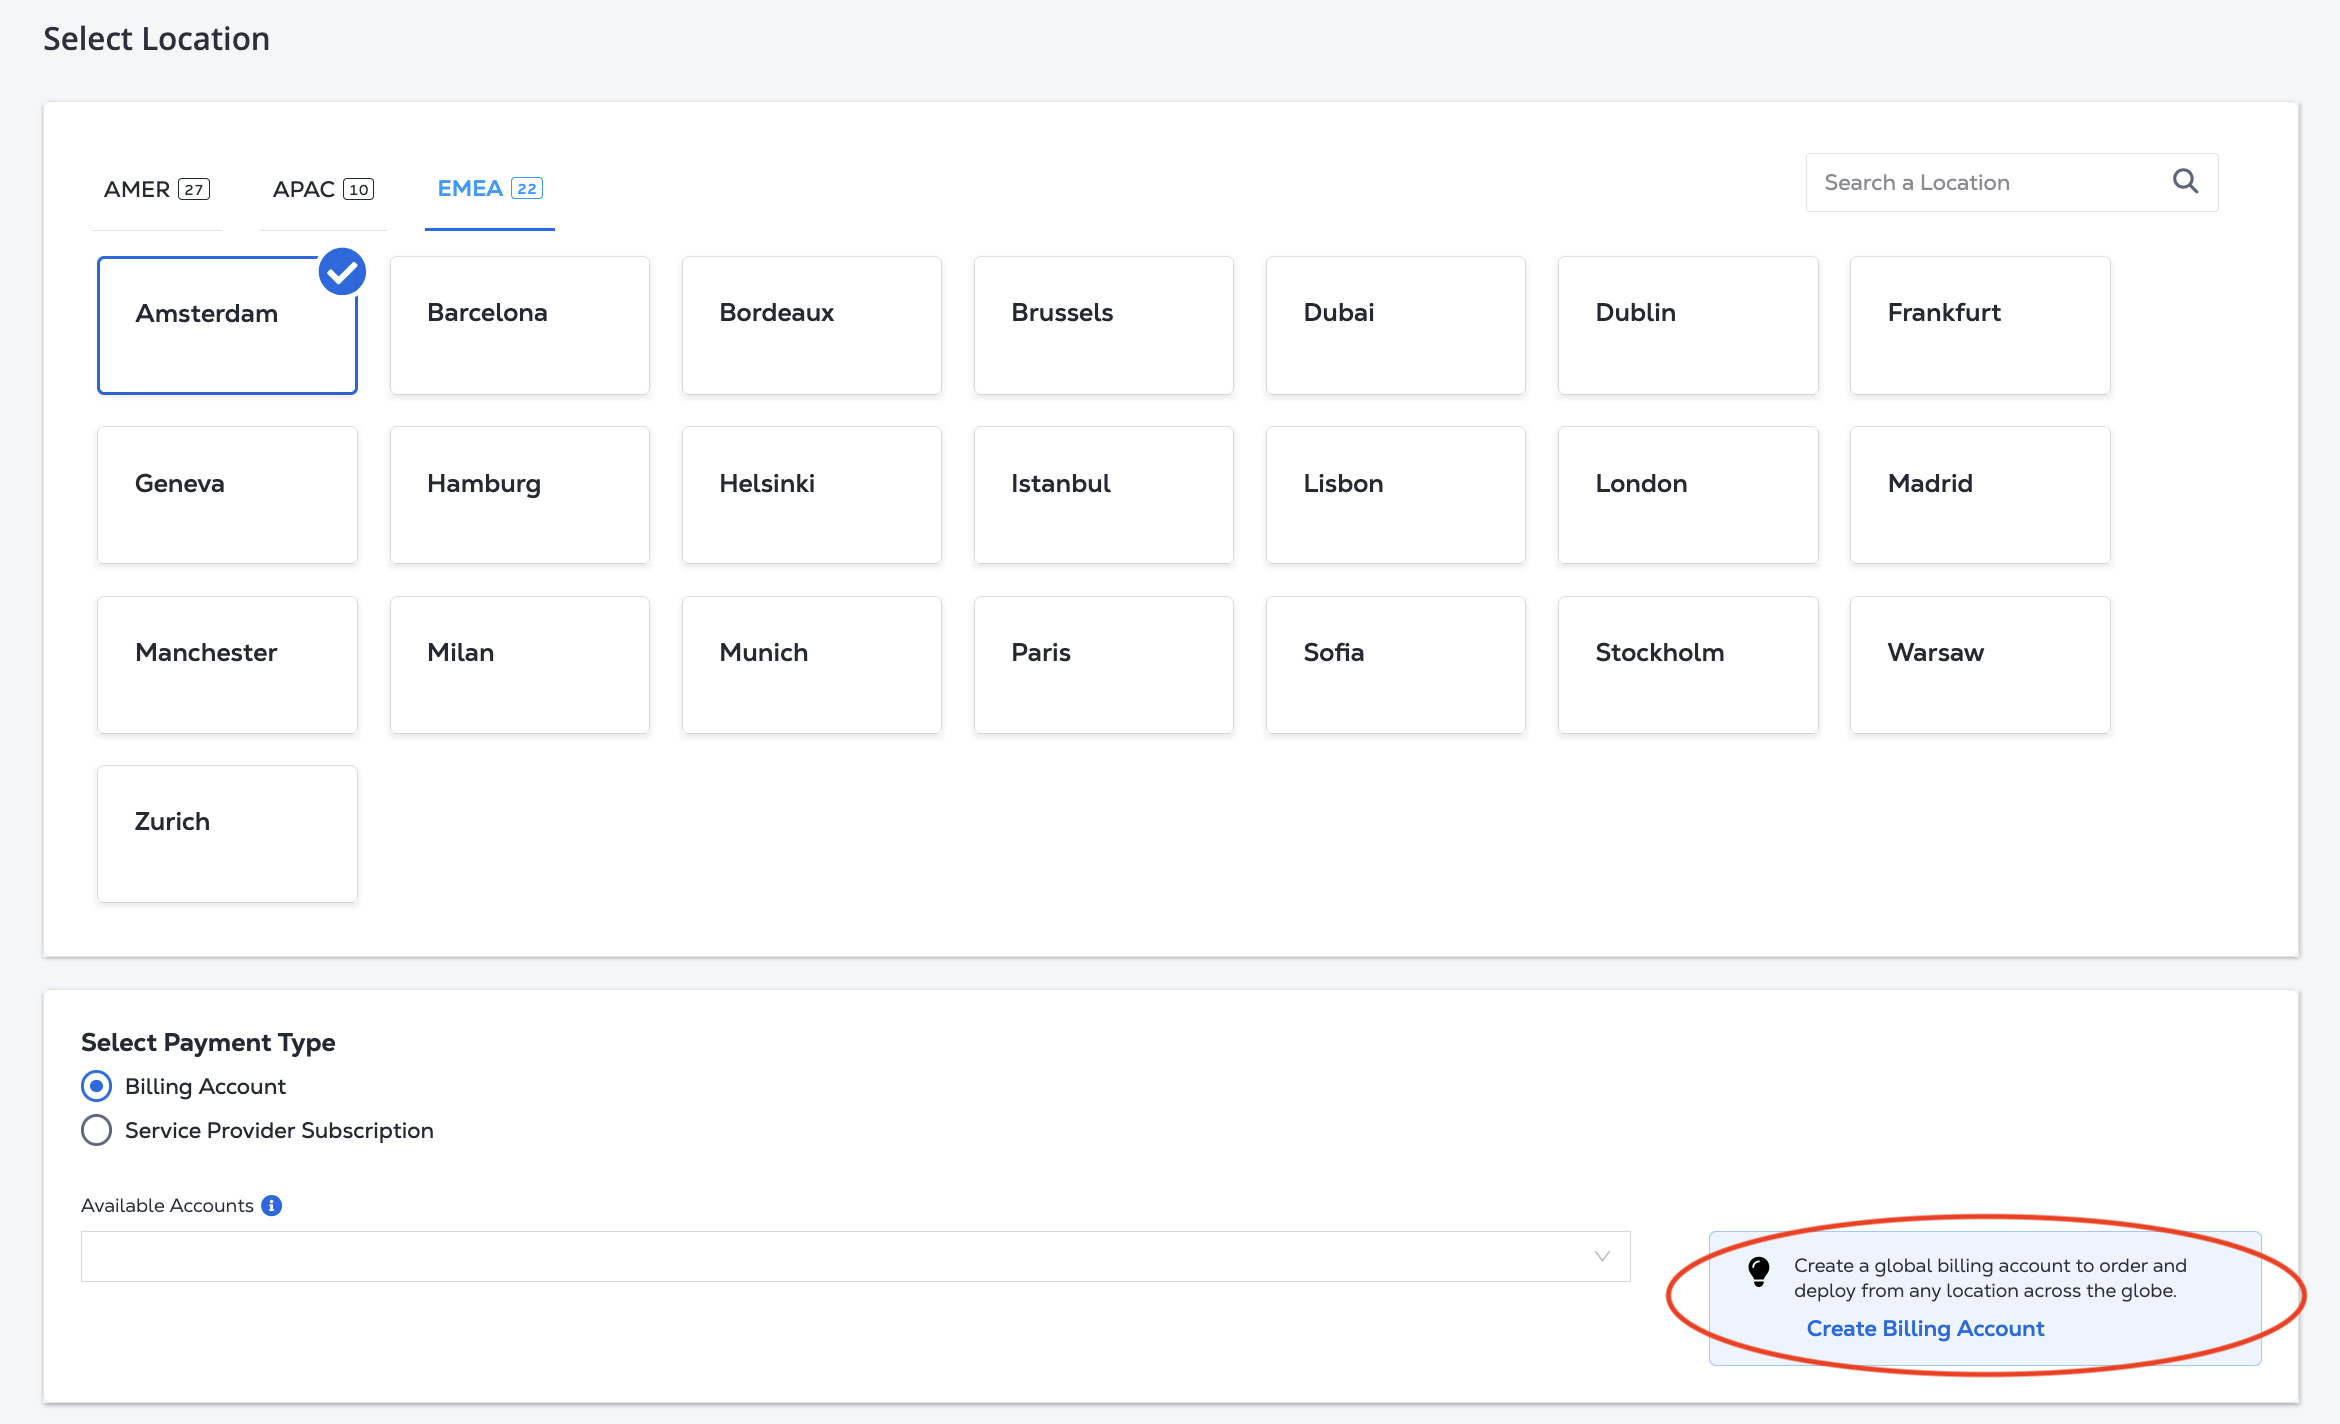
It is also possible to create a new billing account while placing an order for a digital product or service. During the ordering process, you can either select an existing billing account, or click Create Billing Account.
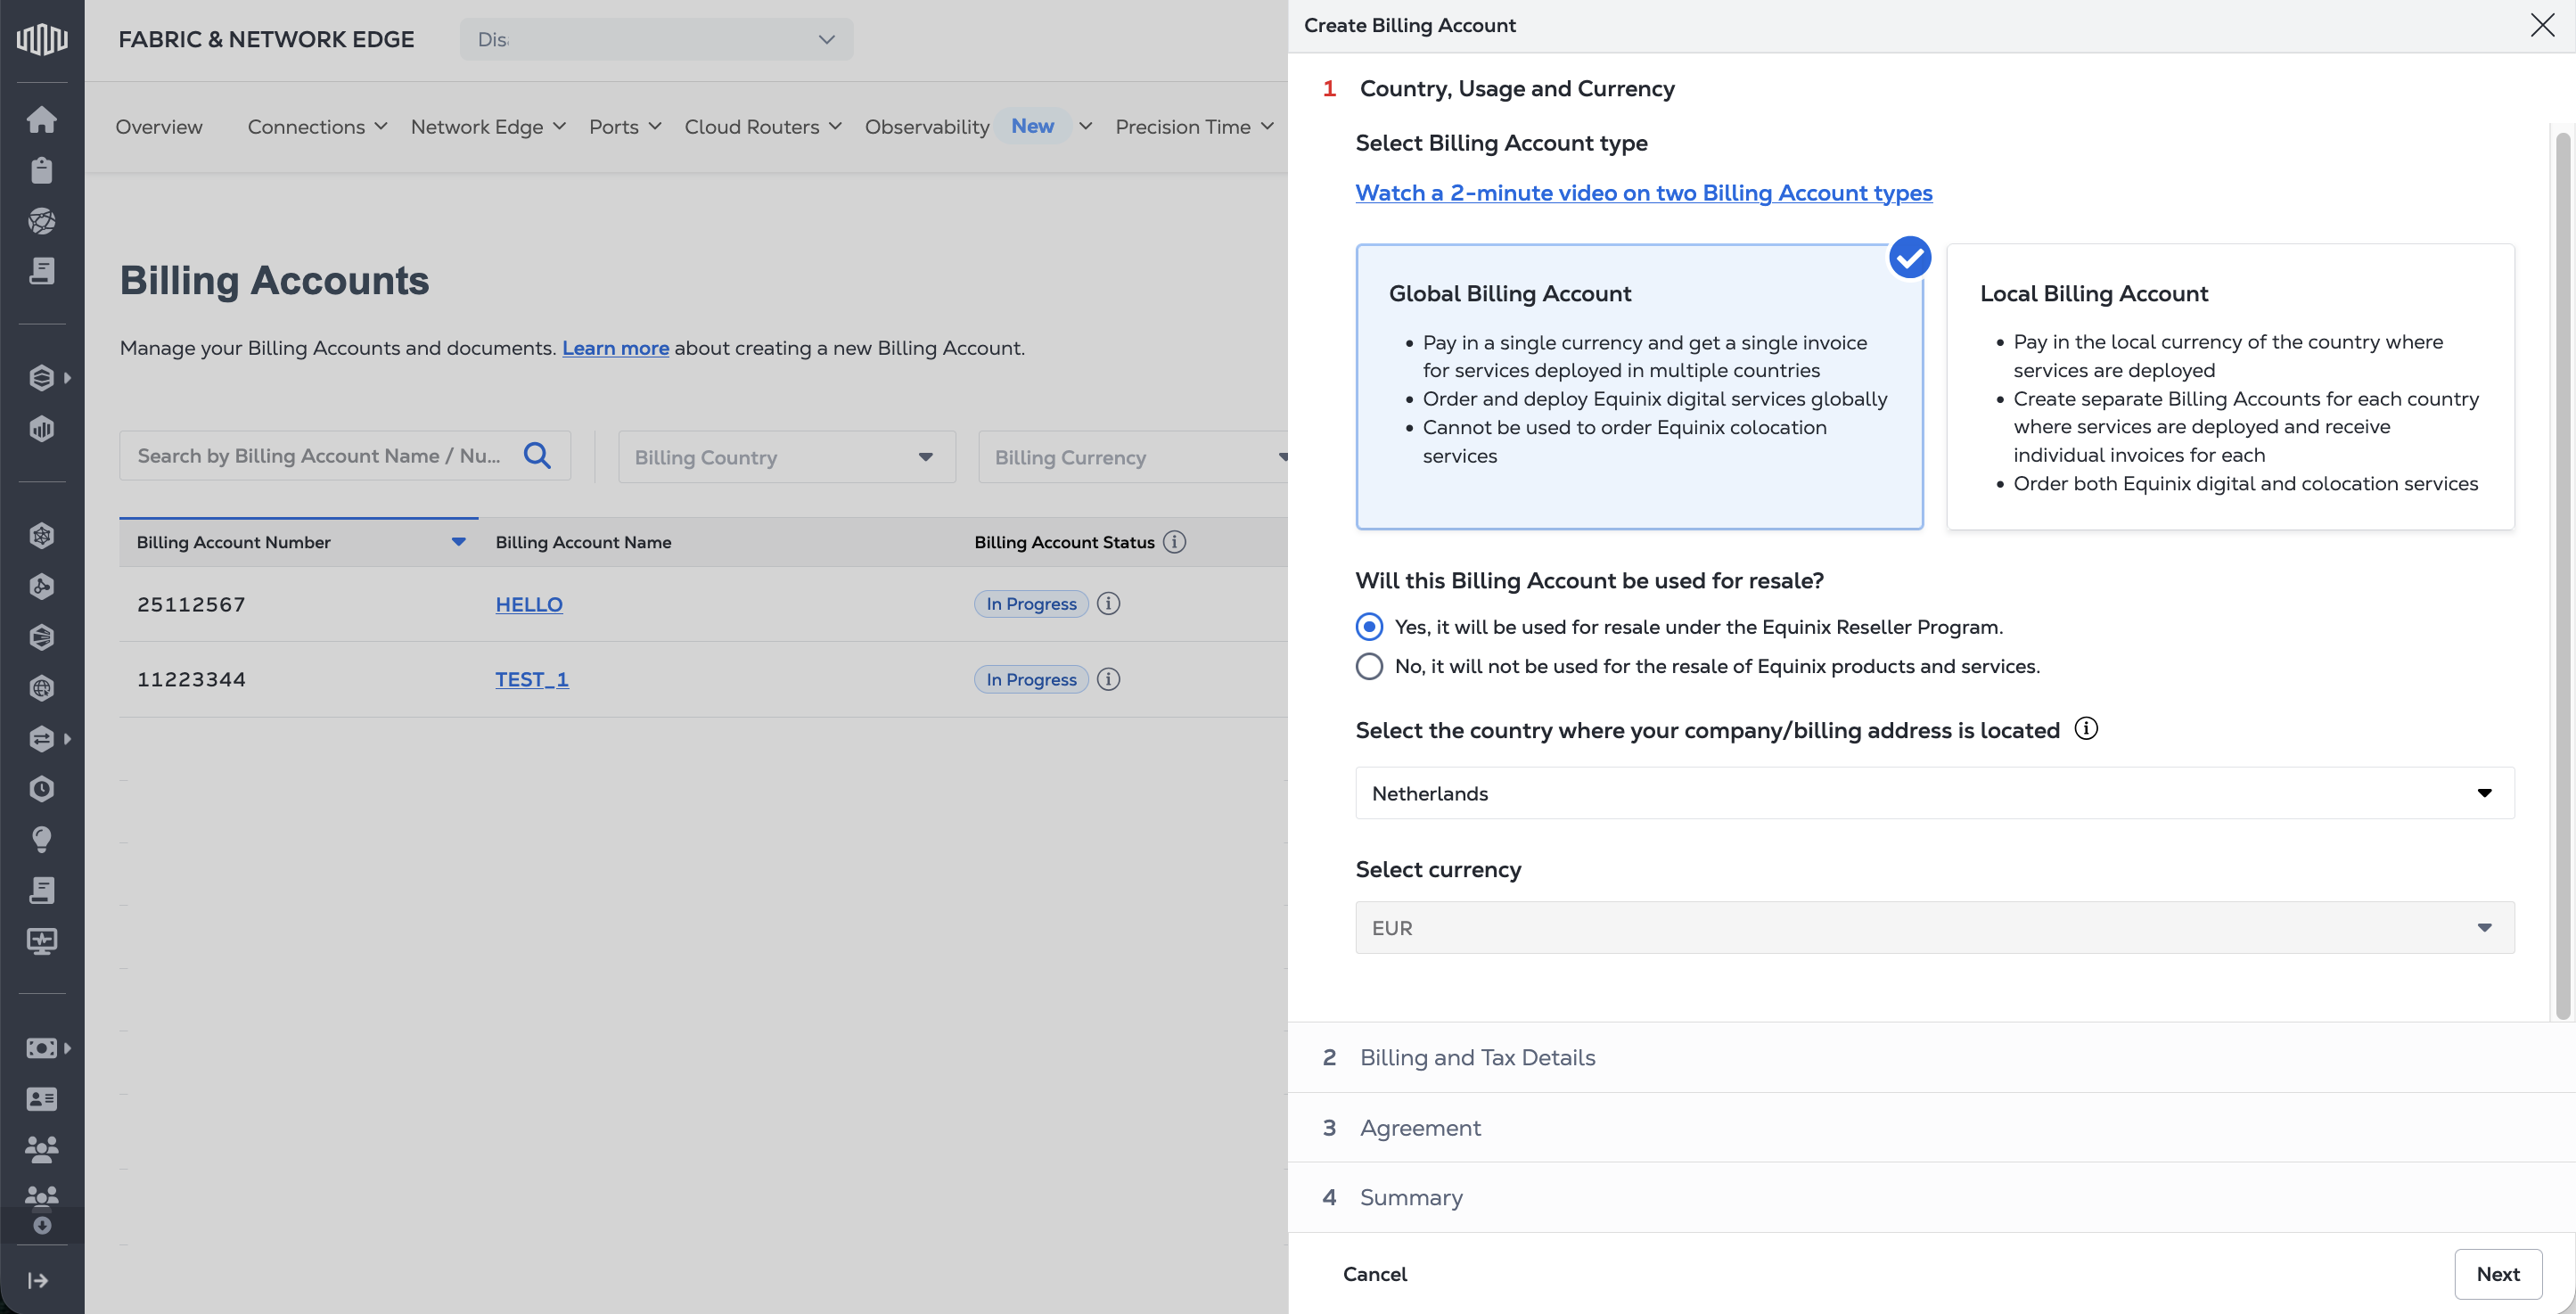
Country, Usage, and Currency
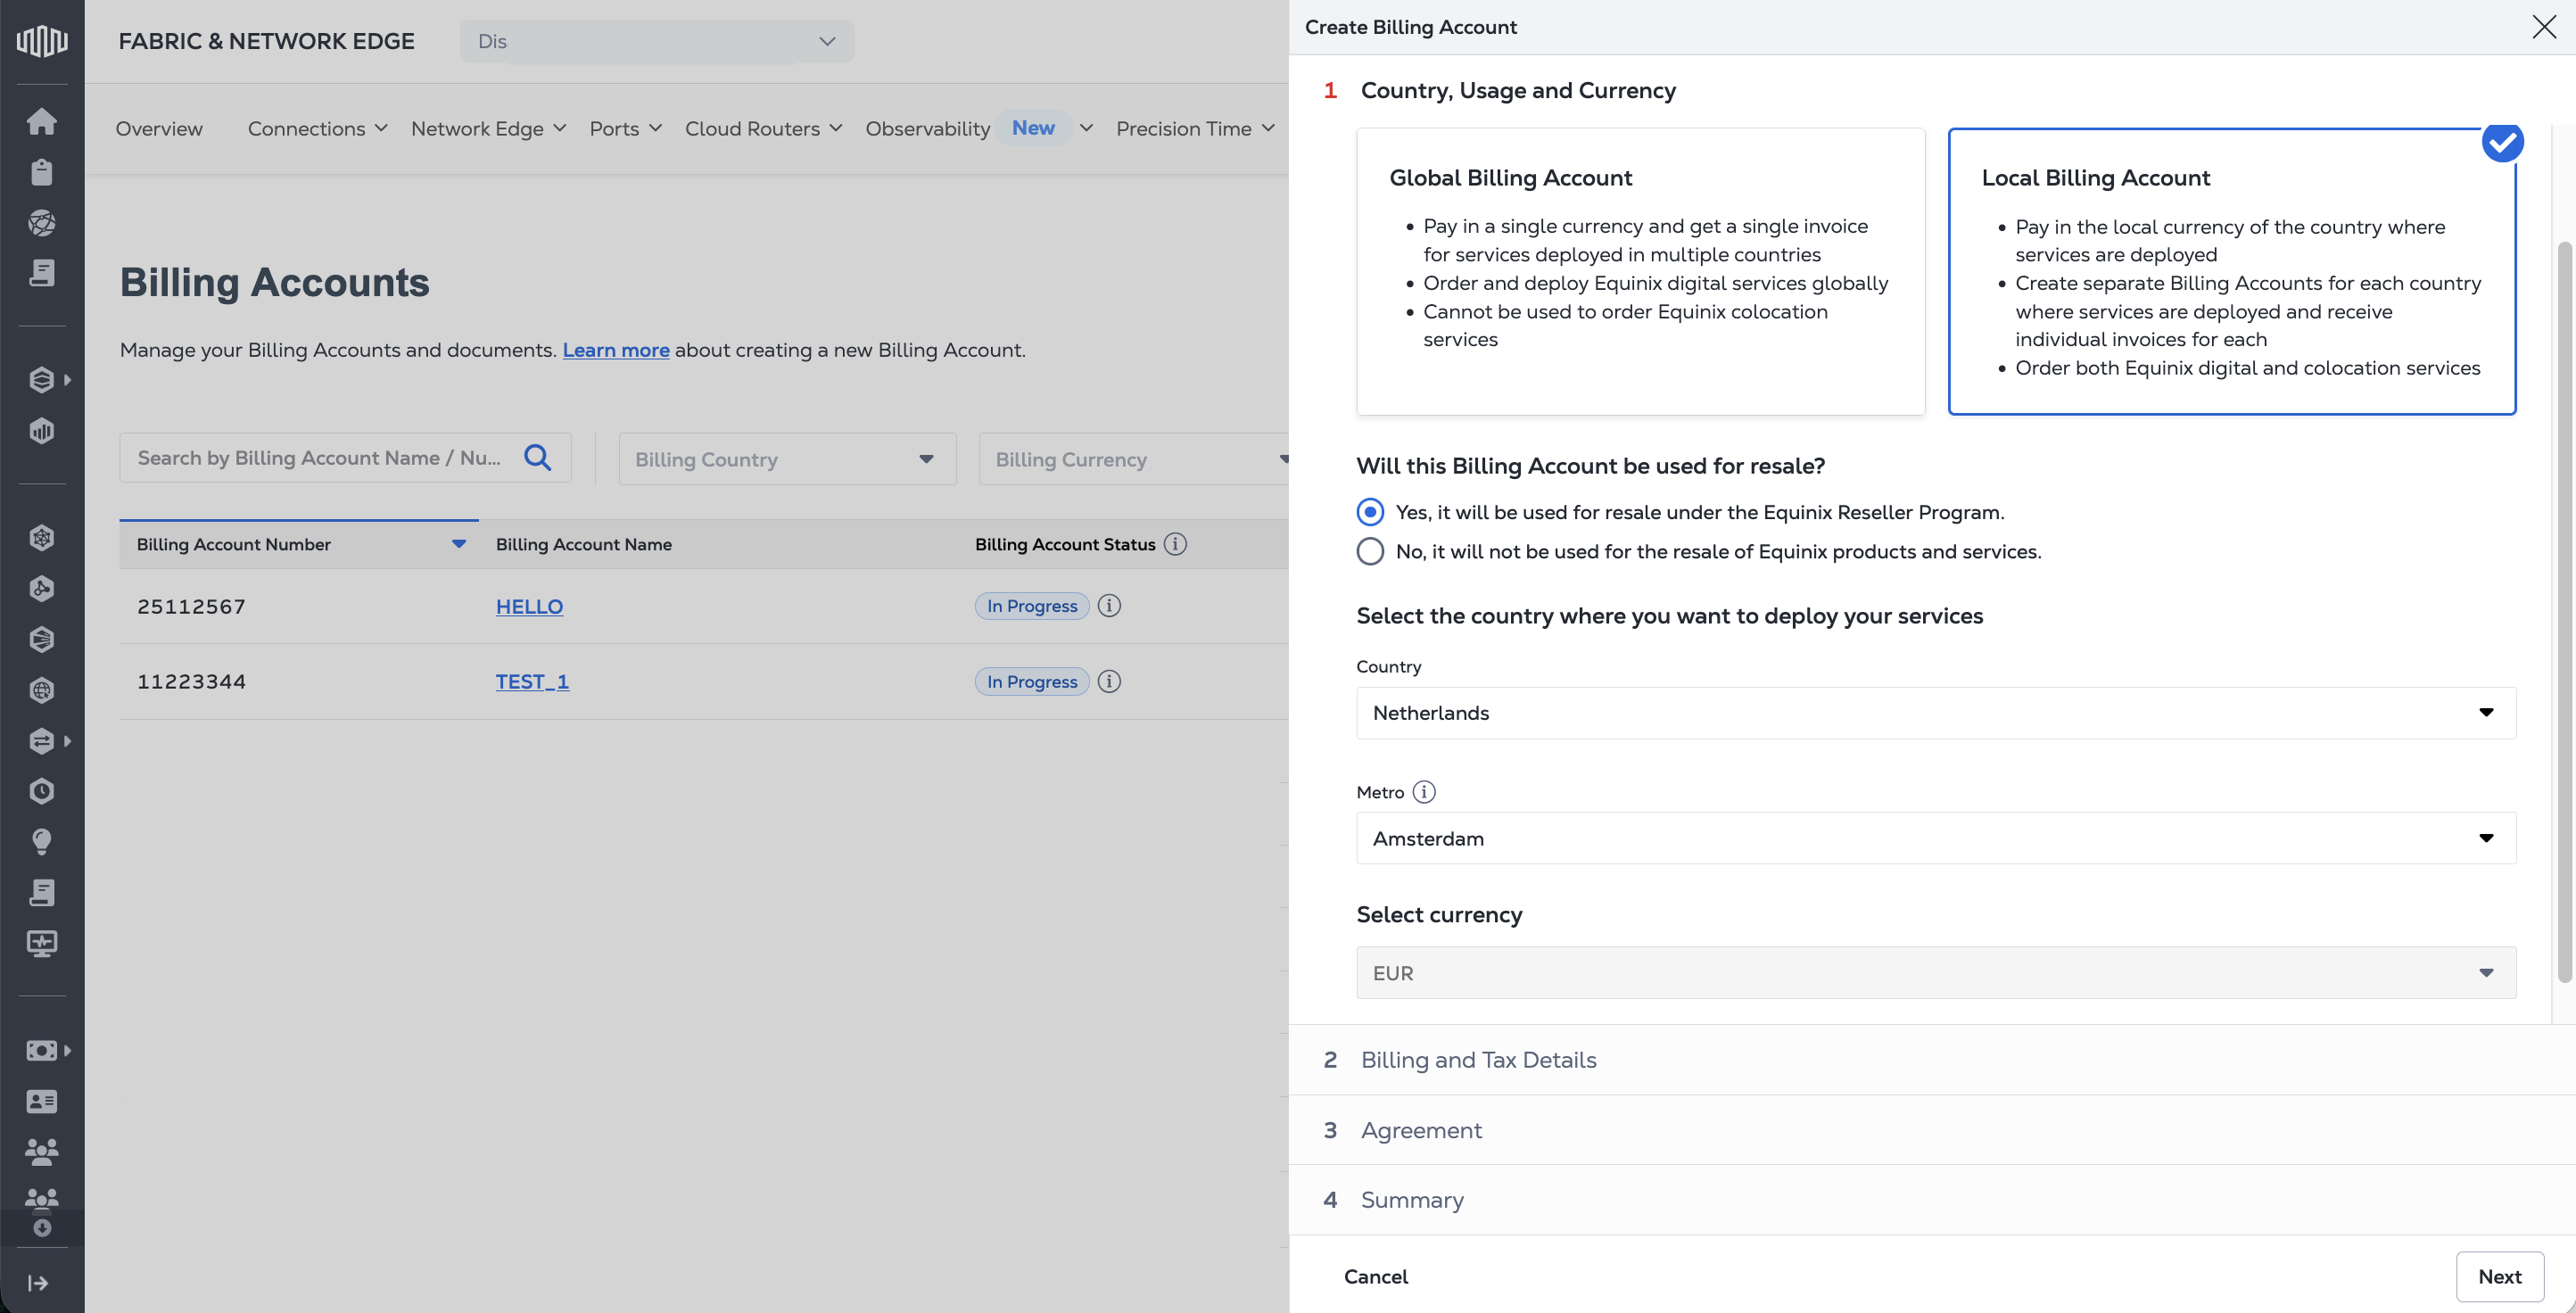
Select the Billing Account type: Local Billing Account or Global Billing Account. For more information on the differences between them, see Local vs Global Billing Accounts.
Global Billing Account
If you are creating a global billing account:
-
Select whether this billing account will be used for resale.
-
Select the country where your company is located from the drop-down menu. The Select Currency field automatically selects your local currency. If your country is not listed, please create a local billing account.
-
Click Next to enter your Billing and Tax Details.
Local Billing Account
If you are creating a local billing account:
-
Select whether this billing account will be used for resale.
-
Select the Country where you are planning to order Equinix products or services from the drop-down menu. The Select Currency field automatically selects the currency available for that country.
-
If required, select:
- The metro where you are planning to order Equinix products or services.
- Whether you plan on ordering a Fabric Port with this billing account and the IBX where you are planning on ordering your Fabric Port.
-
Click Next to enter your Billing and Tax Details.
Billing and Tax Details
In the Billing and Tax Details section, enter the following information:
-
Legal Company Name
-
Billing Address – A billing address is the designated location used by businesses and organizations to send invoices and receive payments. You can either:
-
Use an existing address from the dropdown (if you are an existing user and have created billing accounts in the past).
-
Enter a new billing address.
noteIf the Billing Account is in United States of America, our system will attempt to validate the address that you have input. You can choose to Use Current Address (ignore the pop-up suggestion for address) or Use Suggested Address.
If you choose to Use Current Address, a warning box "Unable to validate billing address" will remain at the bottom of the address section to show that you did not choose the use the suggested address.
-
-
Billing Contact – Enter the billing contact name and contact information.
-
VAT Registration Number – Enter the VAT registration number if the services are sold in a country where VAT is applicable.
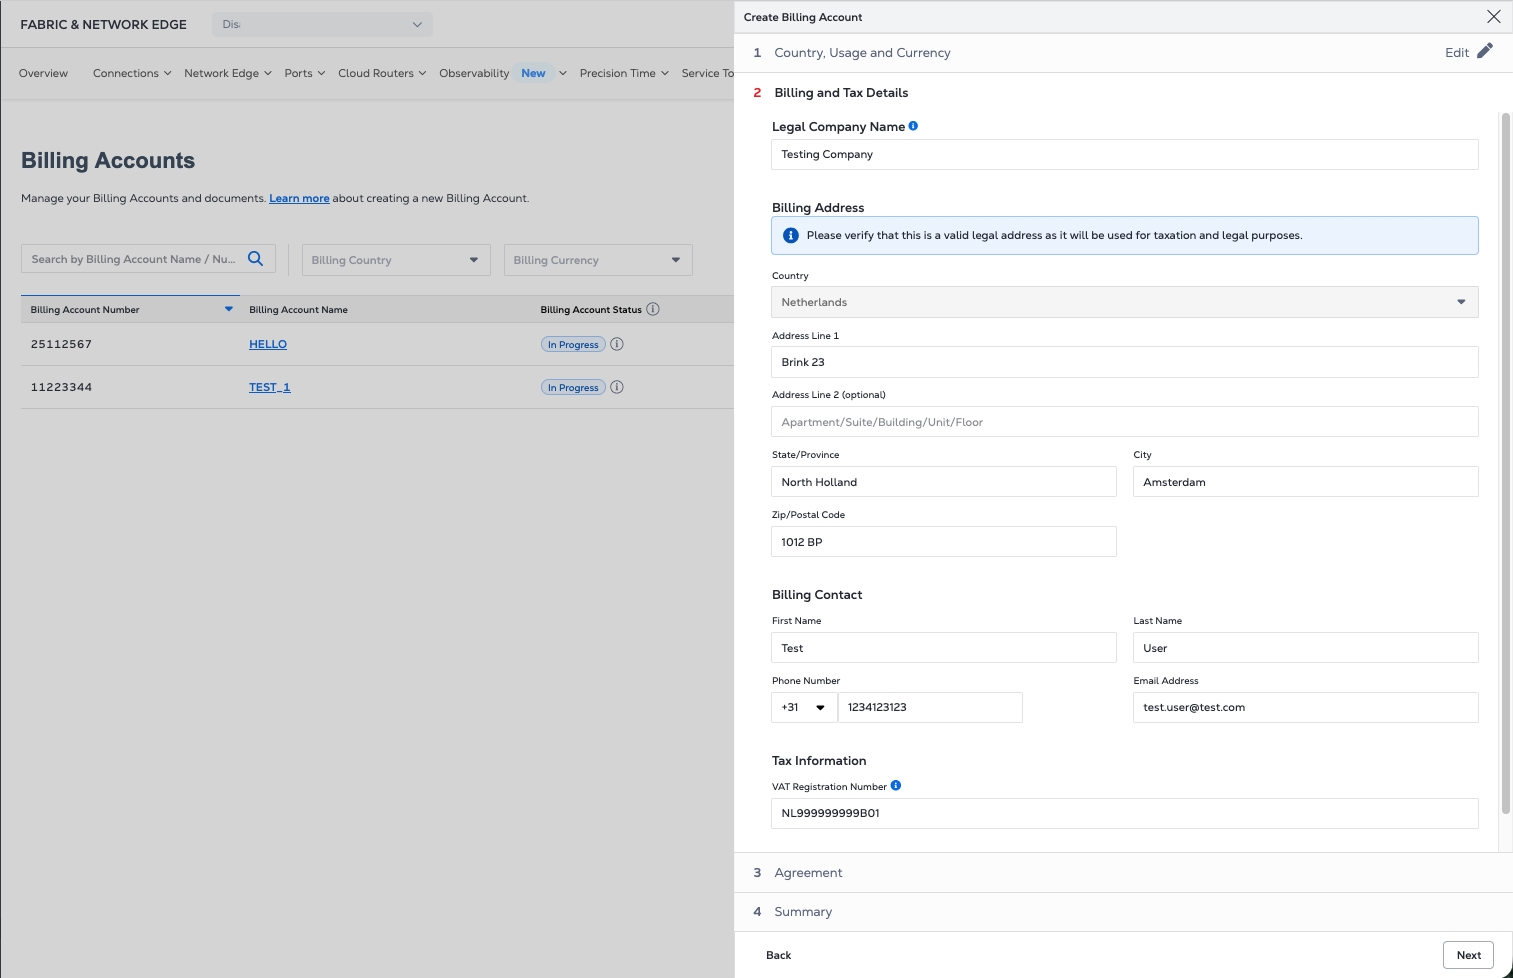
Click Next.
Agreement
In the Agreement section, use an existing or create a new Digital Services Agreement.
-
If your account currently has a billing agreement, you can choose Use an existing/previously accepted signed Digital Services Agreement. Select the billing account from a dropdown list which displays all billing accounts for which the Digital Services Agreement has been accepted in the past. If you select a billing account associated with a negotiated Digital Services Agreement, a message will appear, recommending you contact the account team or create a new support case.
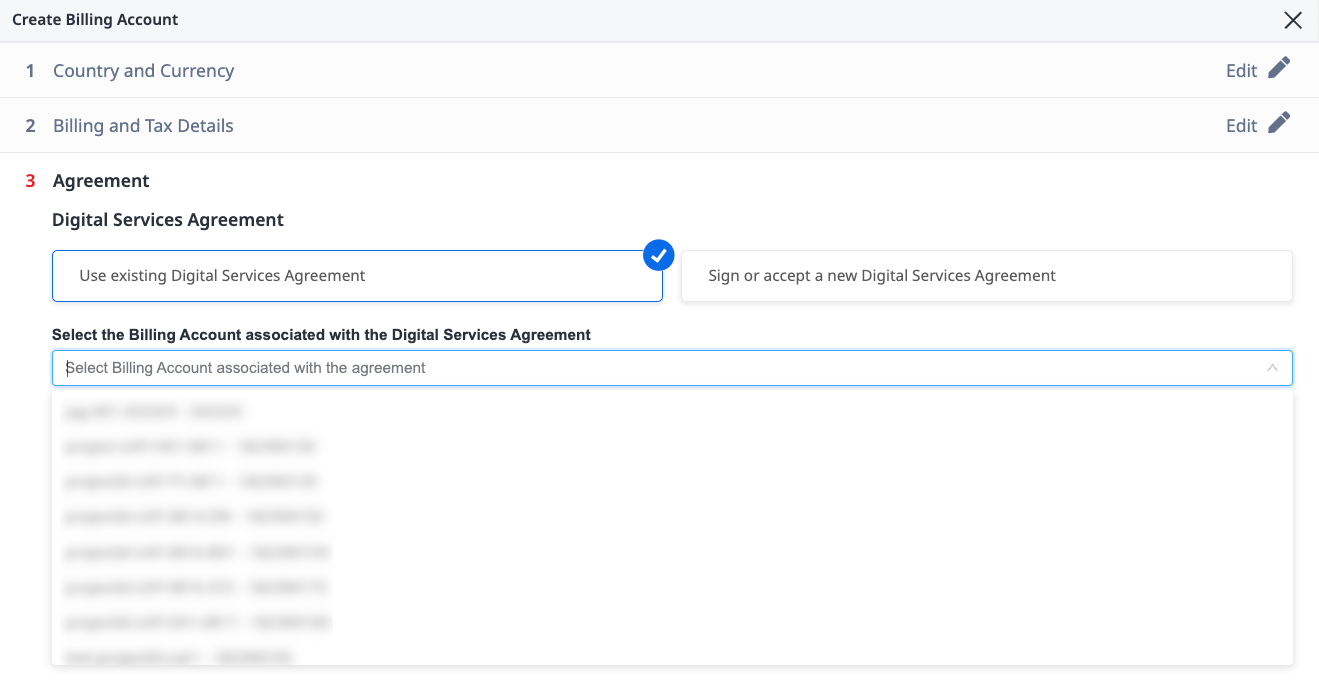
Click Next to proceed to Review and Submit.
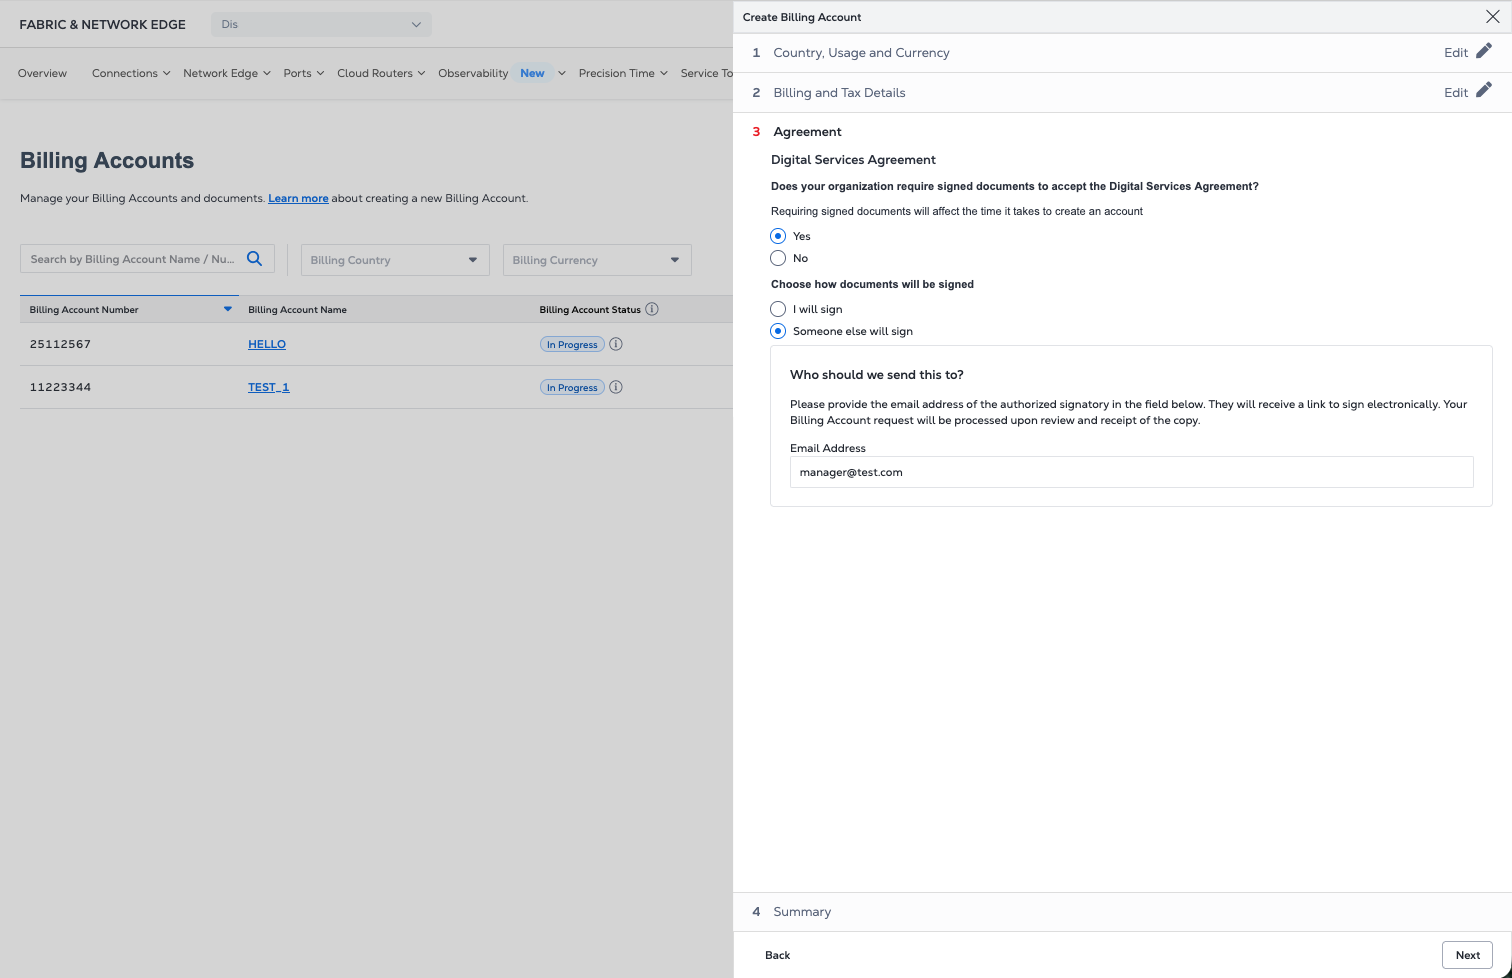
To sign or accept a new agreement choose Sign or accept a new Digital Services Agreement. Answer the question Does your organization require signed documents to accept the Digital Services Agreement?.
-
Select Yes if a signed document is required. This option requires you to e-sign or wet sign the Digital Services Agreement or designate another individual to e-sign or wet sign. In Choose how documents will be signed, select either:
- I will sign and you will receive an email from Equinix that provides a link for completing the signatures.
- Someone else will sign and provide the email address of the individual who will will receive an email from Equinix that provides a link for completing the signatures.
-
Select No if your organization allows electronic acceptance of terms. This option requires you to view the terms and accept electronically. Review the Digital Service Agreement, select I have read and understand these terms, and click Accept.

Click Next to proceed to Review and Submit.
Review and Submit
The Summary shows the details of your new billing account.
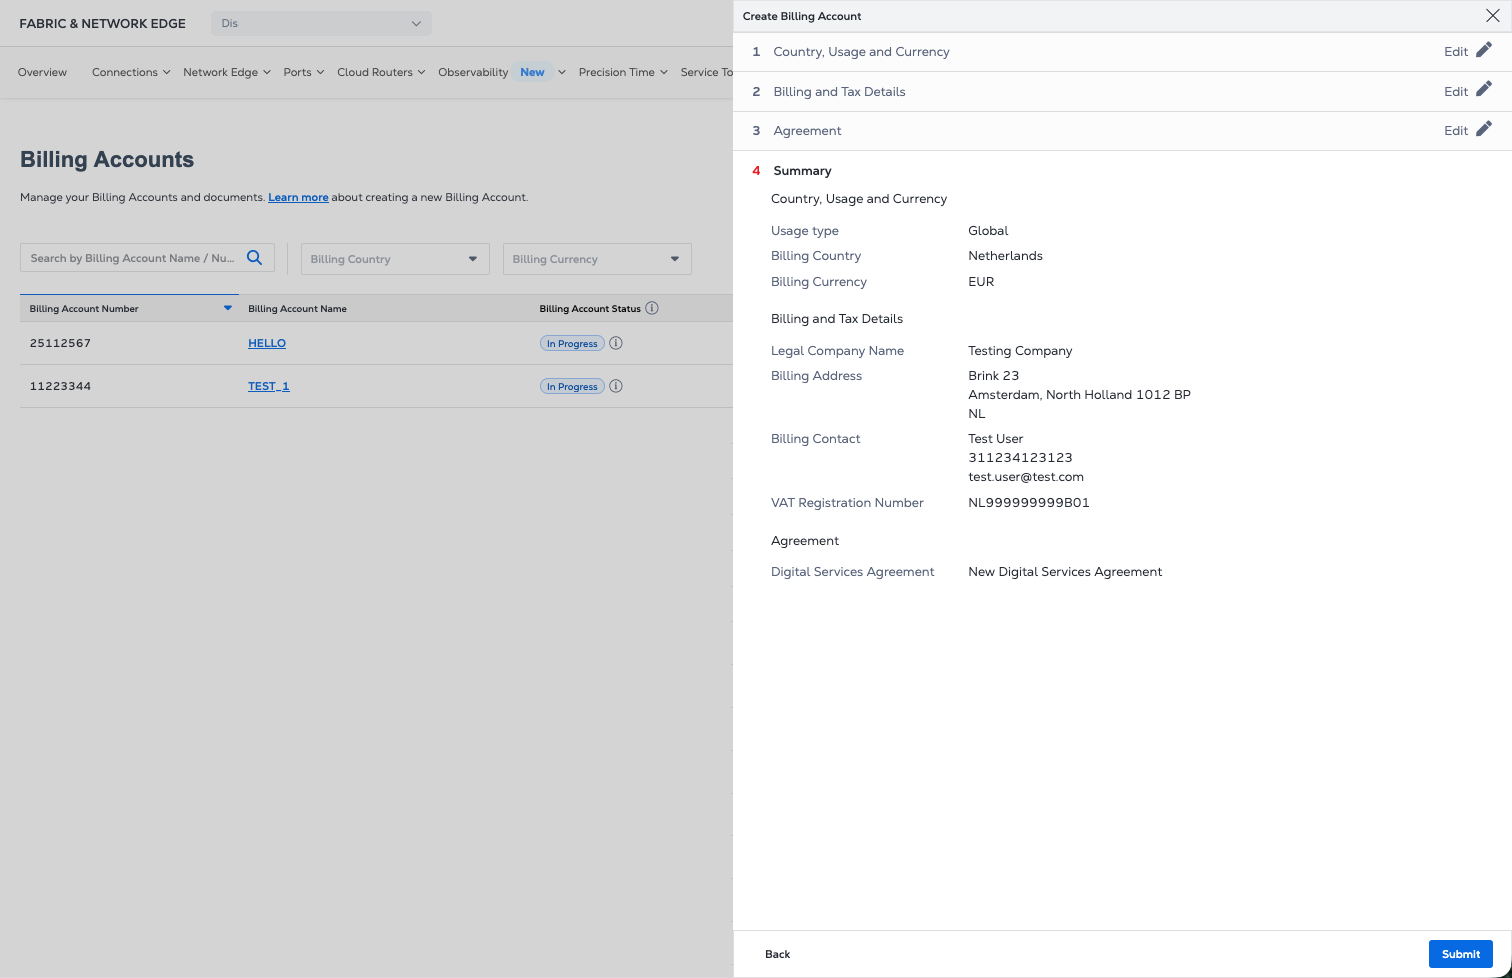
Click Submit to create the new billing account.
Platform Updates 2026
As part of the Platform Updates rolling out to all customers over the course of 2026, Equinix is updating the billing account creation process.
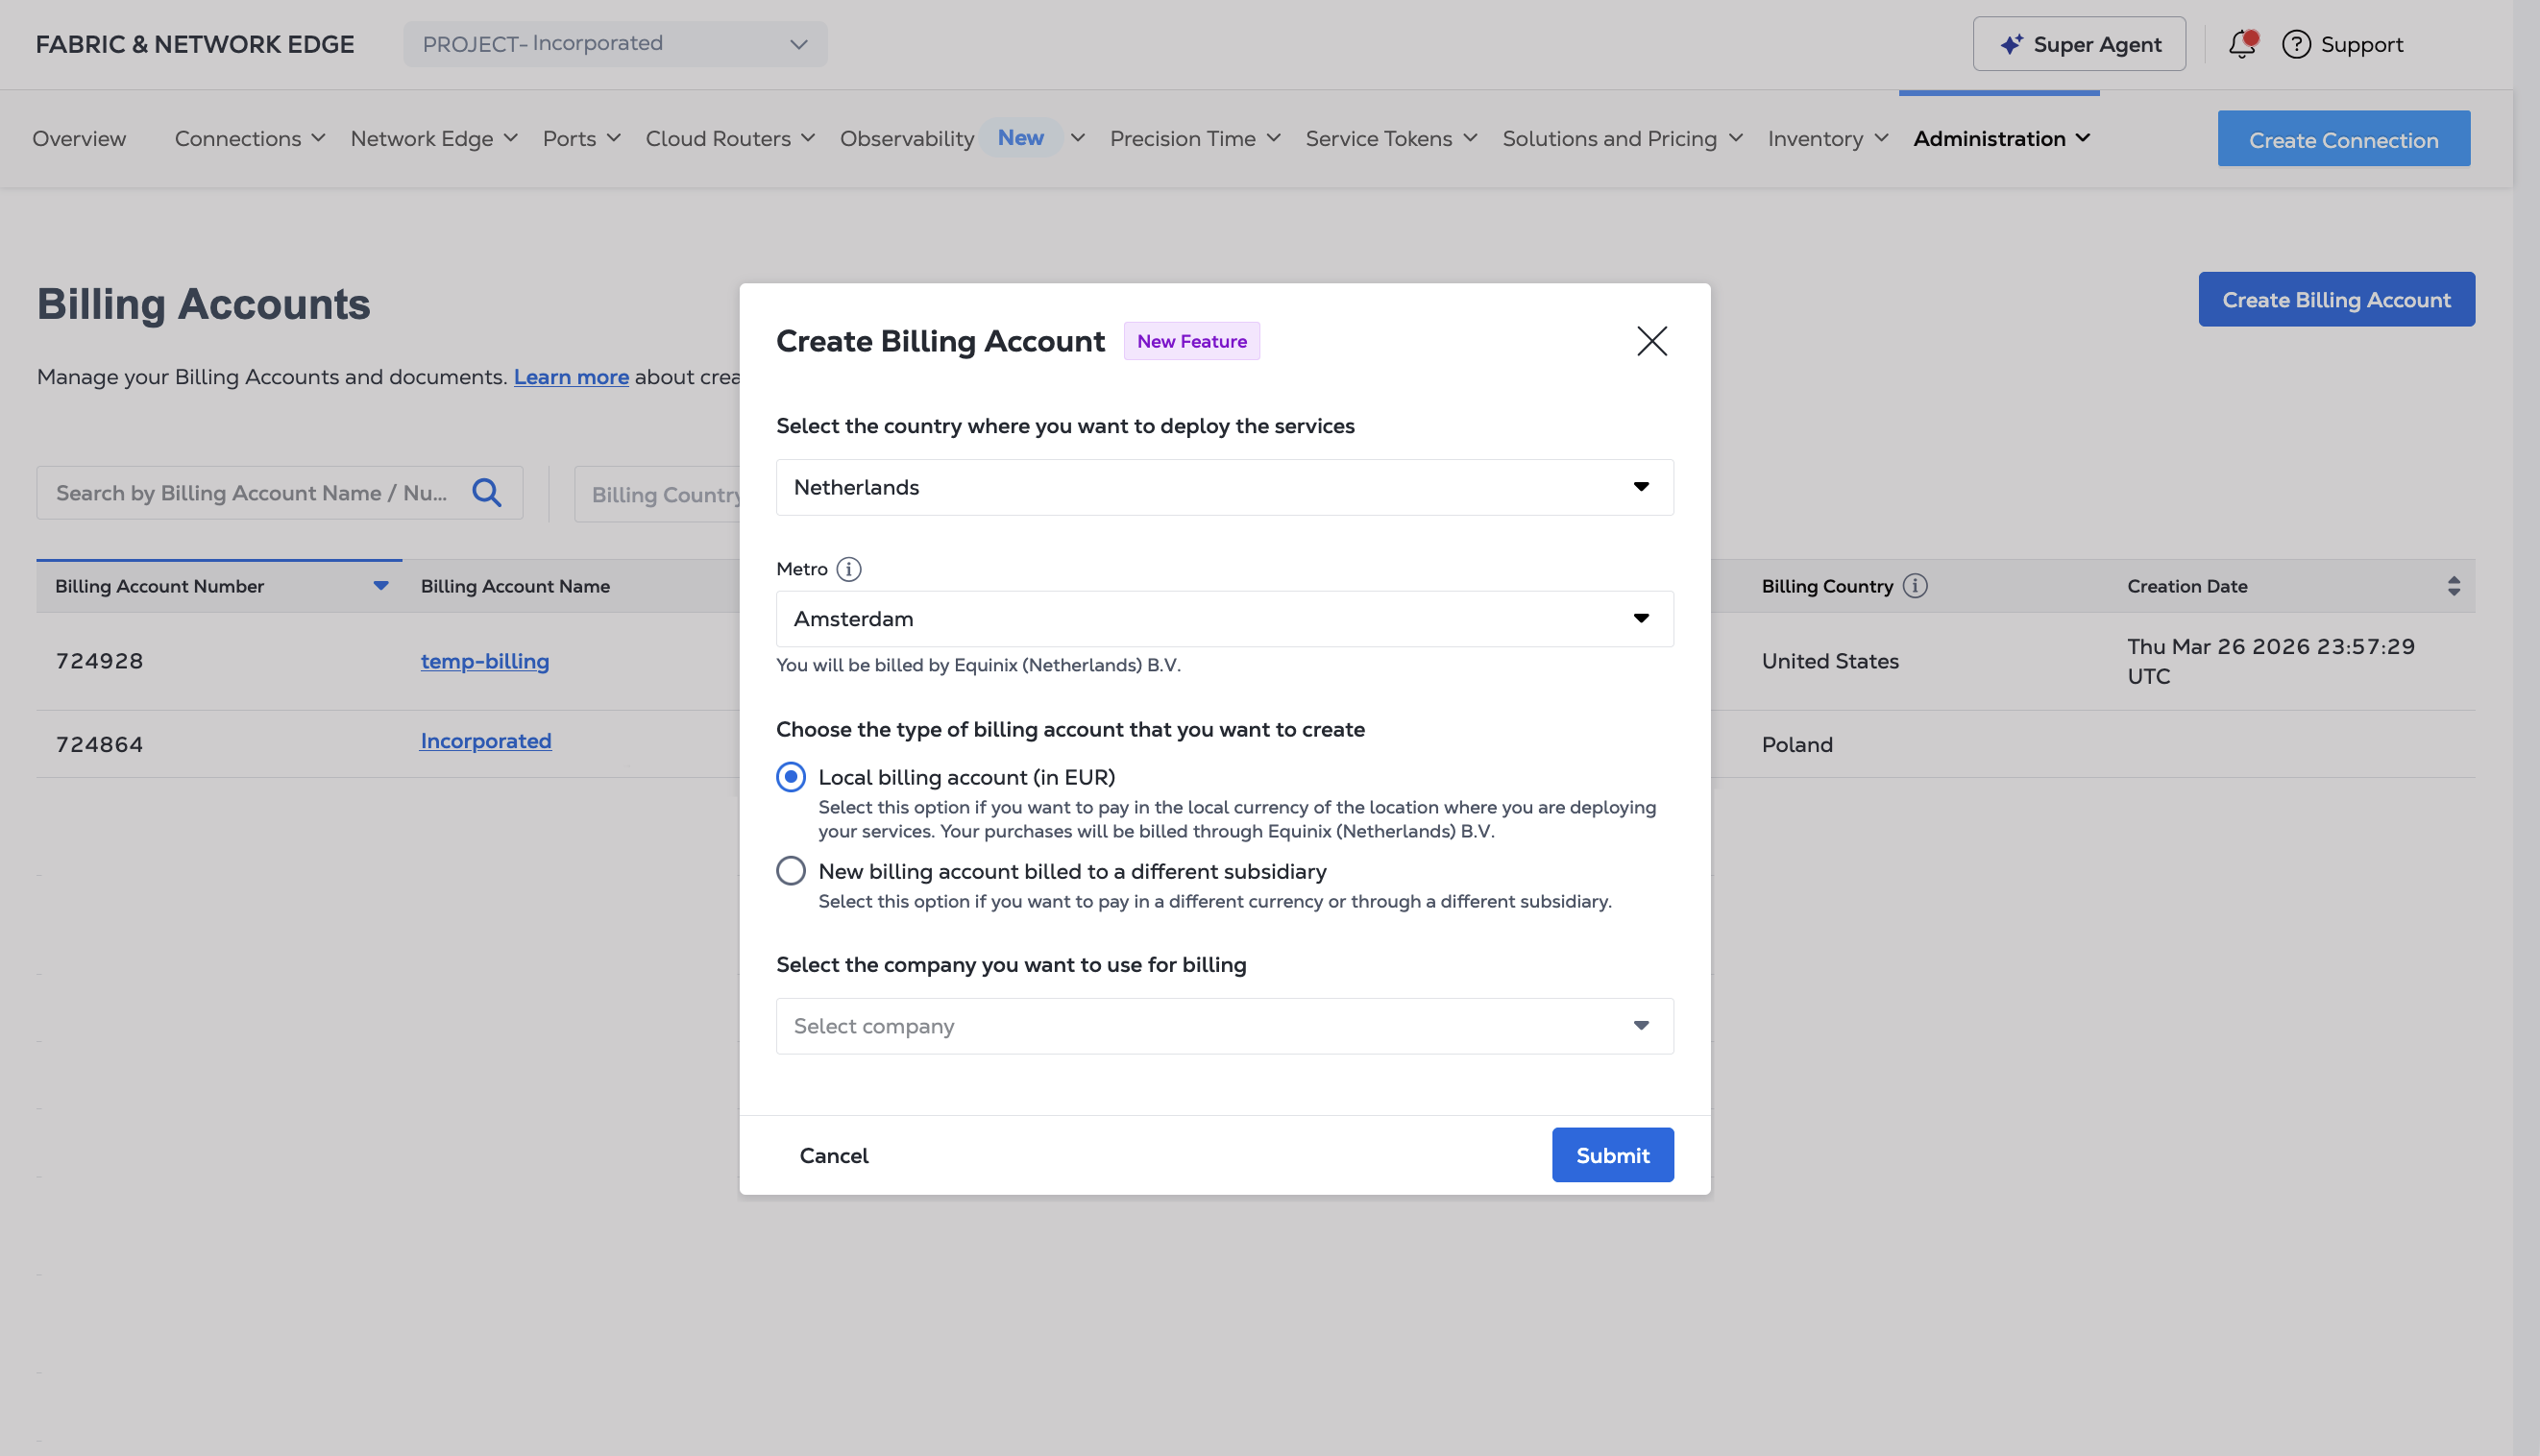
When you click Create Billing Account:
-
If you already have a Global Billing account, click Yes to confirm you want to create another billing account.
-
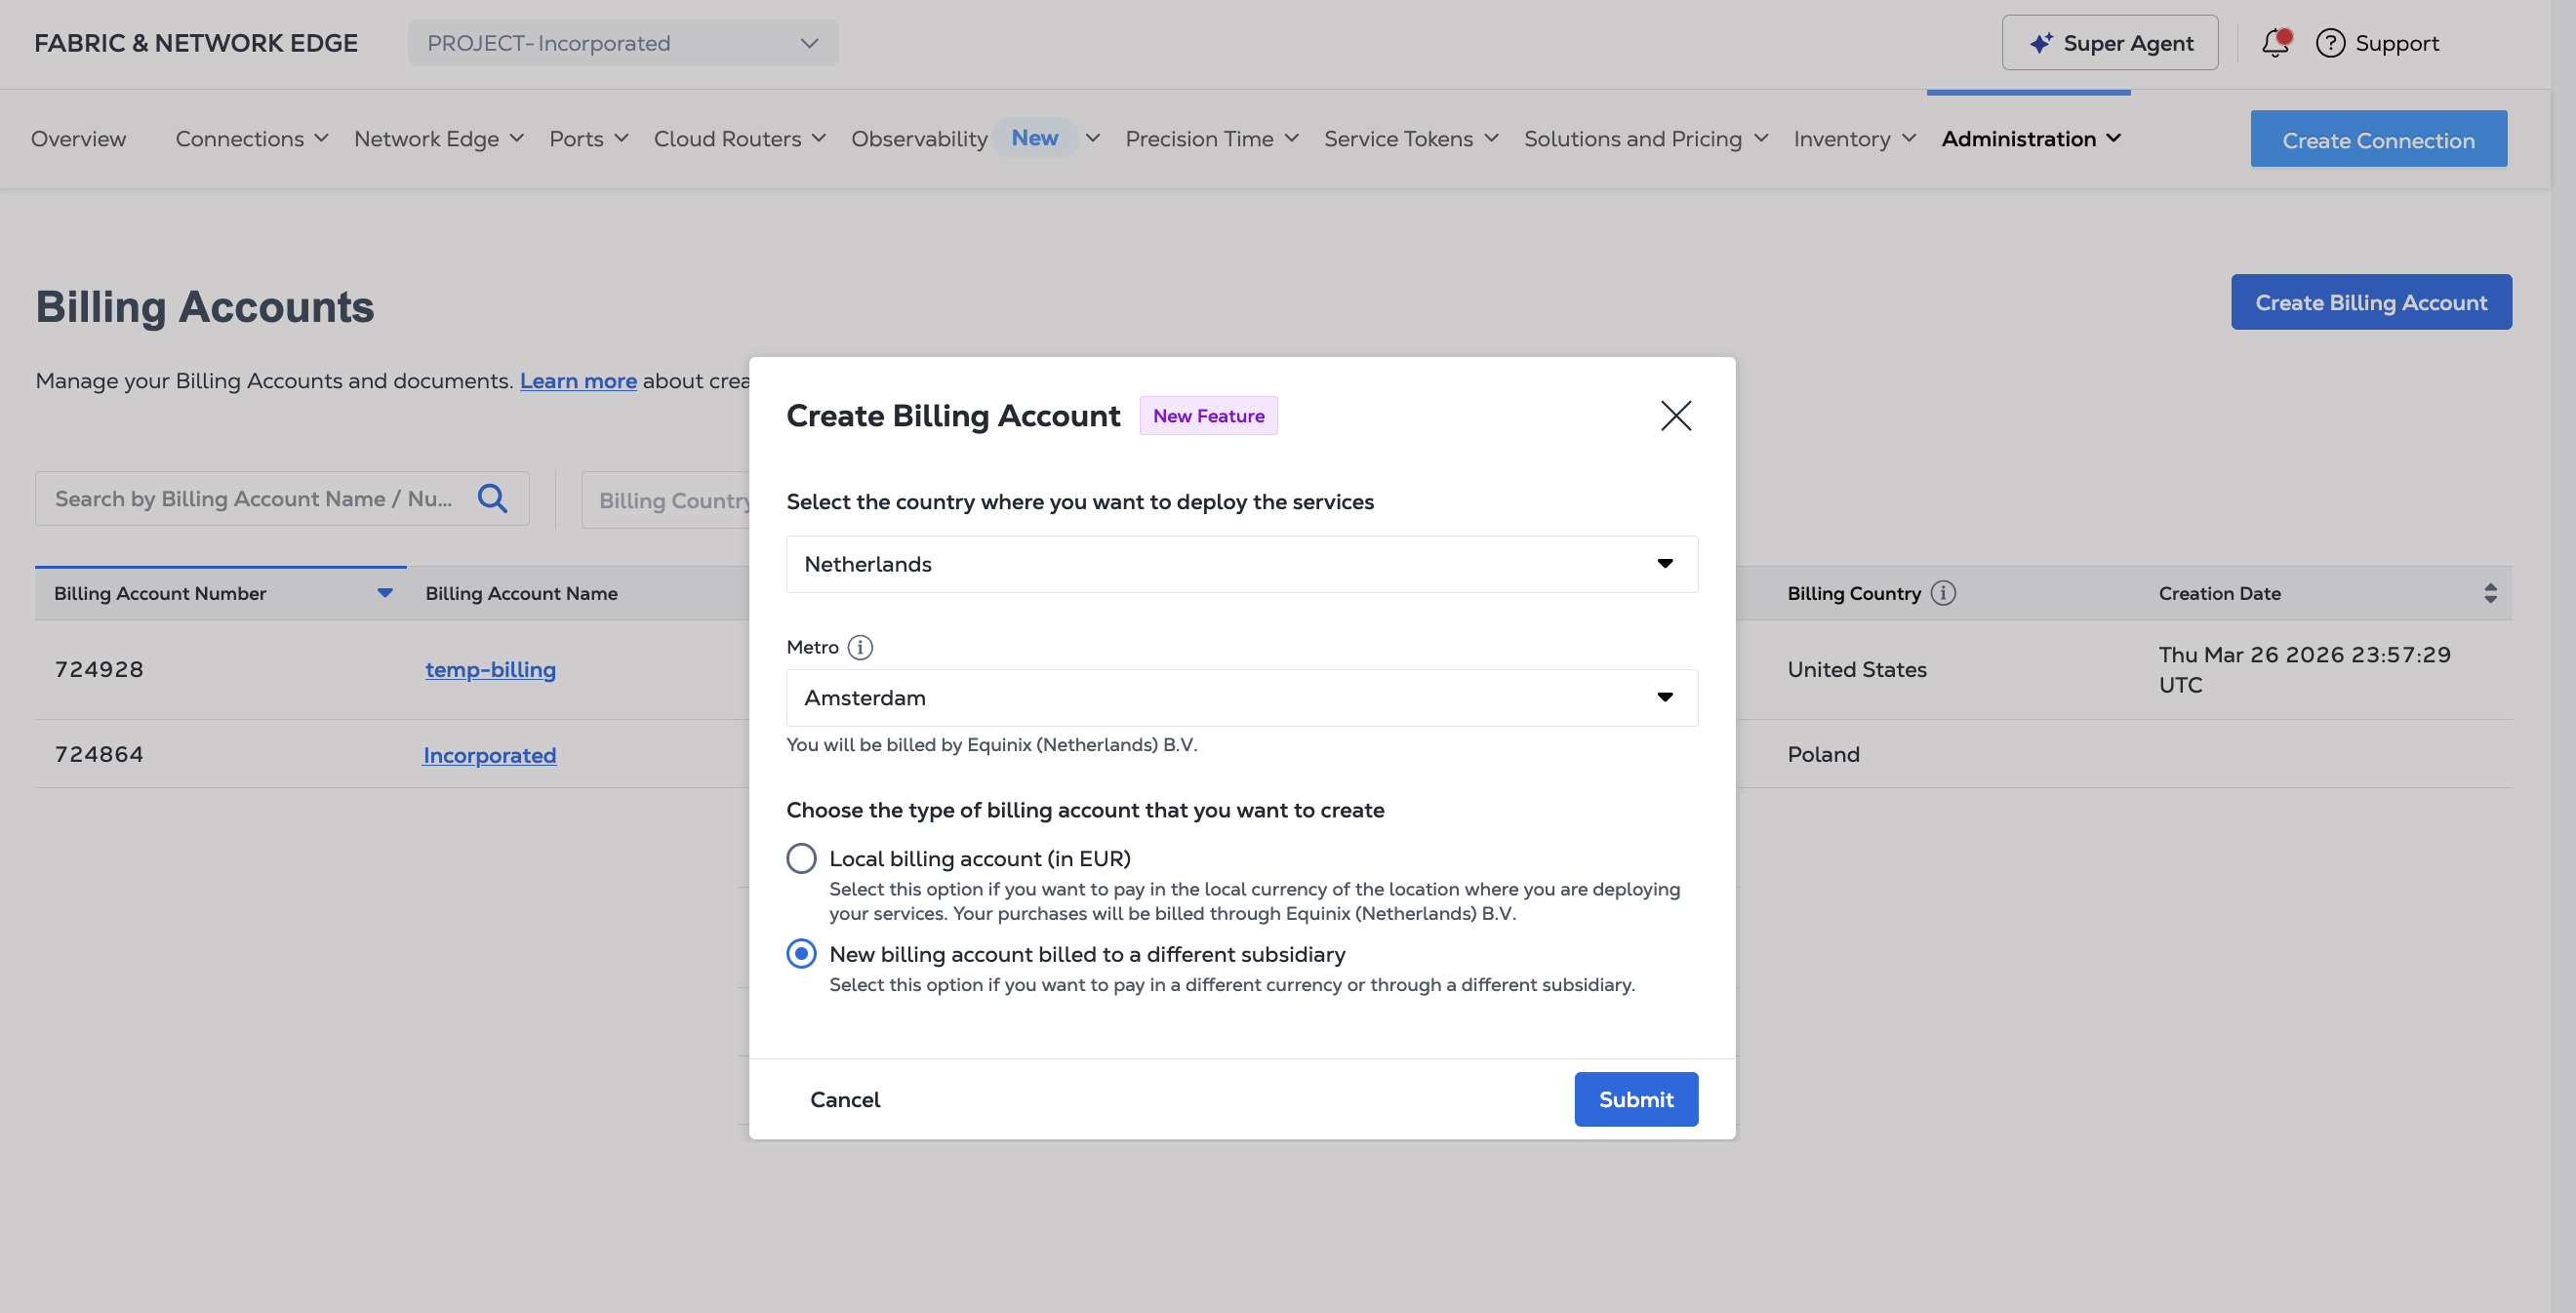
Select the Country where you are planning to order Equinix products or services from the drop-down menu. If required, select the Metro.
-
Choose the type of billing account you want to create, either:
-
A local billing account where you pay Equinix in the local currency of the location where you are ordering products and services using an existing entity.
-
A new billing account where you manually create a new subsidiary and associated local billing account.
 note
noteCreating a new global billing account is temporarily unavailable. This only affects accounts that have been onboarded to the new platform experience seeking to create a new billing account. Existing global billing accounts are unaffected. We apologize for the inconvenience.
-
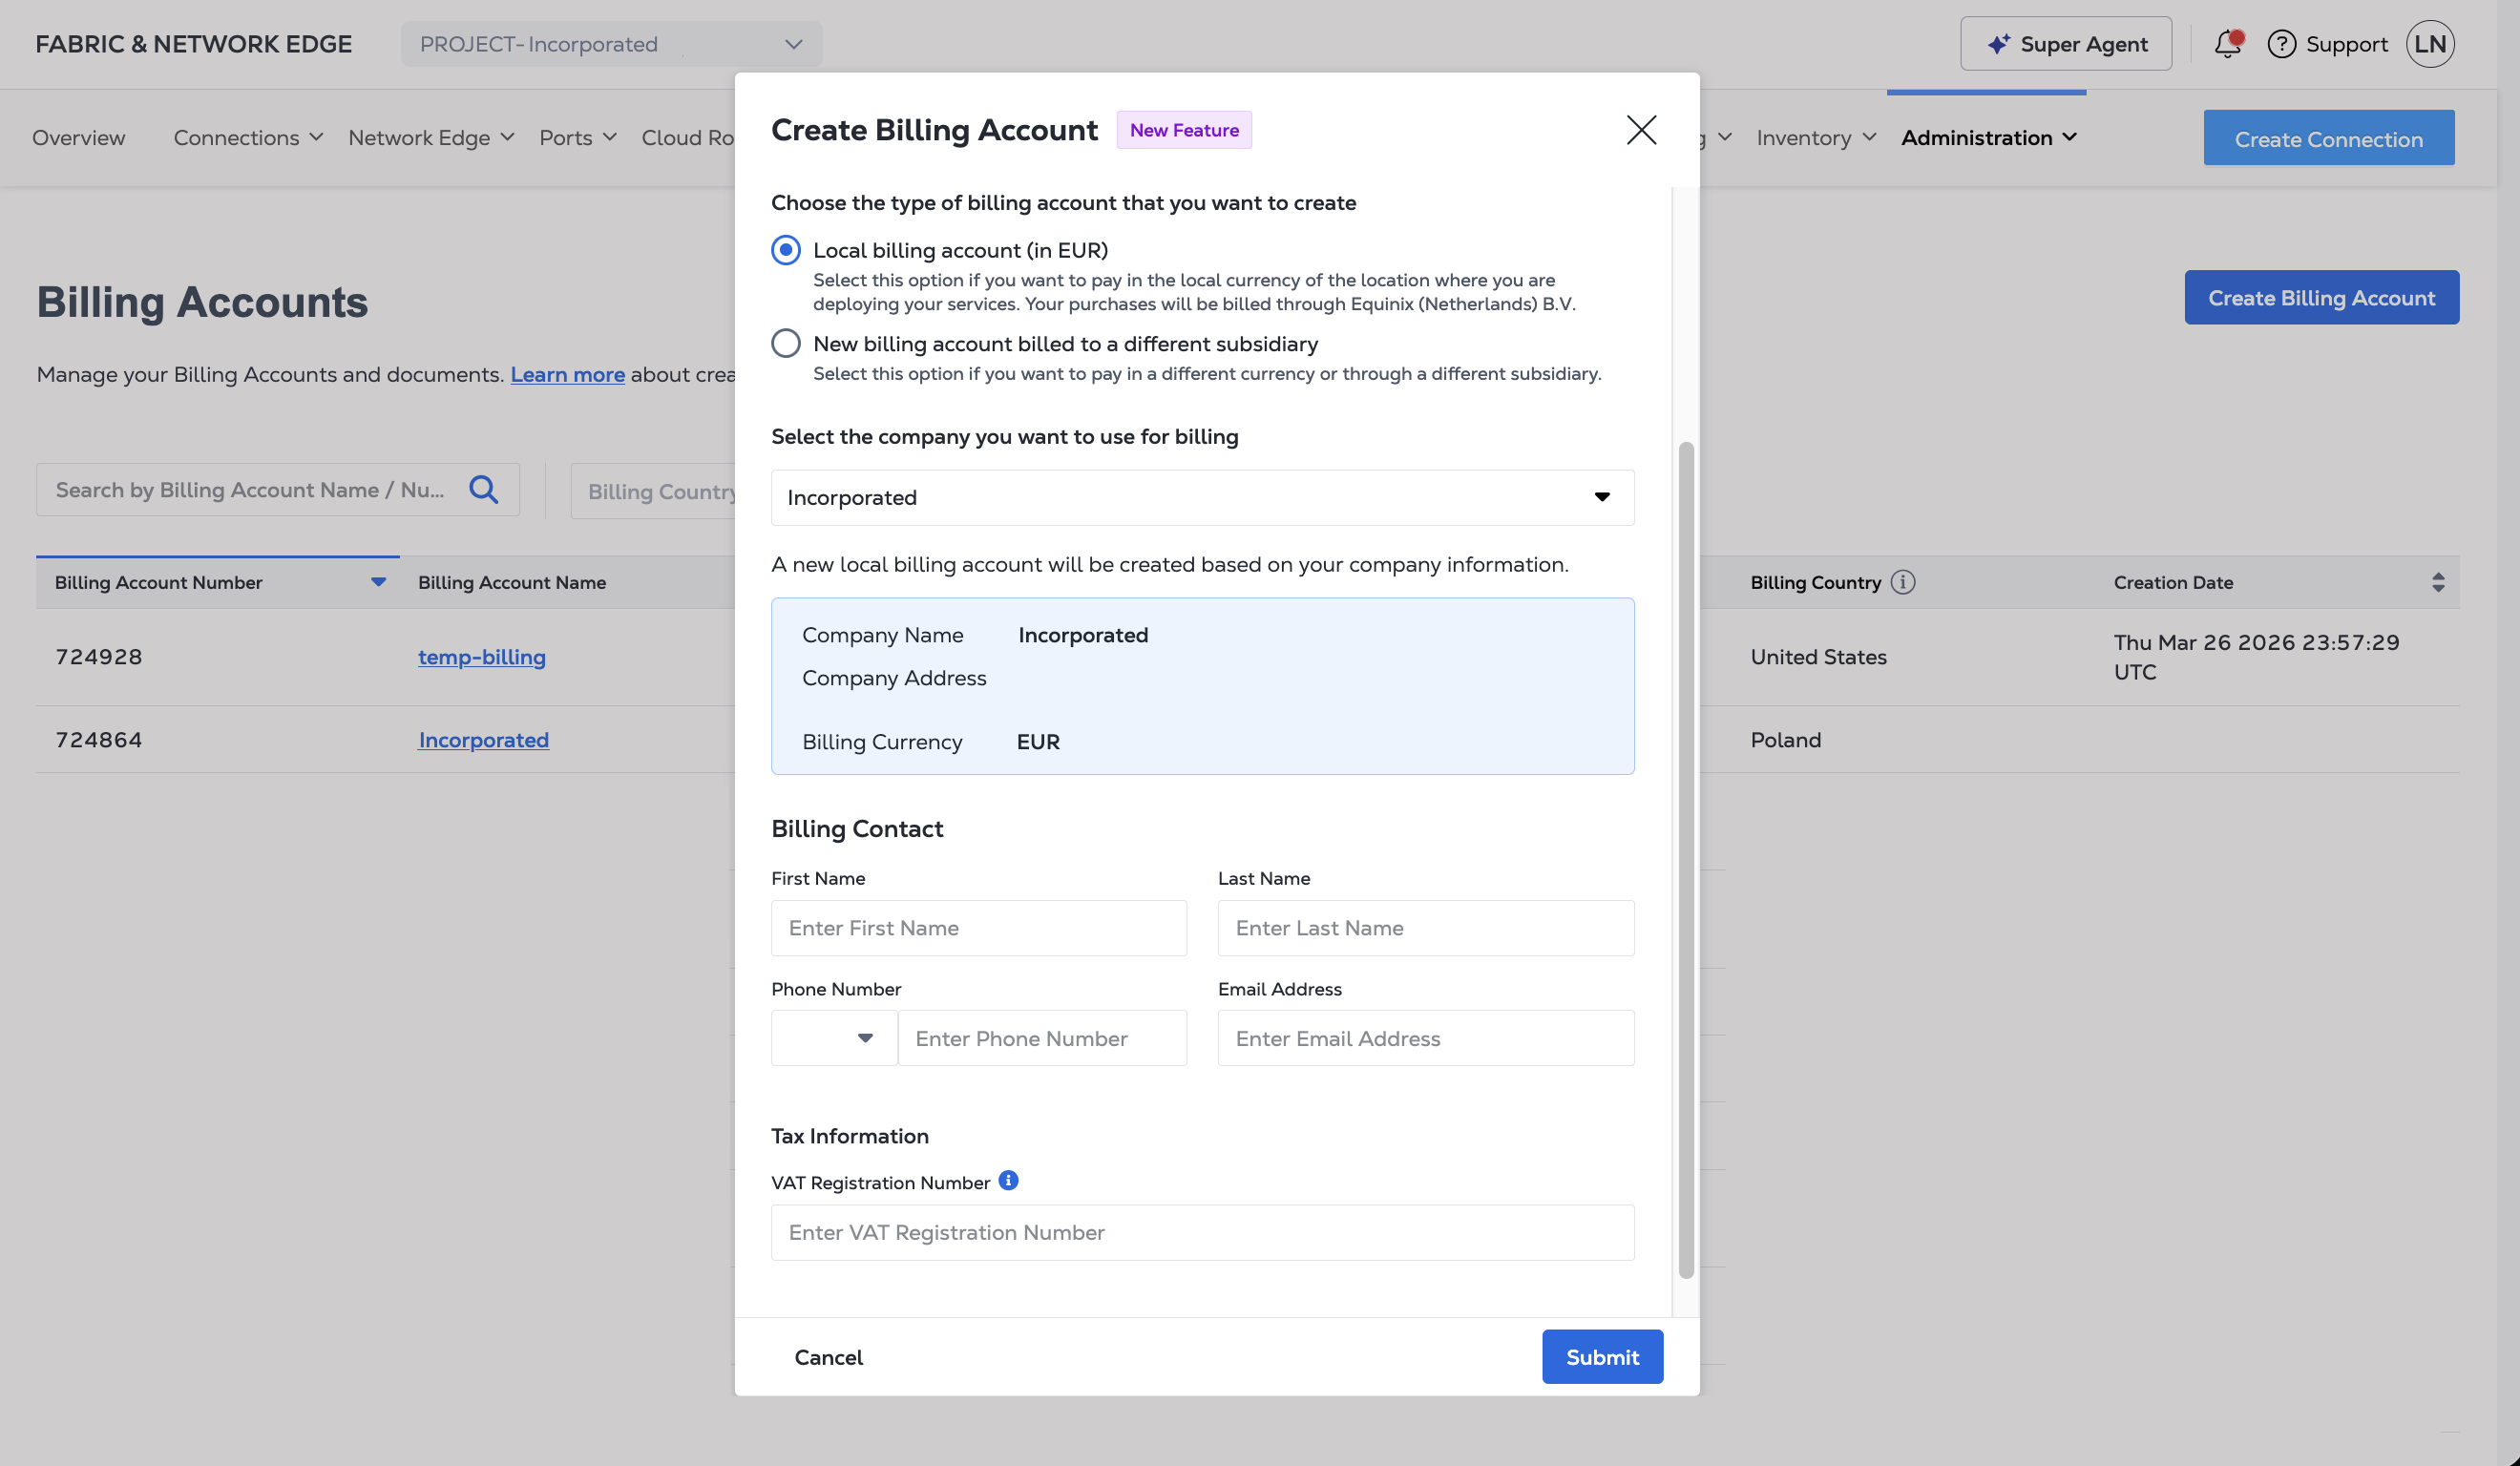
A Local Billing Account
If you are creating a local billing account:
-
Choose which company you want to use. A new local billing account will be created based on your company information. Confirm that the company and currency information is correct.
-
Enter billing contact information, including Name, Phone Number, and Email Address.
-
If required by the country where you are deploying services with this local billing account, enter any requested tax information, like a VAT Registration Number.
-
Click Submit.
A New Billing Account
If you choose to create a new billing account, confirm the information in the Country, Metro, and Currency fields. Click Next.
You can then follow the steps for entering your billing and tax details, agreements, and submitting to create the new billing account.
Billing Account Creation Help
For help on billing account creation, you can open a Support Case.
To create a billing account support case, you will need to select Account Support under Product or Services, and select Billing Account Creation for Case Type.