Portal Navigation
Global Profile Header
The Global Profile Header appears at the top of all Customer Portal screens.
Use the bell icon to view Notification alerts. Select Support to open the Support Menu. Open the User Profile menu to access Customer Portal User Settings.

User Settings
To access User Settings, select the user profile icon. By default, the icon shows the user’s initials.
Select User Settings to open the User Settings page on the Profile tab. The available settings tabs are:
- Profile - Edit personal details and various forms of contact.
- IBX Security - Update personal access settings.
- Permissions - View assigned ordering permissions and subscriptions.
- Crisis Contact Management - Manage contact sources for physical or information security.
- Notification Preferences - Choose which notifications appear in the portal.
- Interface Preferences - Control how your name and time display.
- Privacy - Configure your privacy preferences.
- Share - Define which user profiles have permissions and appear in the network.
Home Page
To access the Home page, select Home. The Home page displays information from products and services in a single view:
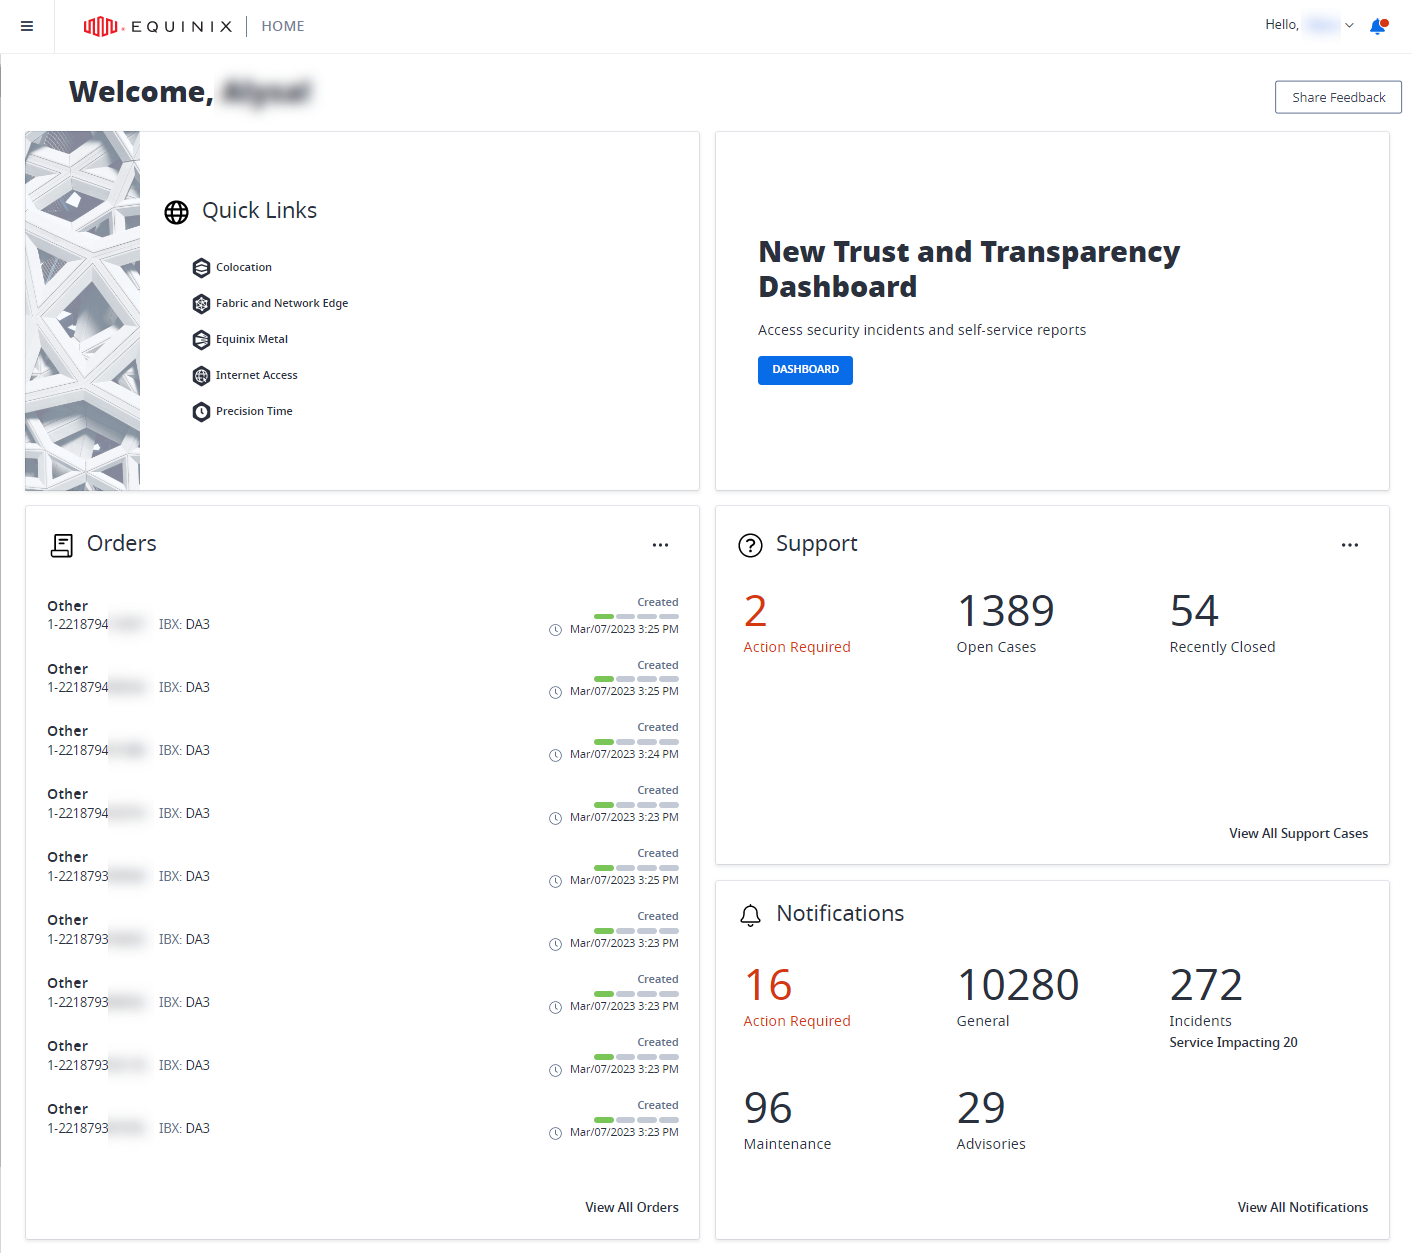
The dashboard includes panels for:
- Quick links to products
- Messages from Equinix
- Your recent orders
- Your support cases
- Your notifications
The panels displayed depend on assigned permissions.
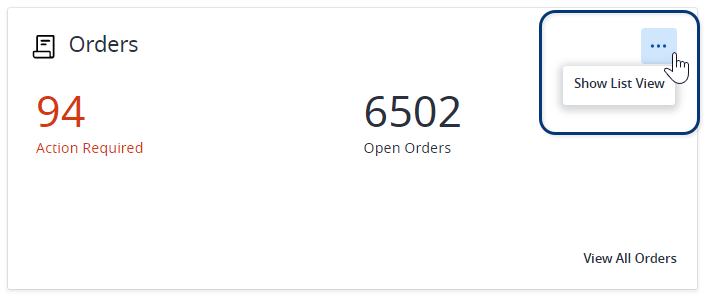
In the Orders and Support panels, switch between Summary View and List View. Select View All to see more details.
Navigate Between Products
After signing in, select a product from the global navigation menu.
Products shown with an external link icon beside the name are not IAM-enabled yet. These portals launch in a separate window. For more information, see Identity and Access Management.
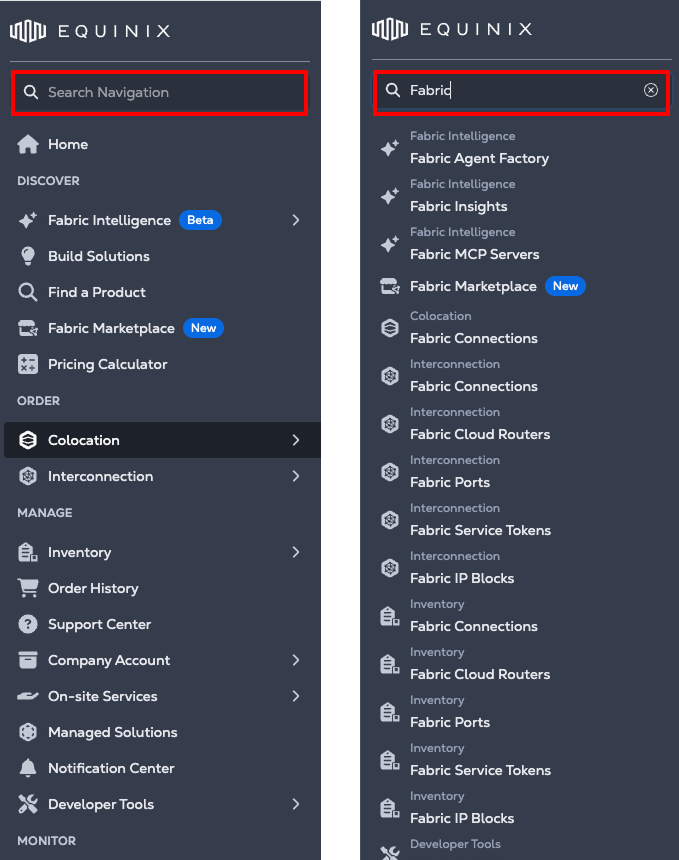
Navigation Search
Use the navigation search field at the top of the left-side menu to find products or sections. Typing in the search field dynamically matches and filters navigation items across the L1 and L2 levels, allowing direct access to available products and sections.
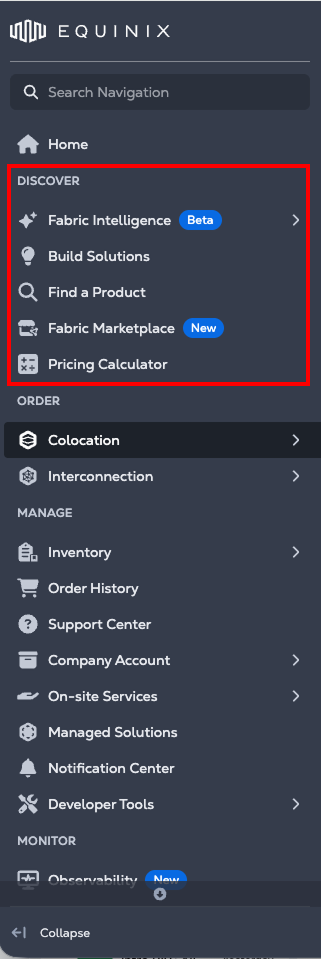
Discover
Use the Discover section to find tools that support product and service discovery within Equinix. It helps you:
- Find service providers in the ecosystem
- Understand connectivity options
- View related cost information
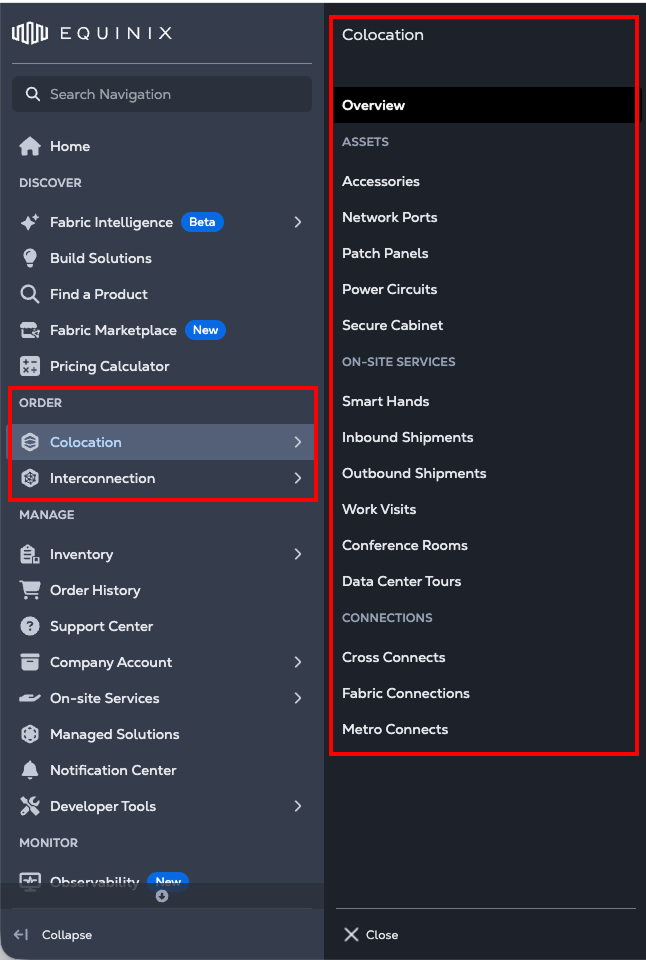
Order
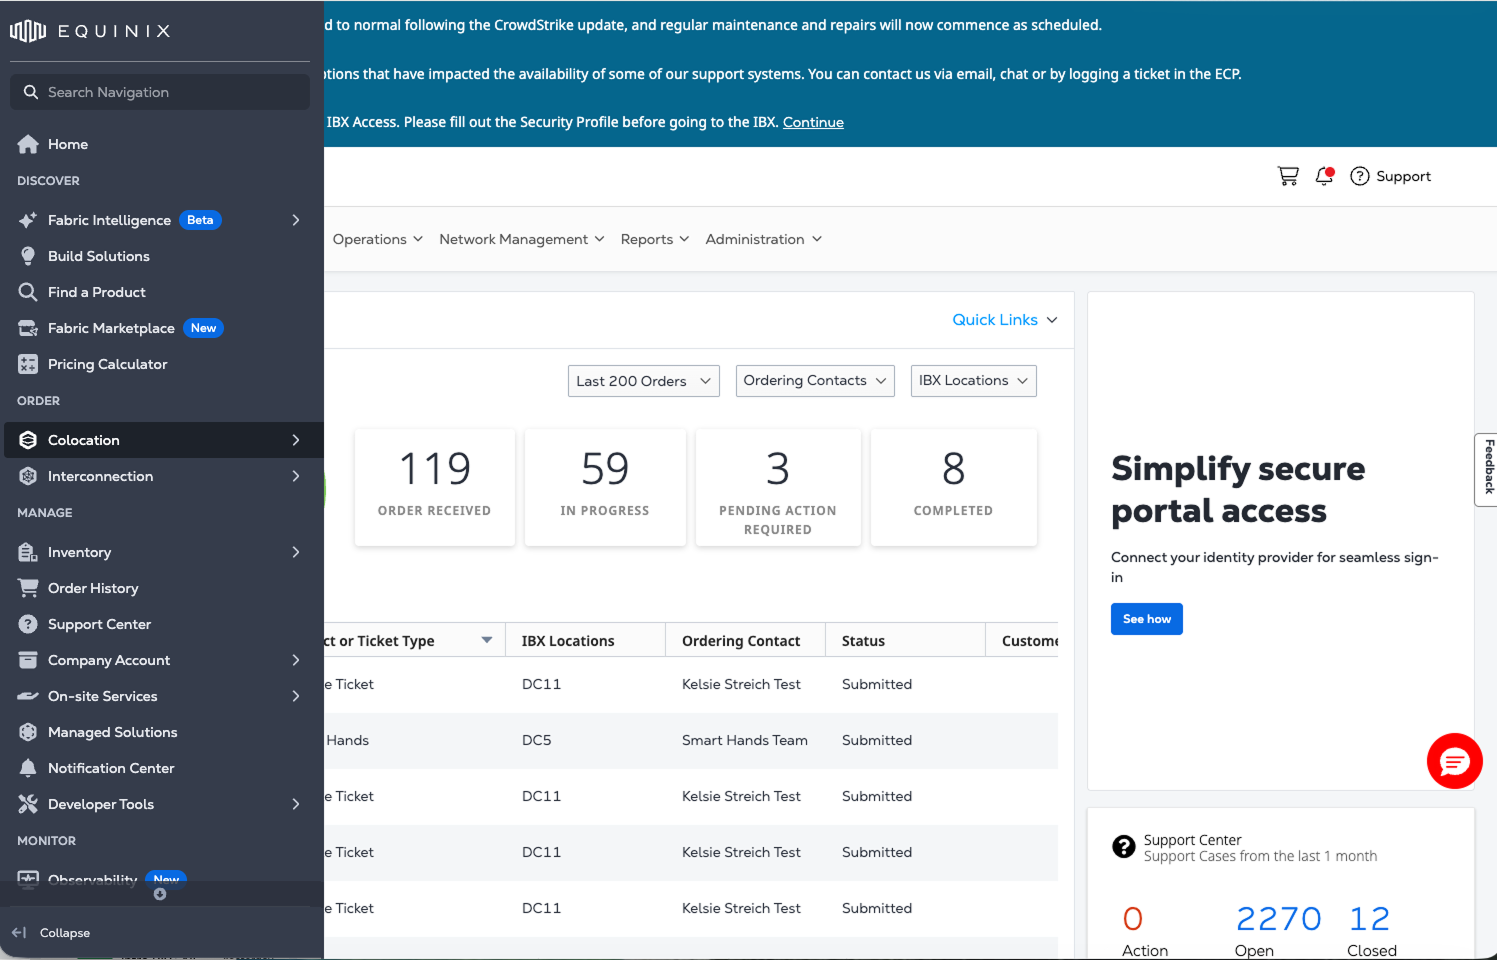
Use the Order section to purchase products and services or complete IBX‑related tasks, such as scheduling a work visit or booking a conference room.
Select an option to open a secondary navigation panel which provides access to related categories and additional actions for the selected product or service.
Manage
Use the Manage section to view and manage your assets and orders. It includes access to Inventory, Order History, the Support Center, and Company Account information, as well as tools for managing On‑site Services, Managed Solutions, notifications through the Notification Center, and Developer Tools.
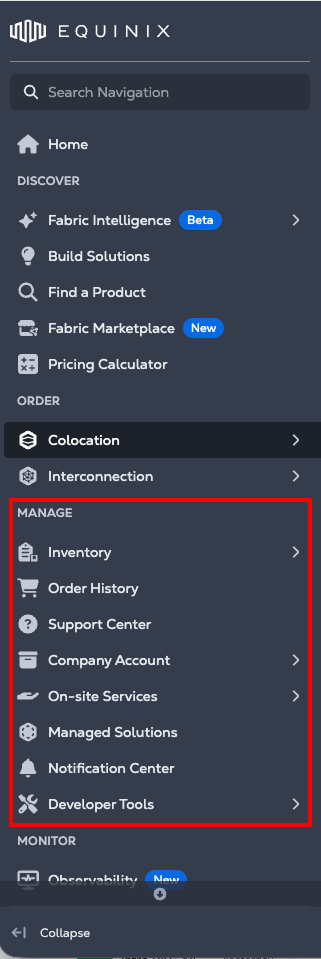
Equinix uses Role Based Access Control (RBAC) to manage permissions. This allows administrators to define a resource hierarchy and assign permissions that propagate to child resources.
- To manage users, select Company Account followed by Identity and Access Management.
- To manage resources and assets, select Company Account followed by Resource Management.
Only IAM users see Identity and Access Management in the global navigation menu.
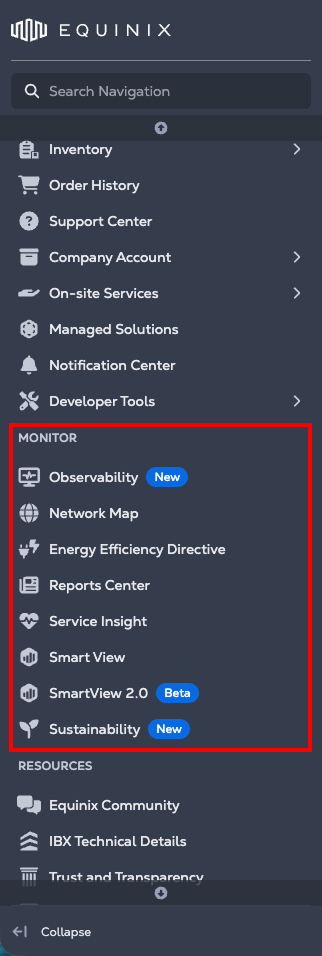
Monitor
Use the Monitor section to observe your existing assets. Access observability views, traffic and usage insights, reports, service insights, and sustainability‑related information.
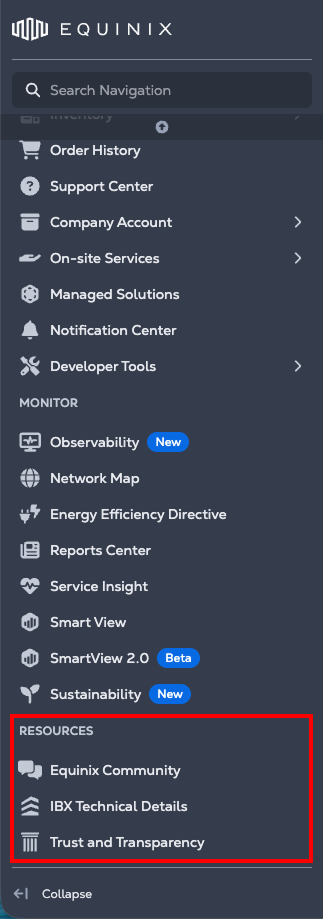
Resources
Use the Resources section to access help and self-service information. This includes Equinix Community, IBX Technical Details, and Trust and Transparency information.