Ordering Cross Connects Without an LOA
You can submit orders for new Cross Connects without a Letter of Authorization. You will need to have the relevant information about both the A-side and the Z-side of the connection.
Customers can order Cross Connects without a signed quote. Service orders and quotes are typically used only for first installs of new customers, or when a customer purchases Cross Connects that deviate from list and customer-specific pricing.
Customers can also to order Cross Connects by contacting the Equinix Global Service Desk (GSD) by email or by phone (email orders result in higher accuracy). GSD orders are processed manually, which results in a longer delay before the order is booked. In addition, a GSD agent might need to contact the customer for missing information or to clarify requirements.
To order Cross Connects in the Customer Portal and API, you must have Cross Connect and Intra-Facility Cables ordering permission.
Steps to Place an Order
-
Sign in to the Customer Portal.
-
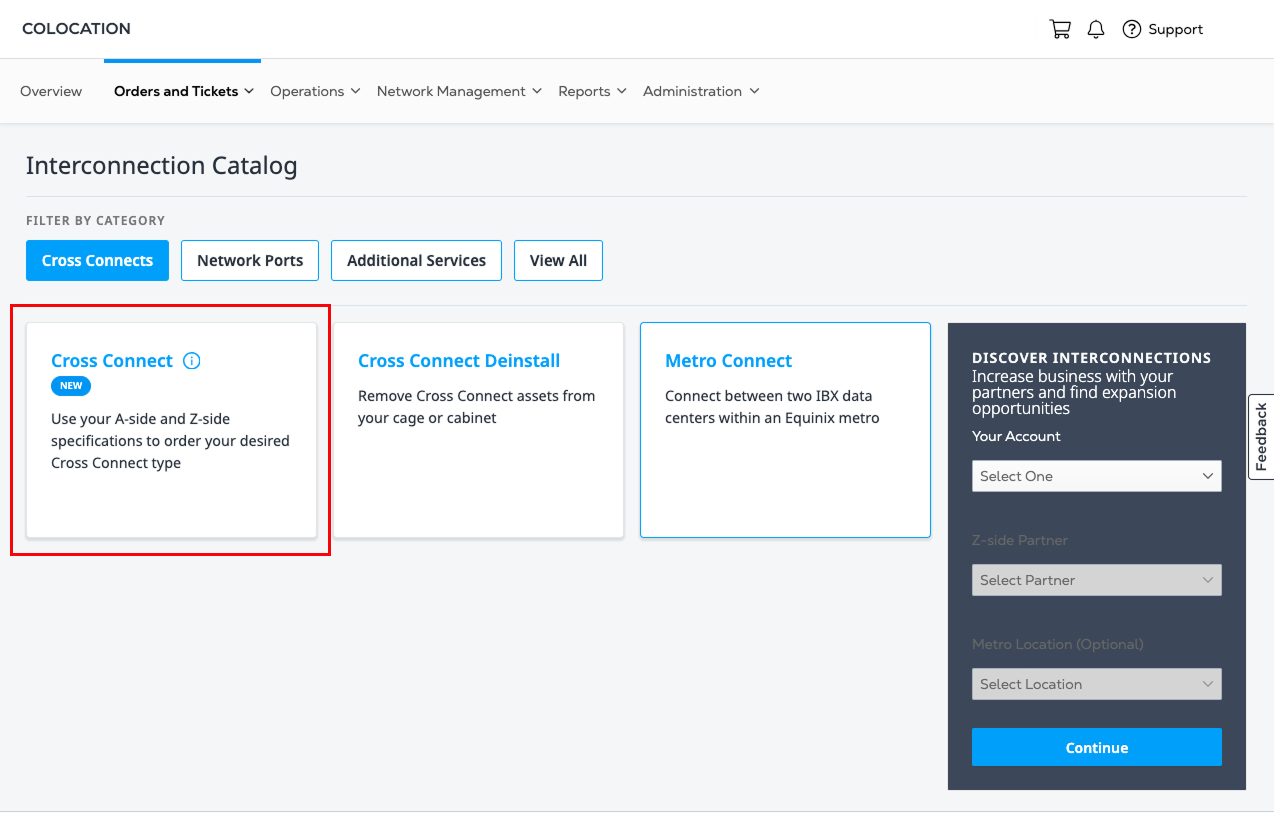
From the Orders and Tickets menu, choose Cross Connect.

-
Click the Cross Connect card in the Interconnection Catalog.
-
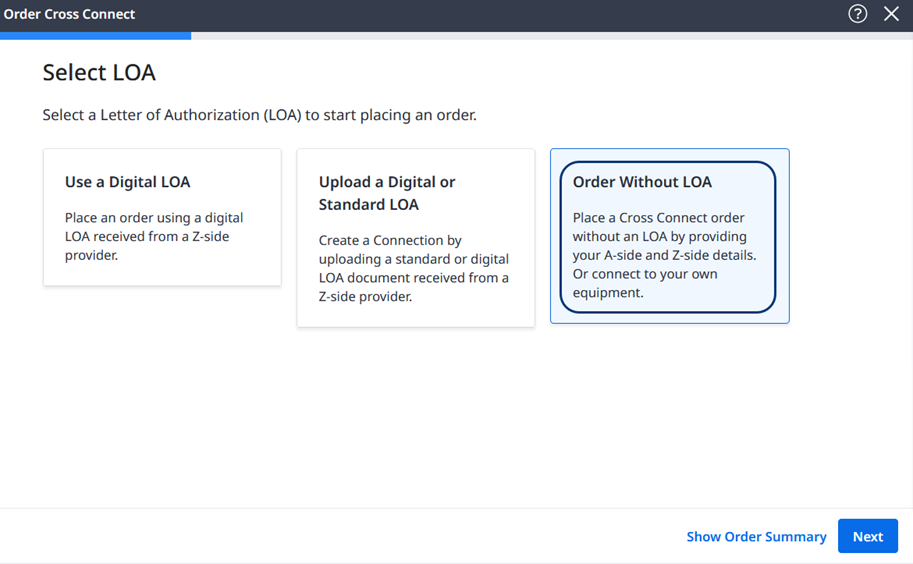
Review the information about the Unified Cross Connect Ordering Experience and click Next.
-
In the Select LOA section, click Order Without LOA.
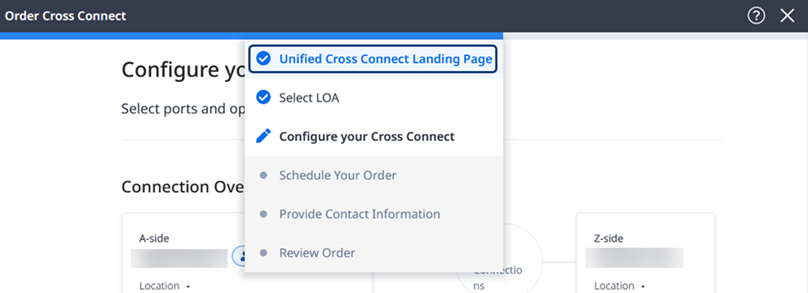
A blue progress bar is displayed across the top of the page. Mouse over the bar to view a drop-down list that shows your progress in the ordering process. Completed sections are displayed with check marks. Click a completed section to return and make changes.
Choosing a Z-side Provider
By default, the Connect to a Provider tile is selected. Select a Z-side Provider from the list. You can filter the list by entering a provider or an IBX data center.
Click Next.
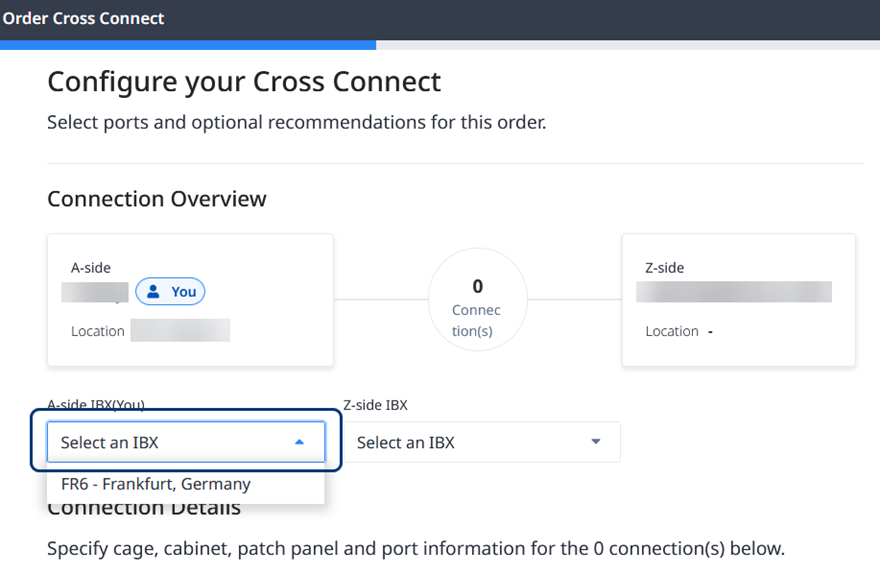
Configuring the Connection
The choices in the following forms are based on the assets that are assigned to your organization and account. The values that are displayed are the ones that are available for your situation.
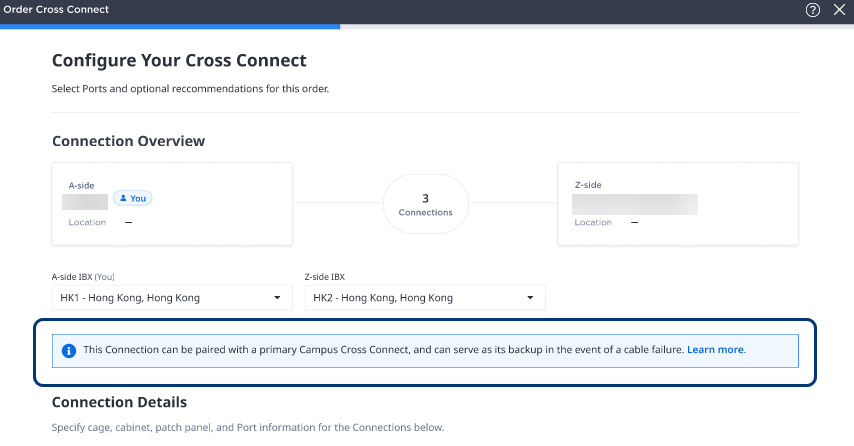
Below the summary in the Connection Overview diagram, choose an A-side IBX and a Z-side IBX from the drop-down lists.
If your new connection can be paired with a primary Campus Cross Connect, a message is displayed below the Connection Overview diagram. This means that the connection can serve as a diverse campus Cross Connect backup if a cable failure occurs. The Configuring Redundancy section below describes how to set up this feature.
Configuring the A-side
In the Connection Details section, click + Add Connection for the A-side connection.
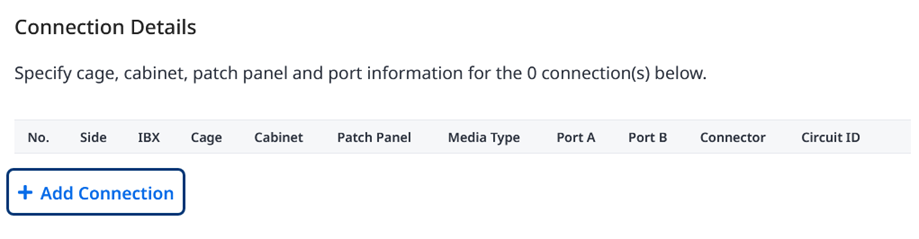
The Asset Connection Details form is displayed on the right side of the page.
For Connection 1, enter a patch panel, or provide the following details:
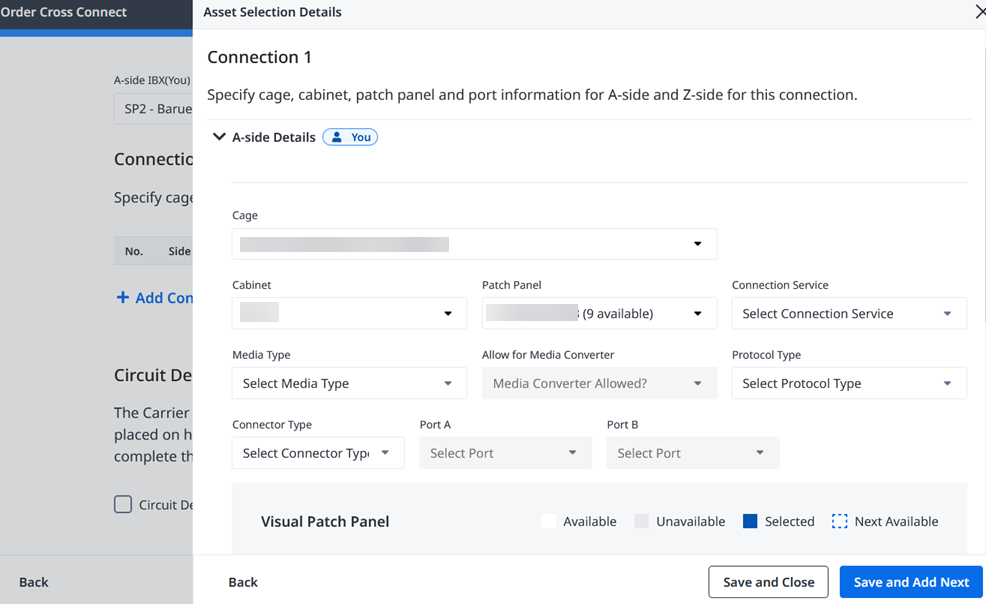
- Choose a Cage, a Cabinet, a Patch Panel, a Connection Service, and a Media Type from the drop-down lists.
- Choose an optional Protocol Type and a Connector Type from the drop-down lists.
- Choose Port A and optional Port B from the drop-down lists, or from the Visual Patch Panel display of available ports below. The Next Available port is the default.
- To request that Equinix install the new Cross Connect from the panel to your equipment, select Patch my equipment and choose the Device Cabinet, Connector Type, and Port. Additional Smart Hands fees will apply.
- Select Add Cross Connect Light Link Verification. An additional charge for each connection will apply.
- Click > Z-side Details to expand the right-side form.
Configuring the Z-side
For Connection 1, enter a patch panel, or provide the following details:
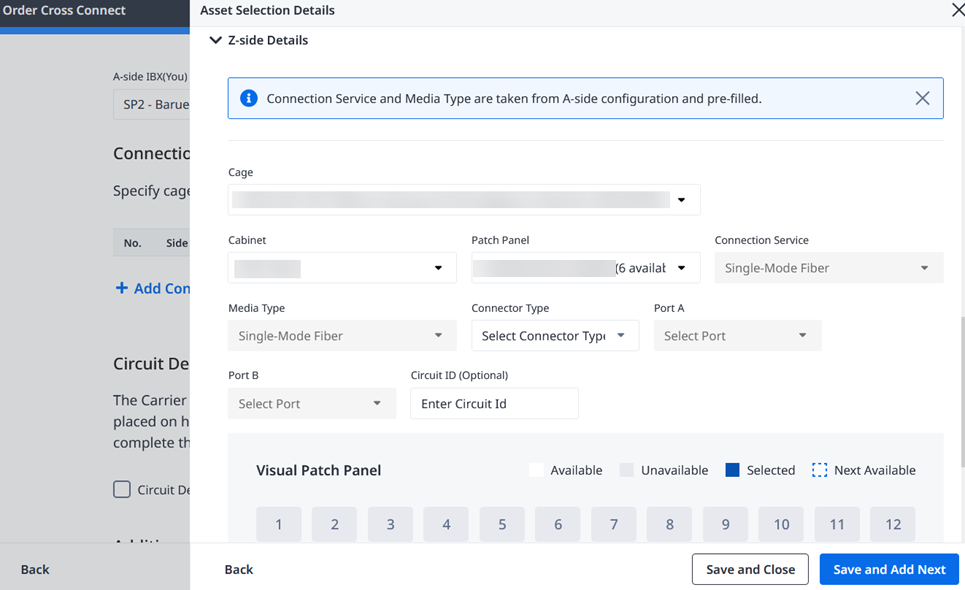
- Choose a Cage, a Cabinet, a Patch Panel, and a Connector Type from the drop-down lists. By default, the Connection Service and Media Type are set from the A-side values.
- Choose Port A and optional Port B from the drop-down lists, or from the Visual Patch Panel display of available ports below. The Next Available port is the default.
- Enter a Circuit ID.
Configuring Redundancy (optional)
To add a diverse connection for more redundancy, select Create Diverse Campus Cross Connect.
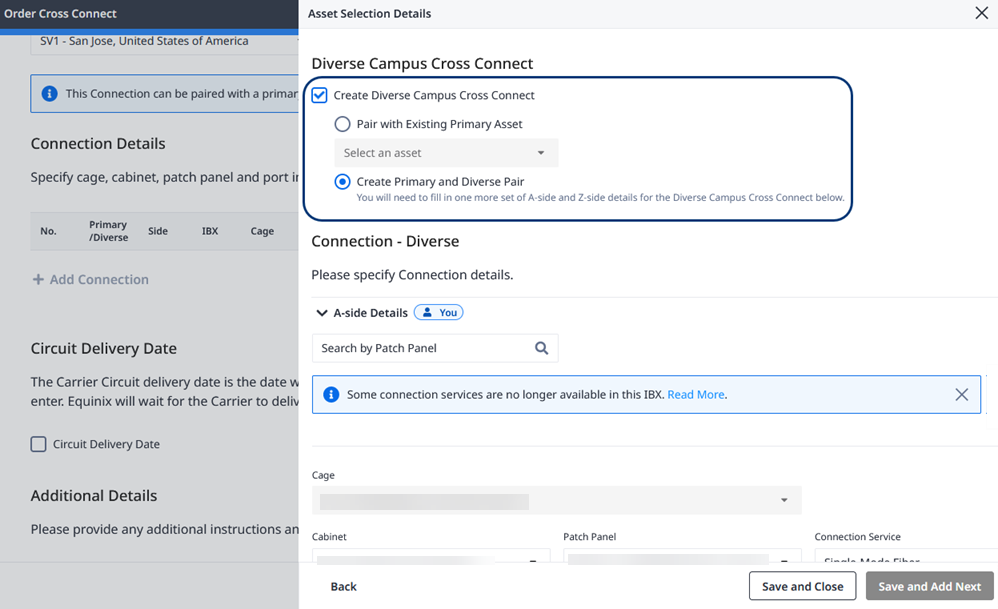
Select a connection type:
-
Pair with Existing Primary Asset – Choose an available Asset from the drop-down list.
-
Create Primary and Diverse Pair – Provide A-side Details and Z-side Details for the new connection.
- Choose a Cabinet, Patch Panel, Connection Service, Media Type, optional Protocol Type, and Connector Type from the drop-down lists as described in the steps above.
- Choose Port A and optional Port B from the drop-down lists, or from the Visual Patch Panel display of available ports below. The Next Available port is the default.
To add more primary connections, click Save and Add Next. Repeat the previous steps for all the additional A-side and Z-side connections.
When all the connection details are complete, click Save and Close in the lower right corner.
Review the Connection Details
The updated A-side and Z-side Connection Details are displayed. If applicable, the diversified connections are displayed too. Review the updated list in the Connection Details section.
- To make changes, click the pencil on the right side of a connection row. Edit the information in the Asset Selection Details form and click Confirm Selection.
- To delete a connection, click the trash can on the right side of a connection. Click Delete Connection. At least one connection must be present to complete the order.
To view all the details and charges, click Show Order Summary. This information updates as you progress through the ordering process.
Schedule Your Order
Choose to either schedule your order to match circuit enablement OR to match completed installation.
To Match Circuit Enablement
-
To place your order on hold to match the date that your circuit is enabled, select Circuit Delivery Date and choose a date from the calendar. This is the date when your carrier commits to enabling the circuit. After your carrier delivers the service, Equinix completes the installation.
-
Enter or upload additional details and instructions that might help the Equinix technician.
-
When all the order details are correct, click Next.
To Match Completed Installation
To schedule the date for your completed installation, select a date in the calendar view. You can select from a date range suggested by Equinix. Or, you can request a different date based on your schedule and pricing needs.
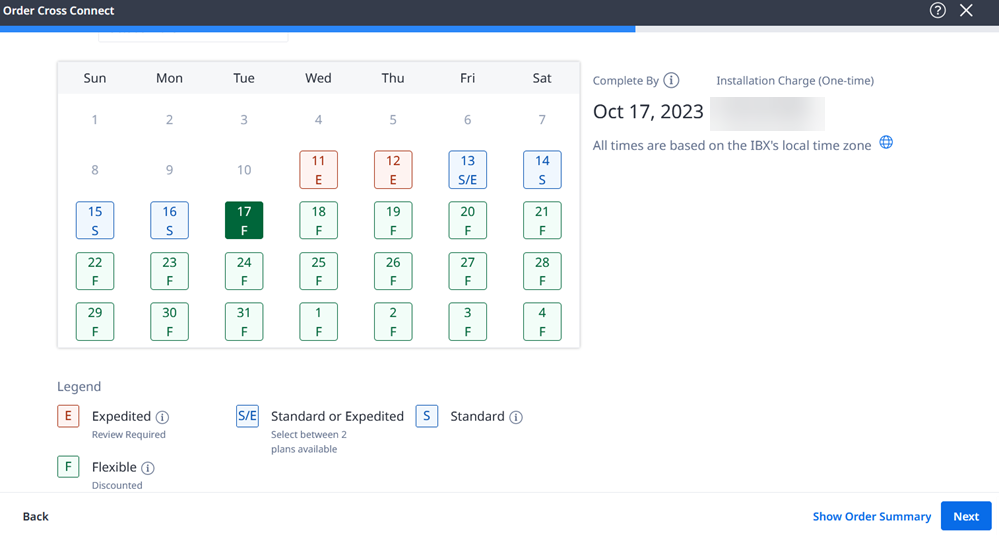
Select one of these calendar options:
- Flexible (F) – Your order is completed on a date that Equinix recommends, and you receive a discount on your installation charge.
- Standard (S) – Your order is completed during a typical, guaranteed installation interval.
- Expedited (E) – Your order is completed more quickly. Click a date in the calendar, and choose a time from the drop-down list. Approval is required, and additional fees might apply.
Click Next.
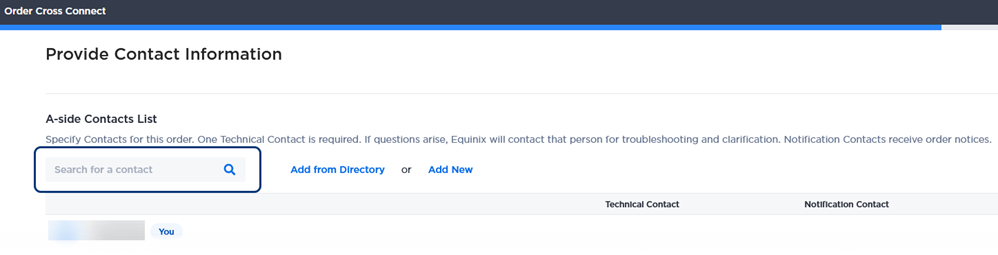
Provide Contact Information
In the A-side Contacts List, you are automatically assigned as the technical contact and the notification contact.
To add additional contacts, either:
-
Click the Search for a contact field, begin typing a name, and select the name from the filtered drop-down list.
-
Click Add from Directory to search the Contact Directory list. Select one or more contacts, and click Done in the lower right corner.
If the contact you want to add is not included in these lists, click Add New Contact. Complete the Add an Unlisted Contact form and click Add in the lower right corner.
The contacts that you add are automatically assigned as a Notification Contact to receive order updates. You can select one of them as a Technical Contact.
In the Z-side Contacts List section, select Notify Z-side contact upon completion. Enter the contact email address.
Click Next.
Review and Submit Your Order
After you have reviewed the information for this new Cross Connects connection, you can make final changes and complete the ordering process.
-
In the Review Order form, verify that the Connection Details, Additional Details, and Contact Information sections are correct.
-
Enter additional Customer Reference information.
-
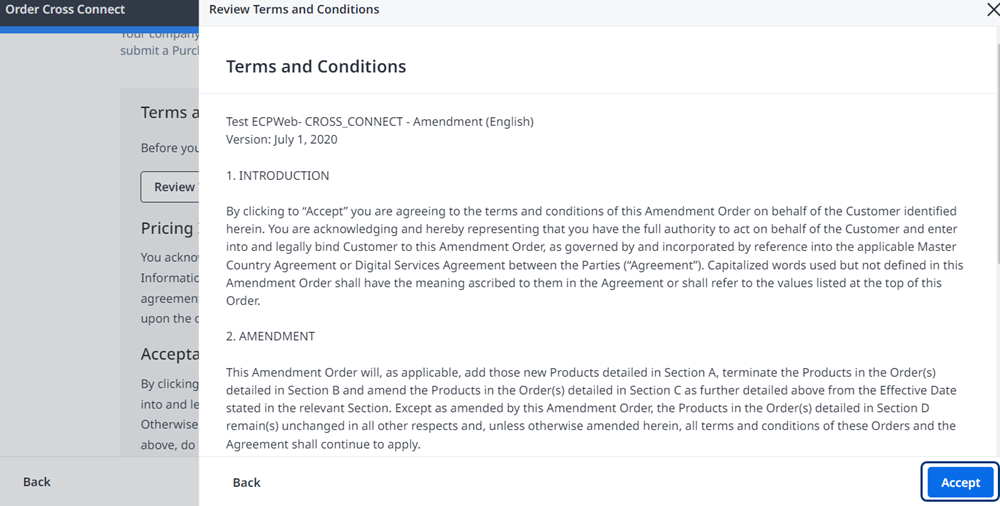
In the Terms and Conditions section, click Review Terms and Conditions.
-
Review the Acceptance section and click Accept.
-
Click I Accept and Submit.
The Order Submitted confirmation window displays your order number.
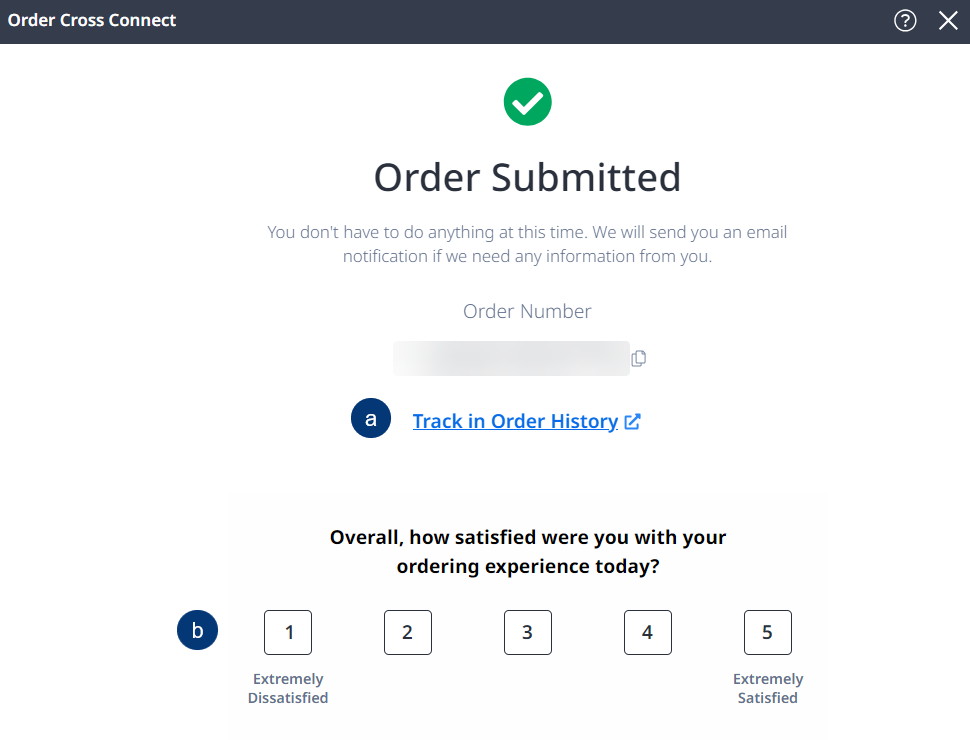
To find details about the status of your order, click Track in Order History.
After your order is completed, you’ll receive a survey email inviting you to provide feedback on your experience. This survey allows you to comment on how the order was fulfilled and whether you were satisfied with the work performed.