Remove a Cross Connect
Use the online form to deinstall cross connects, set a removal date, and request Smart Hands assistance with the deinstallation.
-
Sign in to the Customer Portal.
-
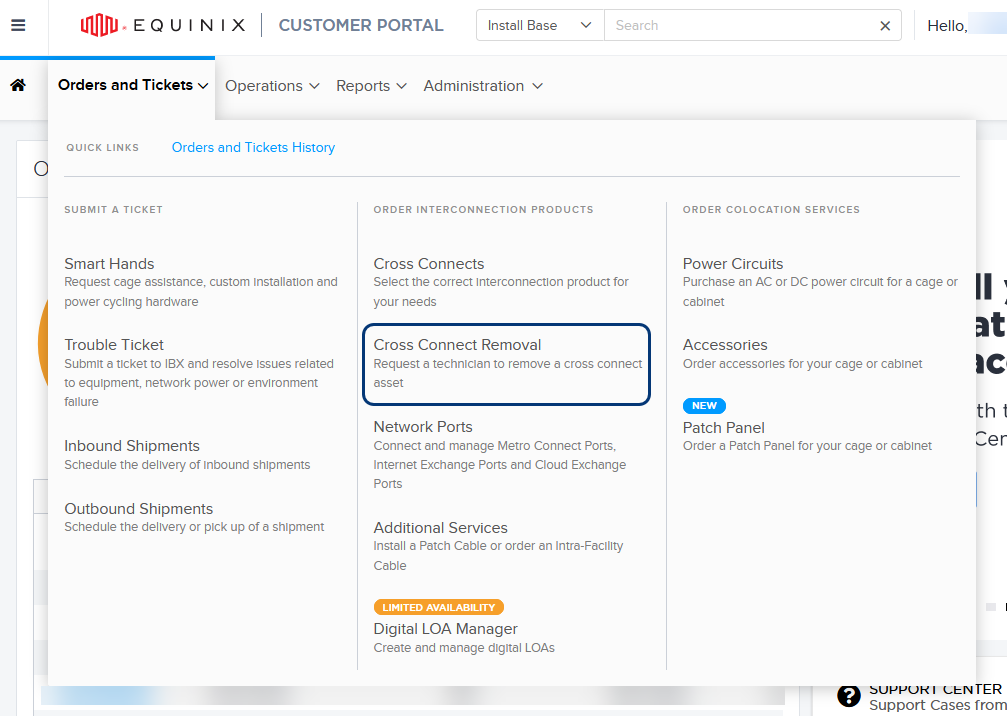
Go to the Orders and Tickets menu and select Cross Connect Removal.
-
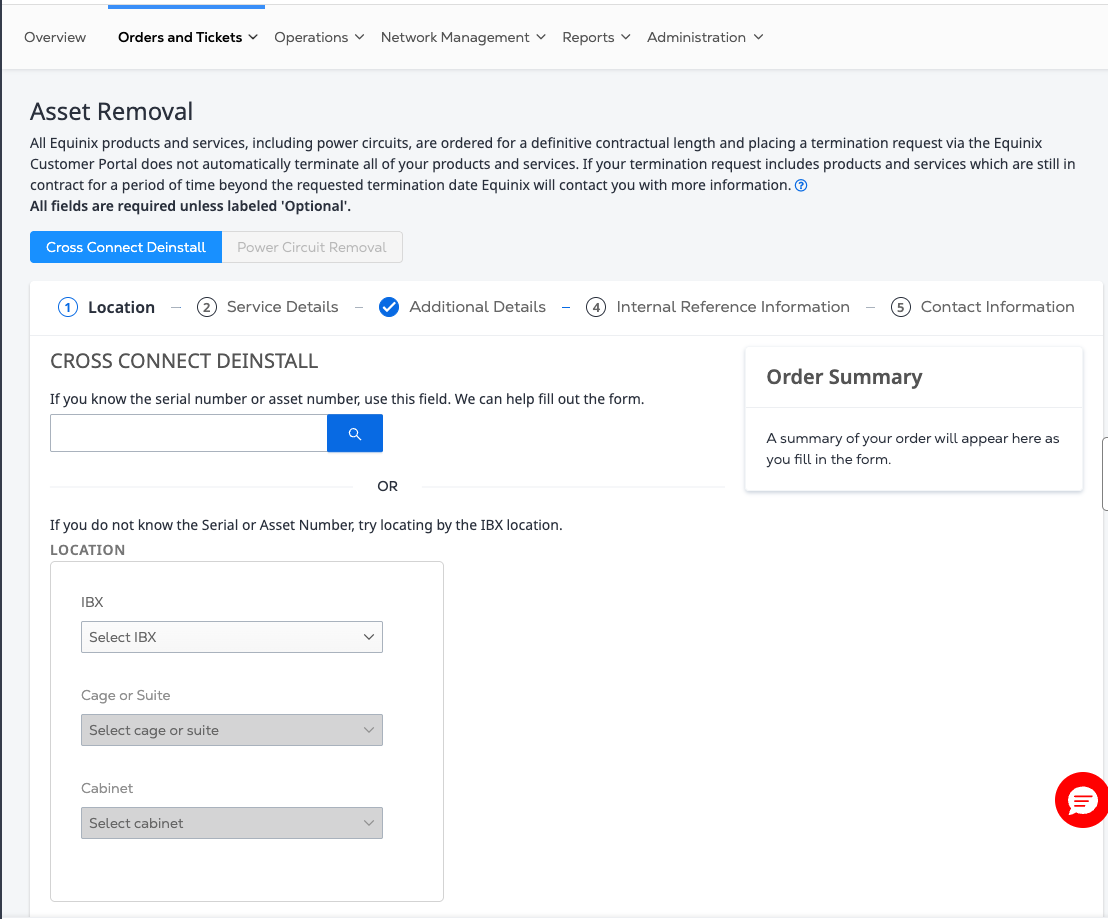
This opens the Asset Removal form which lets you deinstall a cross connect.
-
Enter the serial number or asset number in the search field, or choose an IBX, cage or suite, and cabinet from the dropdown lists.
tipTo use the Asset Search, enter the asset or serial number of the A-side that you want to remove in the asset search box. If the asset is found, the IBX, Cage or Suite, and Cabinet fields are automatically populated. All associated assets will appear in the Service Details for Cross Connect Deinstall section. Select the cross connect you want to remove.
-
The list of asset details is shown. Select the cross connect that you want to remove. Choose additional options:
-
Proceed with deinstall even if live traffic is detected – If this option is selected, Equinix completes the deinstallation of the cross connect, and is not responsible for any service outages that might occur. If unselected and live traffic is detected, Equinix will send two-way communications asking for additional information. If no response is received within 10 days, the deinstallation order will be processed as requested.
-
Create a Smart Hands order to remove if there is a patch cable in place – This option automatically generates a separate Smart Hands request to remove your patch cable, and a Smart Hands fee will apply. The patch cable removal will be scheduled to complete by your Requested Removal Date.
-
Connection Details – Choose a Device Cabinet from the dropdown list. Enter any Device Details that might help the Equinix technician, and the Device Port.
-
-
Enter a Requested Removal Date.
Cross Connects are invoiced through their actual deinstallation date, which is no less than 30 days after your Requested Removal Date. For more information, see the Equinix Customer Cabling and Cross Connects Deinstallation Product Policy.
-
In the Additional Details section, provide information to help Equinix complete the deinstallation:
- Enter any Additional Details.
- Upload one or more files, including bmp, jpg, gif, png, tif, txt, docx, xlsx, ppt, pdf, and vsdx formats.
- Select your preference for providing a purchase order number.
- Enter Customer Reference information, such as a purchase order number or an internal code. This number can help identify this removal request when you search your Order History or download a report.
-
Add additional Contact Information.
-
Technical Contact:
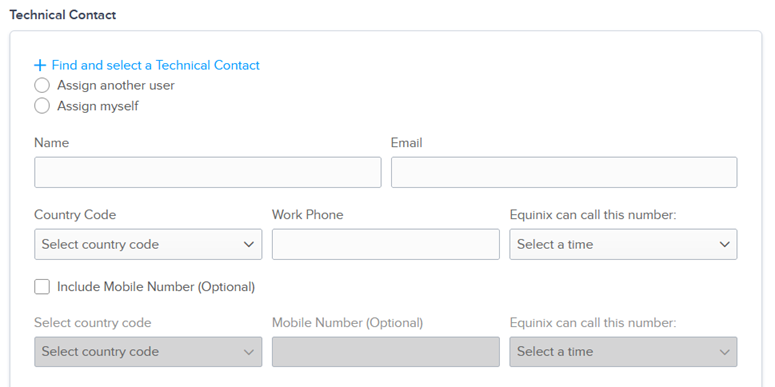
- Click Find and select a Technical Contact to select from a directory.
- Click Assign another user and enter contact information.
- Click Assign myself and enter contact information.
-
Notification Contact:
-
By default, your name and email are listed.
-
To add an additional name, click Find and select a Notification Contact to select from a directory.
-
-
-
Review the Pricing Information section, and the Order Summary on the right side of the form. Click Submit.
View Status
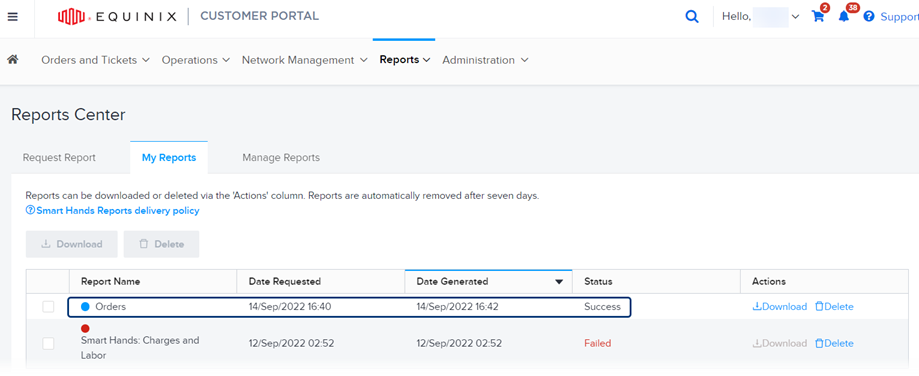
To view the status of your submitted request, click the Reports menu, then click the My Reports tab.
Cross Connect Removal Date
After you submit the removal request, Equinix removes the cross connect on or after your Requested Removal Date, depending on operational availability. The cross connect is invoiced through the actual removal date, which is no less than 30 days from the date you submitted the removal request. The Equinix Customer Cabling and Cross Connect Deinstallation Product Policy applies to all deinstallation requests.