Request a Digital Letter of Authorization
New Digital LOA Manager
In the new Digital Letter of Authorization (LOA) Manager, Requestors request LOAs and Issuers issue and authorize them.
-
Sign in to the Customer Portal.
-
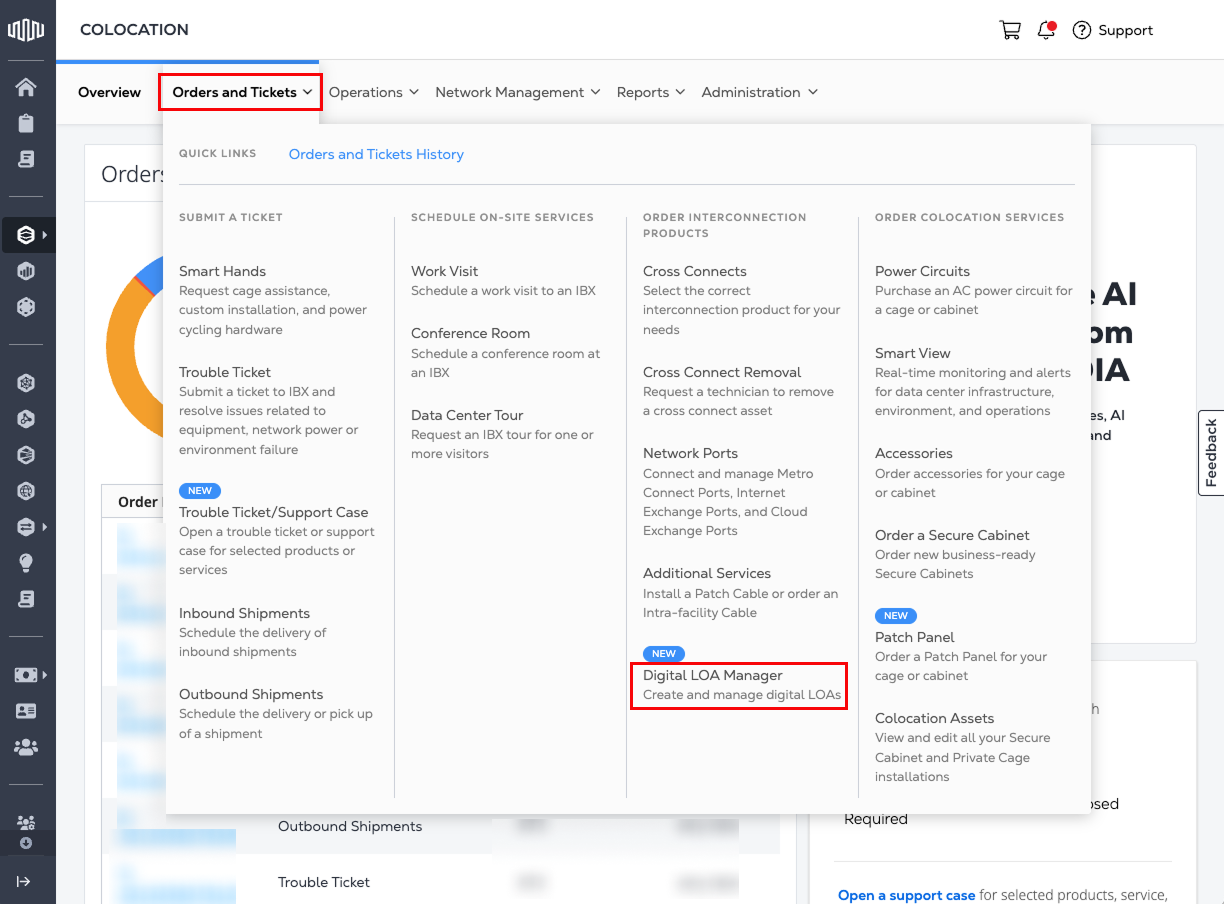
Go to the Orders and Tickets menu and select Digital LOA Manager.
-
When prompted, click Yes, Try New Digital LOA Manager to switch to the new experience.
Request a Digital LOA from an Issuer
To request a Digital LOA from the other Equinix customer you are connecting to, follow these steps:
-
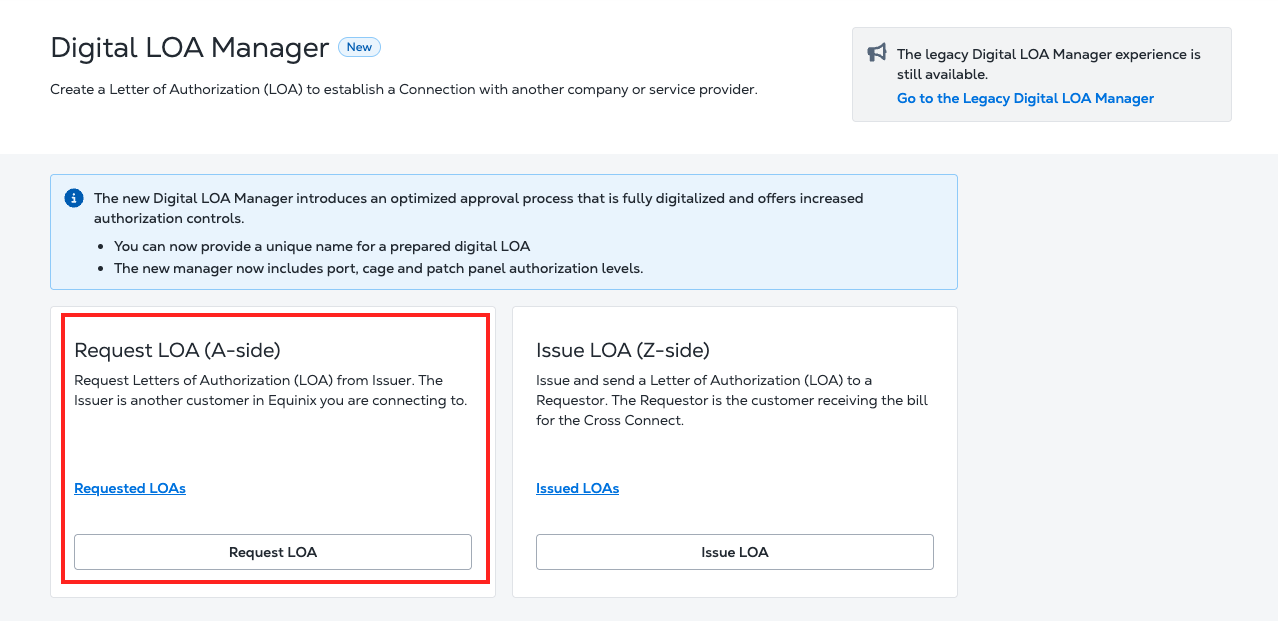
Look for the Request LOA (A-side) card and click Request LOA.
-
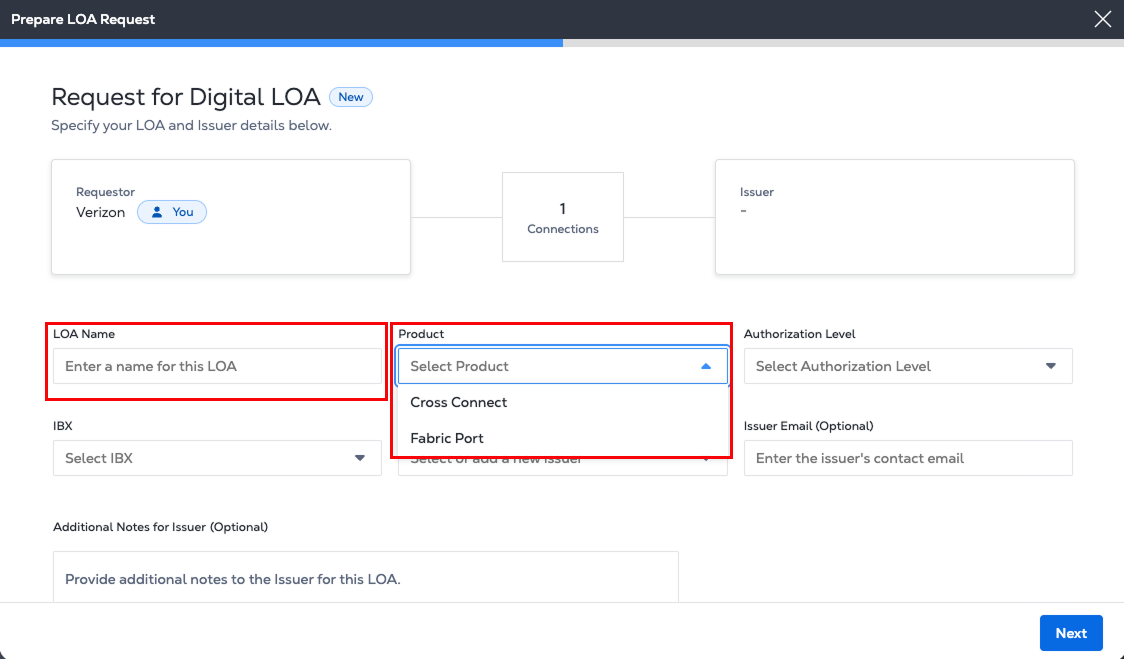
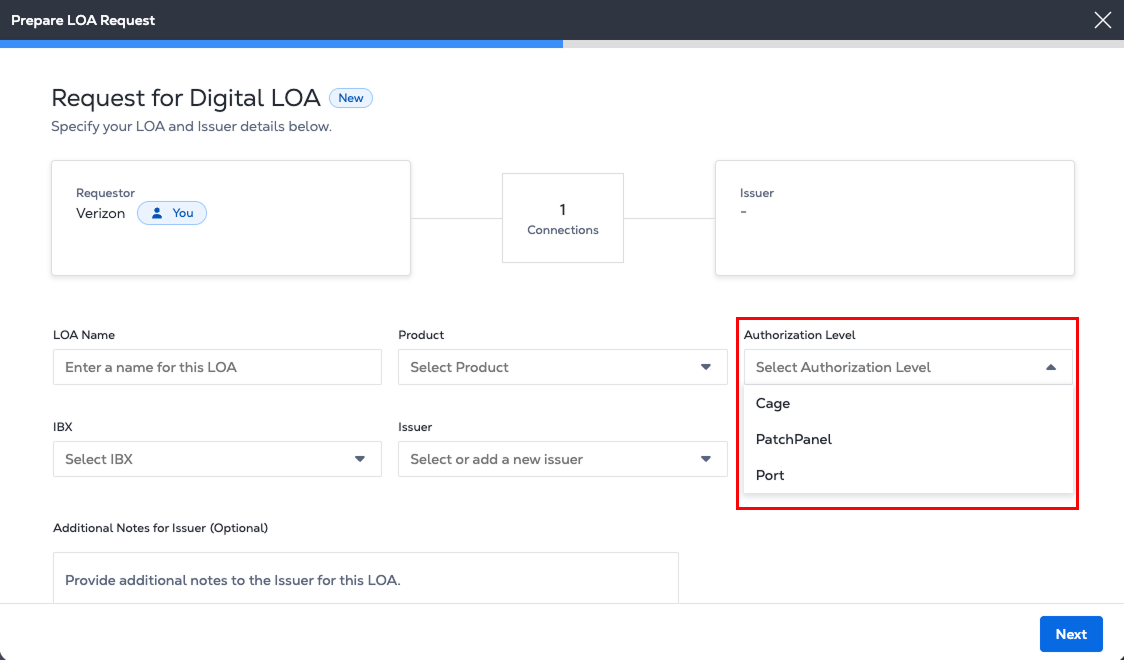
Enter a name for the LOA and select a product from the Product list
-
The Authorization Level determines the equipment the LOA authorizes. For instance, a cage authorization grants access to an entire cage, while patch panel and port authorizations grant access to a specific patch panel or port.
-
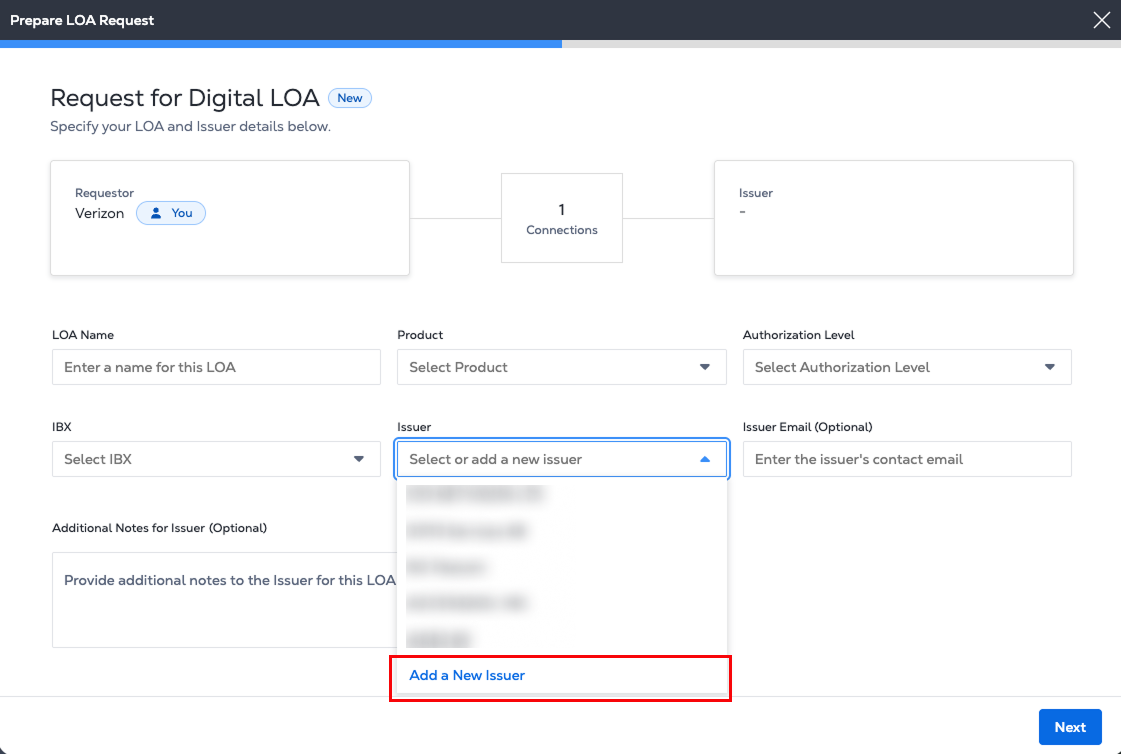
Select the IBX data center and select or add an Issuer.
- Click Add a New Issuer to enter the Requestor Name and Email.
-
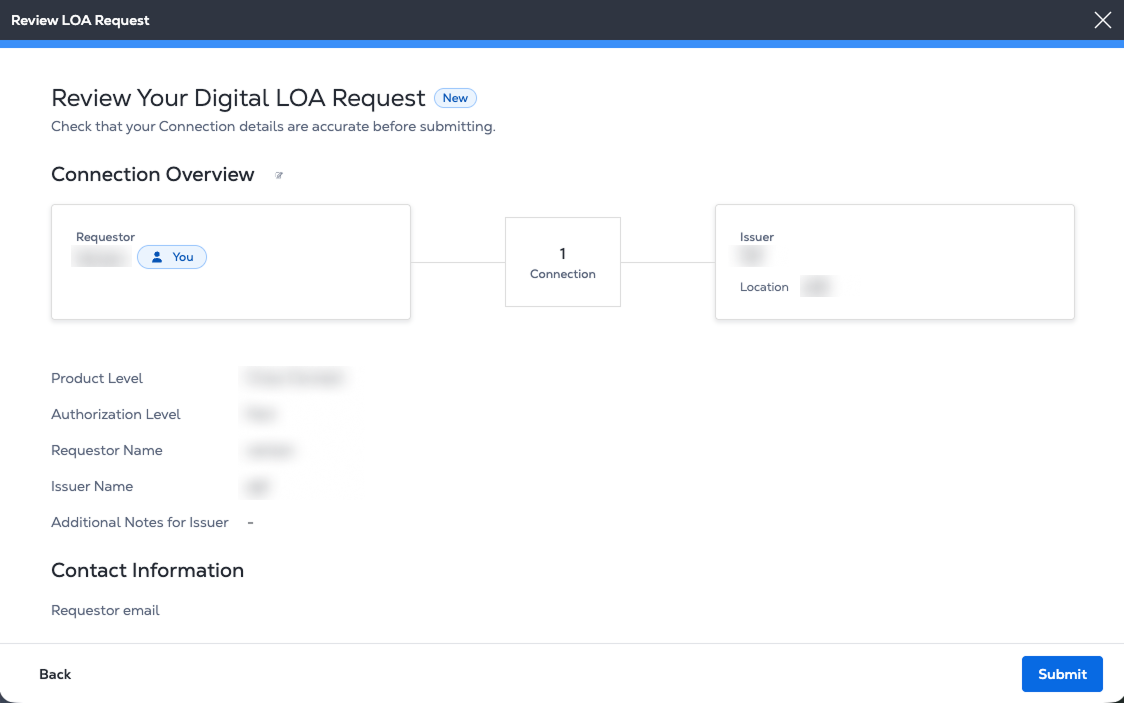
In Review Your Digital LOA Request, verify that the connection details and contact information is accurate.
- Click Submit.
-
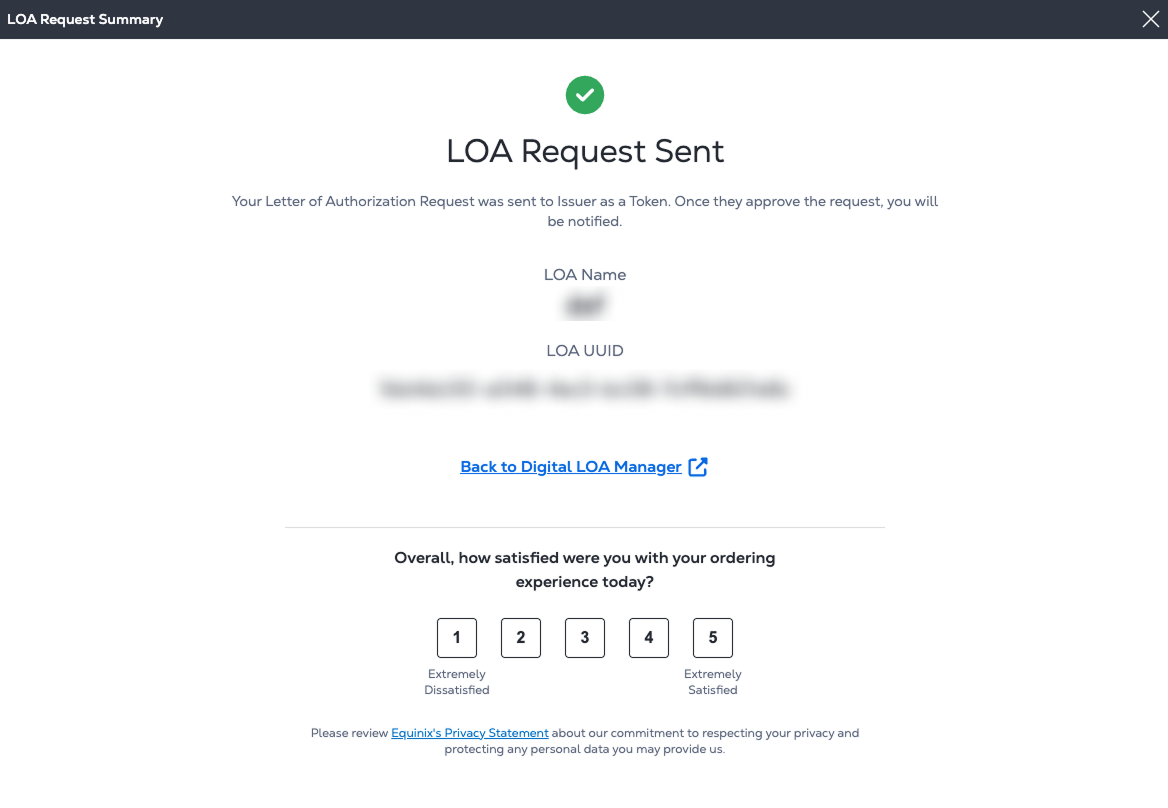
The LOA Request Summary contains the unique ID for the Digital LOA. Your Issuer receives an email notification that includes the new Digital LOA as a token. Once they approve the request, you will be notified.
Legacy Digital LOA Manager
If you are an A-side partner initiating a Cross Connect and requesting a Digital LOA from a Z-side partner, follow these steps:
The Z-side partner receives the request and either approves or rejects it. In some cases, the Z-side may also be required to sign and upload a physical LOA. If you are a Z-side partner creating a Digital LOA, see Creating a Digital Letter of Authorization
-
Sign In to the Customer Portal.
-
Go to the Orders and Tickets menu and select Digital LOA Manager.
-
When prompted, click No, Thank You to use the legacy experience.
Request LOA (A-side)
-
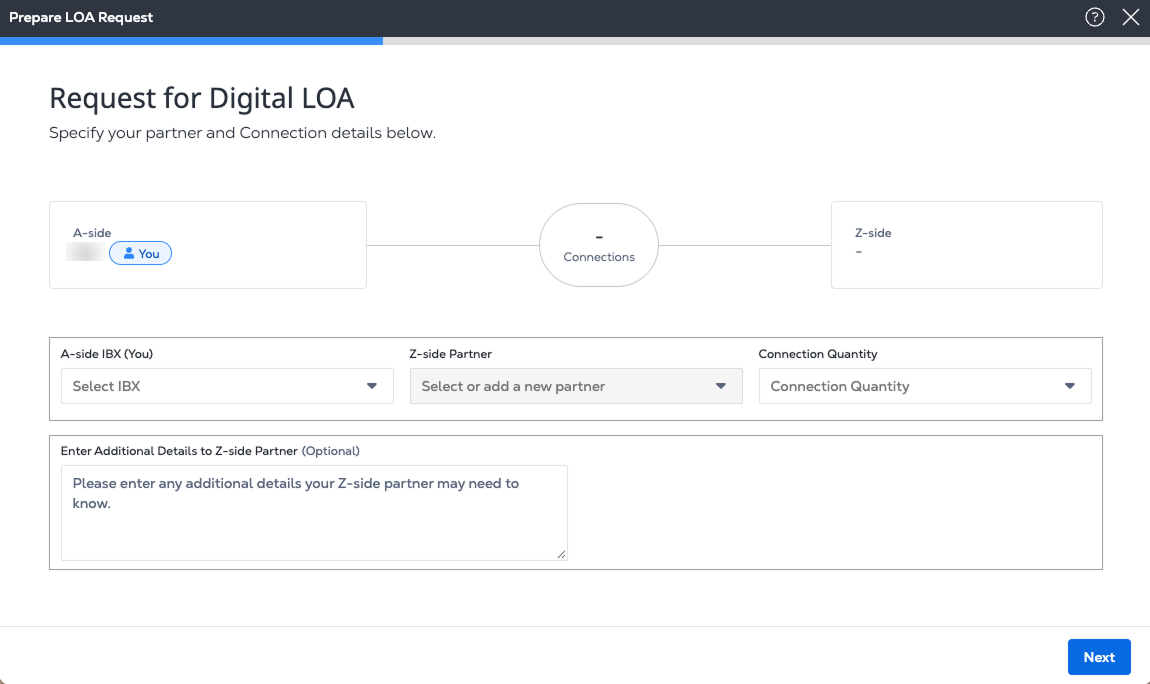
Look for the Request LOA (A-side) card and click Request LOA.

-
Choose an A-side IBX and a Z-side partner from the drop-down lists.
-
(Optional) If your Z-side partner isn’t listed, select Add a New Partner and enter their name.

-
Type the new company name in the Z-side Partner Name field.

-
Enter any Additional Details that might be helpful for your Z-side partner. For example, the type of connection and connector type, and when it's needed.
- Click Next.
-
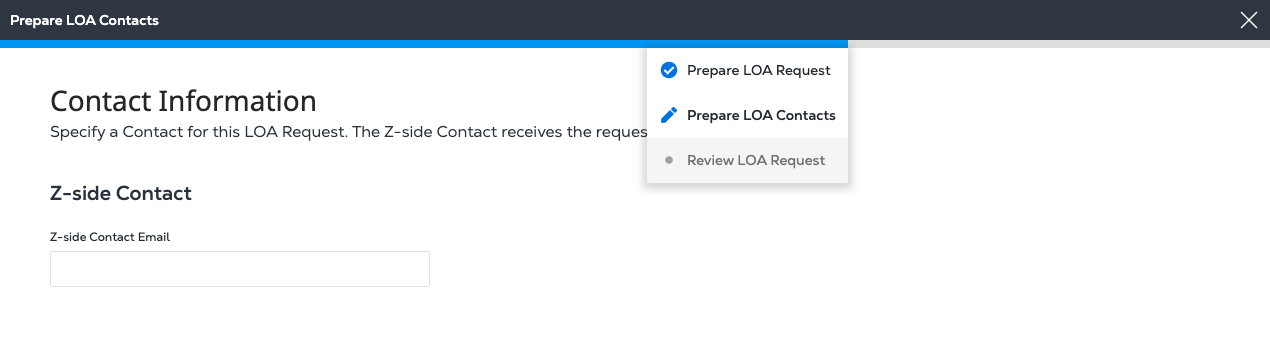
In the Z-side Contact List section, enter the address for your Z-side Contact Email.
-
To add one or more additional Z-side contacts, click Add additional emails.

-
Click Next.
-
In Review Your Digital LOA Details, verify that the Z-side Connection Details and Contact Information sections are correct.
To edit this information, hover over the blue progress bar at the top of the page. In the drop-down list, click Prepare LOA Request or Prepare LOA Contacts to return to the previous step and make your changes.

-
Click Next. A confirmation message is displayed with a brief survey.

Your Z-side contact receives email that includes your request to connect as an A-side partner, and a link to the Digital LOA Manager to create the new LOA.
-
A blue progress bar is displayed across the top of the page during the LOA request process. At any time, you can hover over the bar to view a drop-down list showing your current step and overall progress.
A check mark shows that you completed the previous page, Prepare LOA Request. To return to that step and make edits, click Prepare LOA Request in the drop-down list.