Create a Digital Letter of Authorization
A Digital Letter of Authorization (LOA) is an electronic document that replaces traditional, manually created LOAs. It authorizes the setting up of a Cross Connect within an IBX data center. Digital LOAs can currently be used to order Cross Connects.
-
The A-side partner initiates and pays for the Cross Connect. The A-side partner requests a connection inside an IBX data center.
-
The Z-side partner owns the assets required for the connection. The Z-side partner generates a Digital LOA to authorize the A-side partner to use those assets.
A Digital LOA must be created and approved before a Cross Connect can be established between the A-side and Z-side partners.
Who creates a Digital Letter of Authorization
This guide is for Z-side partners who need to create a Digital LOA.
If you are an A-side partner requesting a Digital LOA from a Z-side partner, refer to Requesting a Digital Letter of Authorization
For instructions on using the digital LOA to order a new connection, see upload an LOA when ordering a Cross Connect.
Steps to Create a Digital LOA
-
Sign in to the Customer Portal.
-
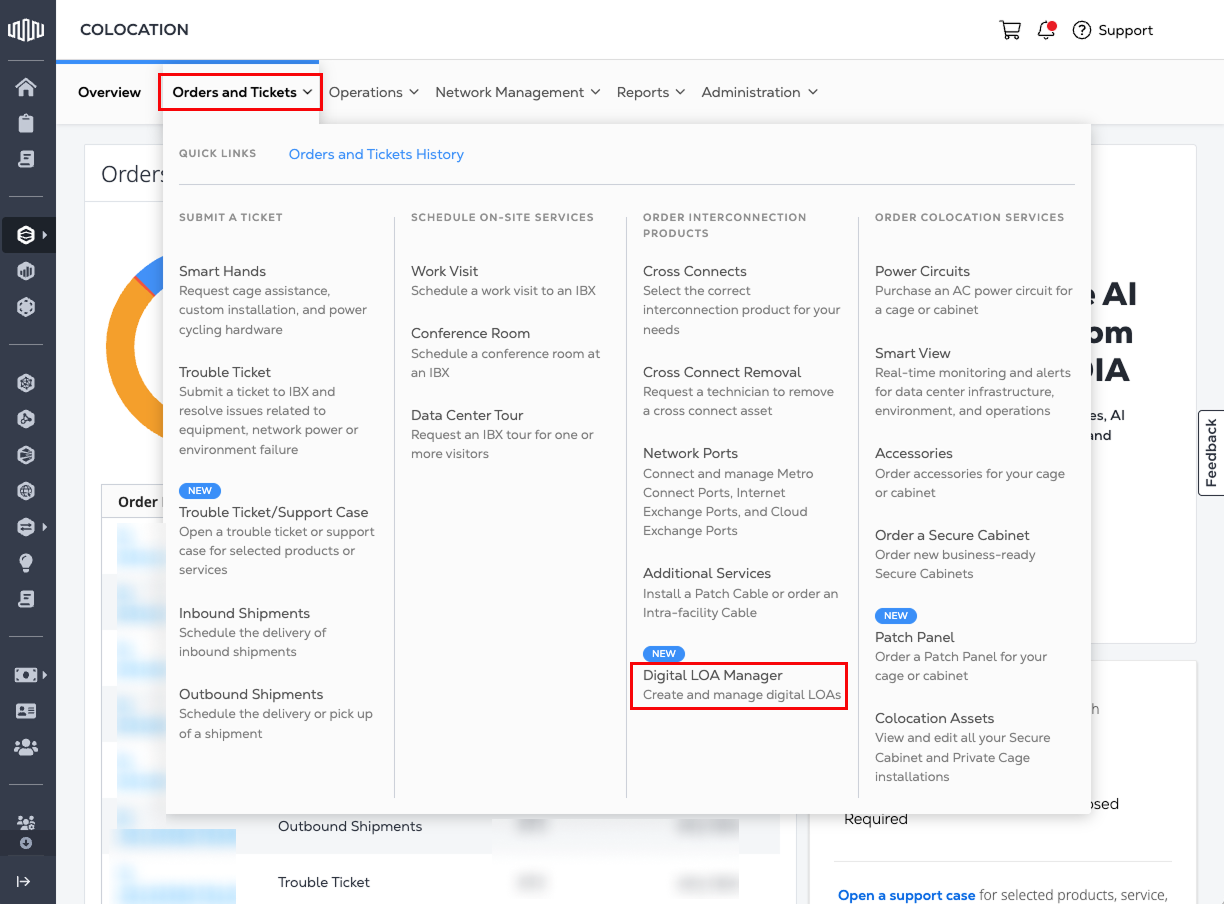
Go to the Orders and Tickets menu and select Digital LOA Manager.
-
Look for the Create LOA (Z-side) card and click Create LOA.
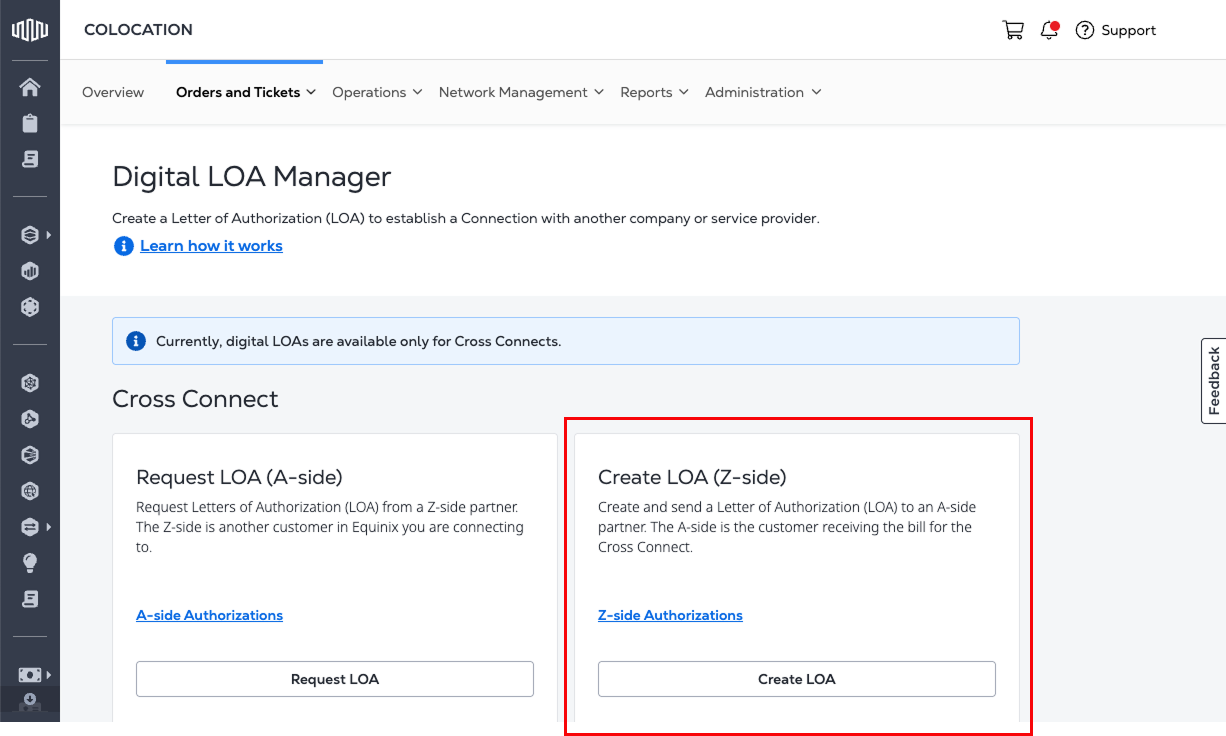
If you received an email request from an A-side partner, the link in the email takes you directly to this step.
The Digital LOA Manager filters your options based on the assets that are assigned to your organization and account.
Select Your Partner and IBX Location
-
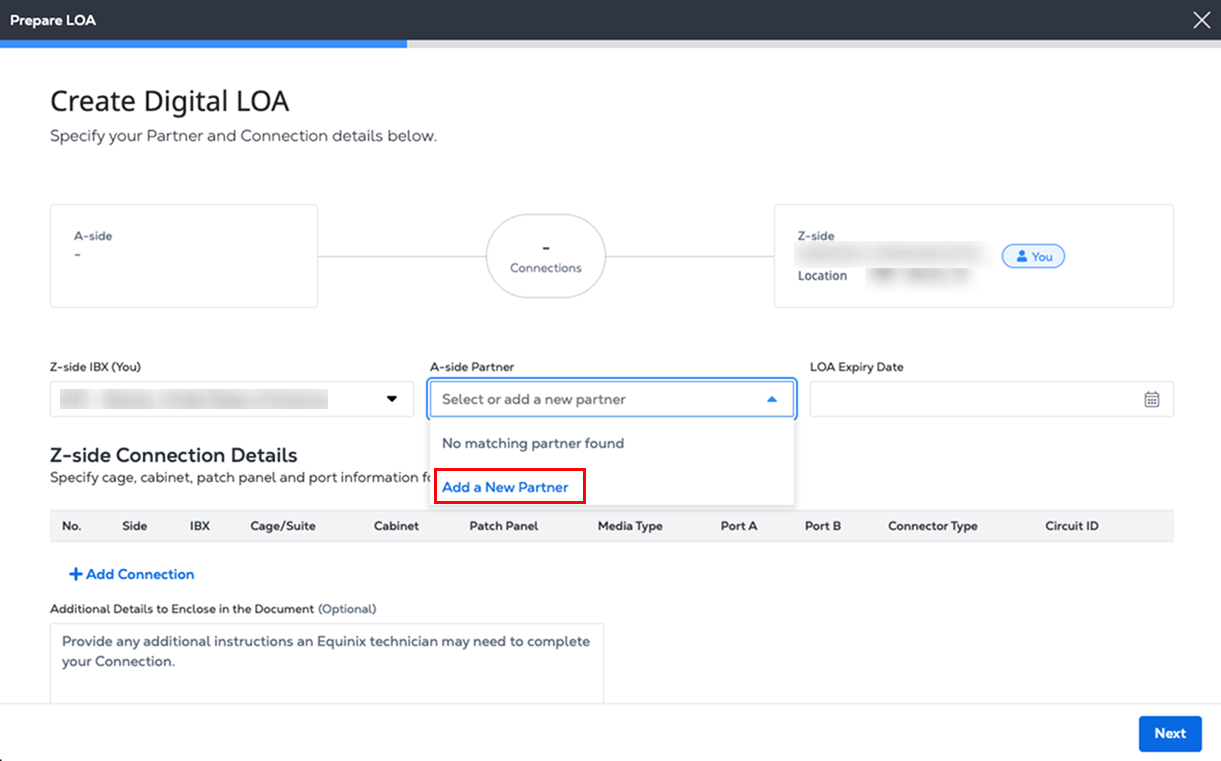
Choose a Z-side IBX and an A-side partner from the drop-down lists.
-
(Optional) If your A-side partner isn’t listed, select Add a New Partner and enter their name.
-
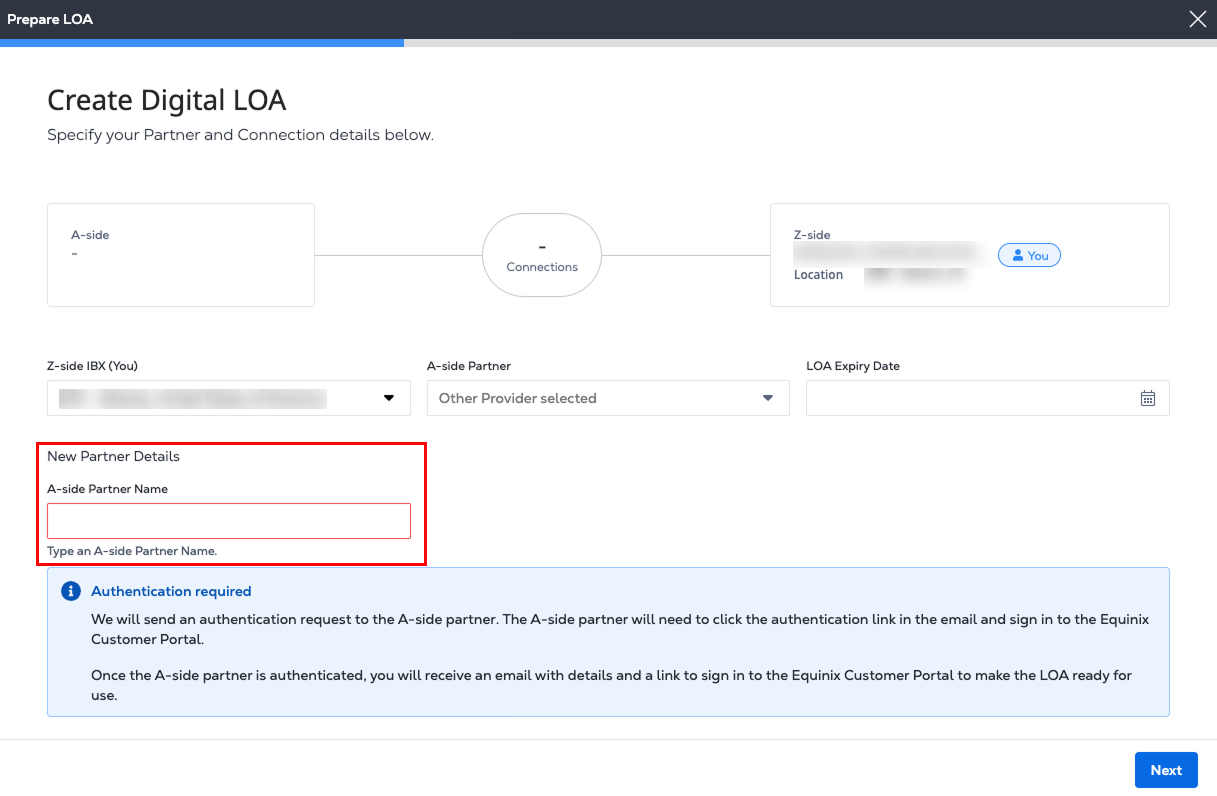
Type the new name in the A-side partner name field.
 note
noteAdding a new partner requires two-step authentication.
- The A-side partner receives email that contains an authentication request. The A-side partner must verify via email and sign in to the Customer Portal before the LOA can be finalized.
- After the A-side partner is authenticated, you receive email with details and a link to sign in to the Customer Portal to make the LOA ready for use.
Set the LOA Expiration Date
Enter an expiration date for the LOA in the LOA Expiry Date field within 100 days to allow enough time for approval and ordering.
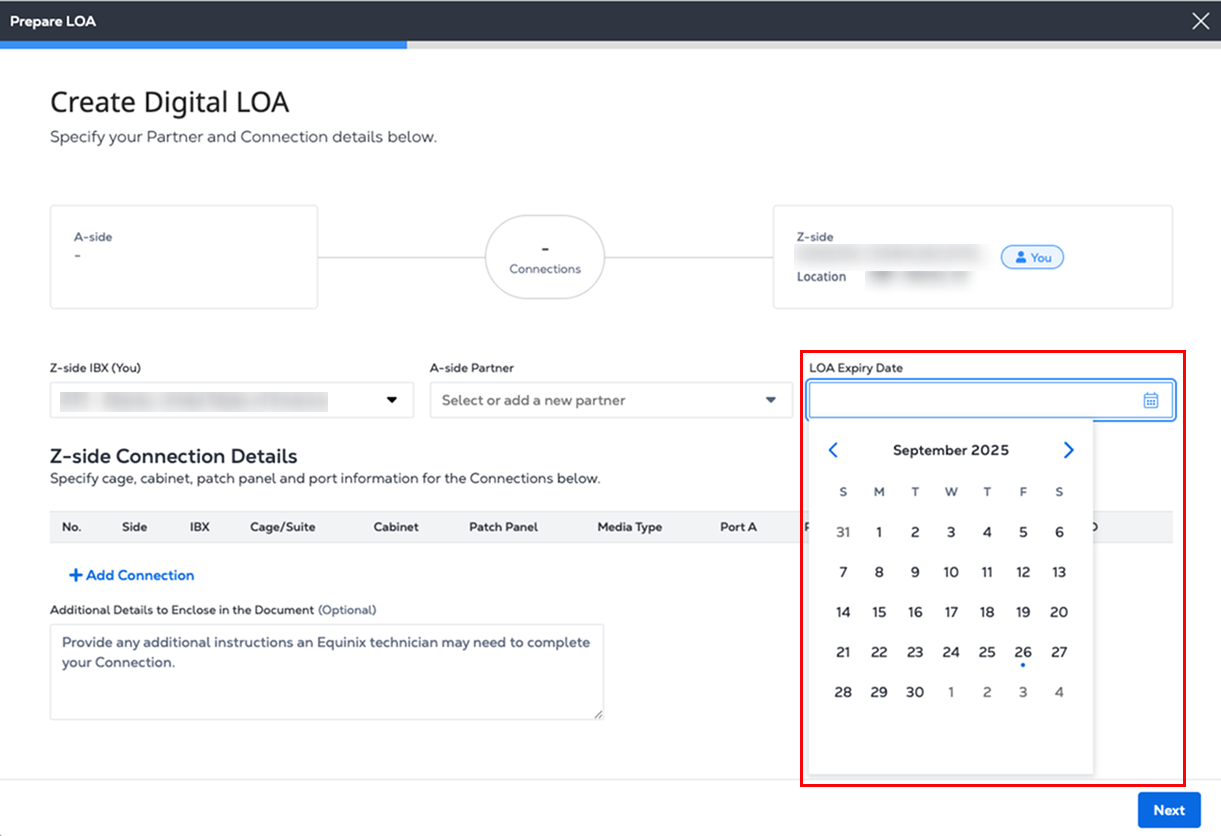
Setting an expiration date ensures that the reserved ports and patch panel assets are protected for a limited time. Ports of the selected patch panel are reserved and cannot be used for any other purpose. If the DLOA is not used before the expiry, the assets are automatically released and made available for other connections.
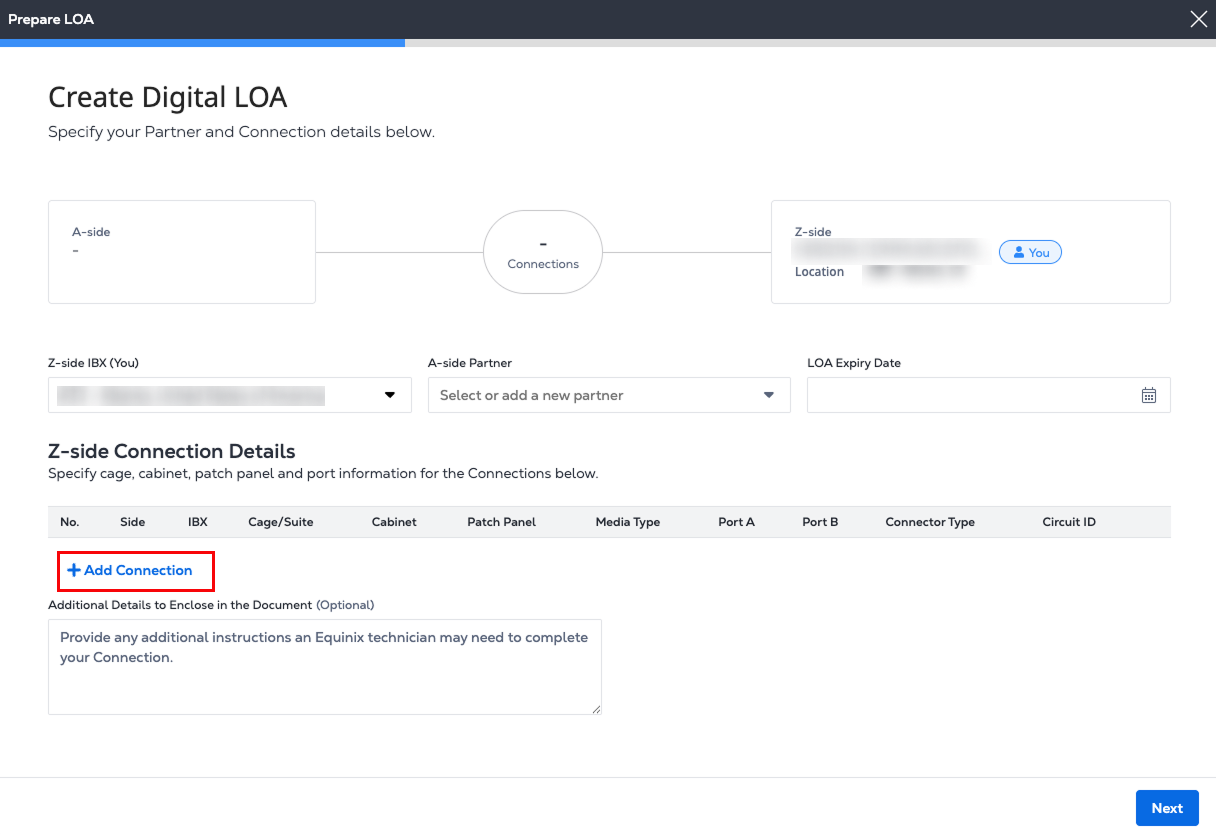
Add Z-side Connection Details
-
In the Z-side Connection Details section, click Add Connection.
-
Fill in your connection details: IBX, cage, cabinet, patch panel, ports, and other connection attributes. The Digital LOA reserves the specified assets. This ensures that the ports are available to complete the connection process.
-
If the patch panel identification number is available, enter it in the Search by Patch Panel field. This auto-populates the fields for IBX, cage, patch panel, and port information.
-
If you do not know the patch panel number, from the drop-down lists, choose a Cage, Cabinet, Patch Panel, Connection Service, Media Type, Protocol Type, Connector Type, and ports A and B.
-
Enter a Circuit ID.
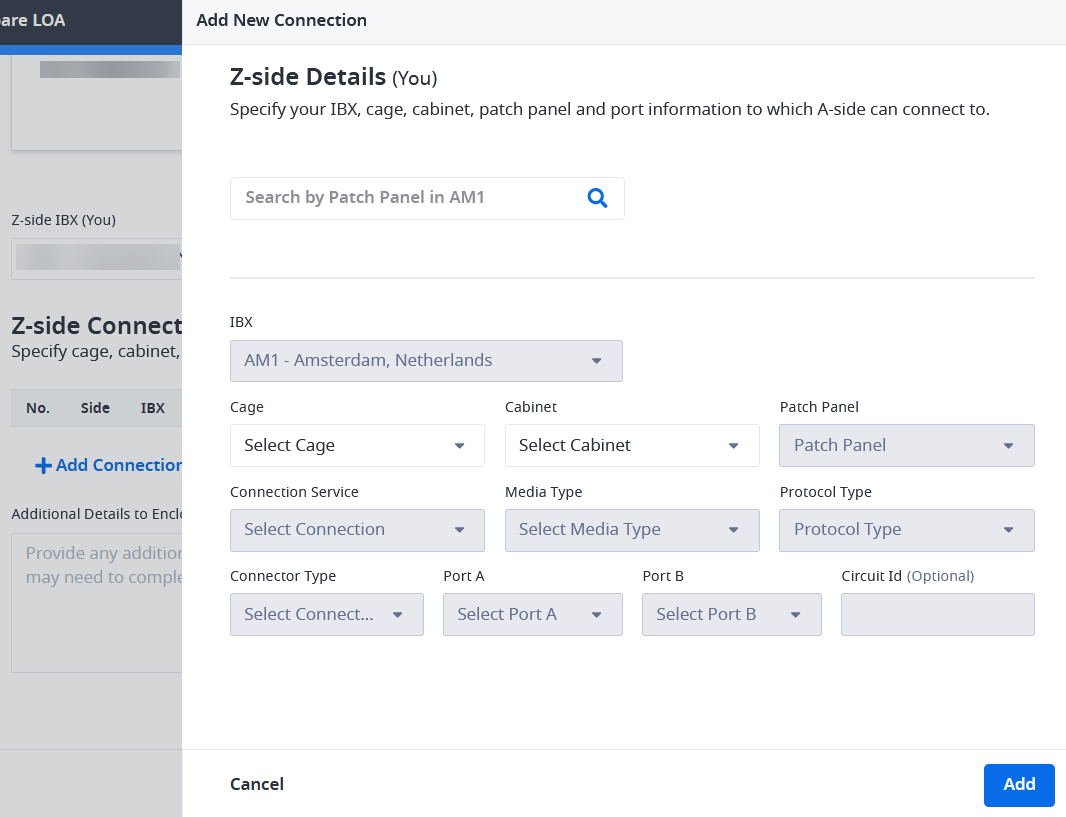
noteOnce you reserve a port using this form, it is removed from the drop-down list for future LOA selections. As a result, the number of available ports in the Patch Panel drop-down decreases.
-
-
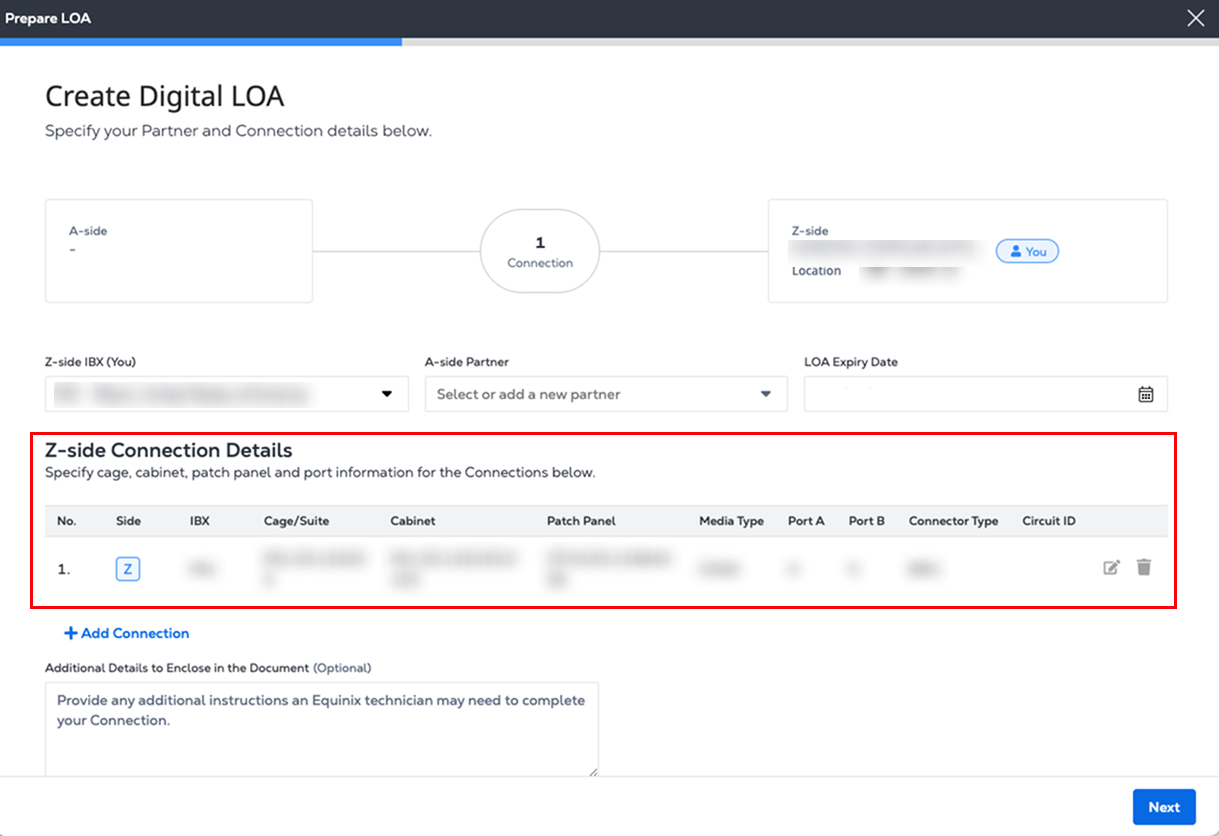
Click Add. The new Z-side Connection Details are listed.
-
Repeat steps to create up to 10 additional connections.
-
Enter any Additional Details that might be helpful to an Equinix technician.
-
Click Next.
When creating a DLOA to order multiple Cross Connects, the IBX, cage, and cabinet assigned to the first A-side connection is used for all subsequent A-side connections. These settings are fixed during the order creation process and cannot be modified.
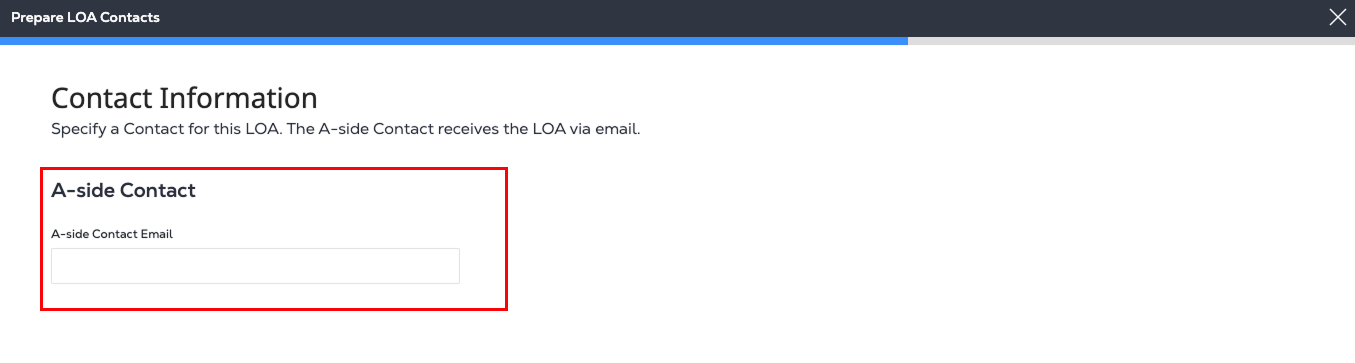
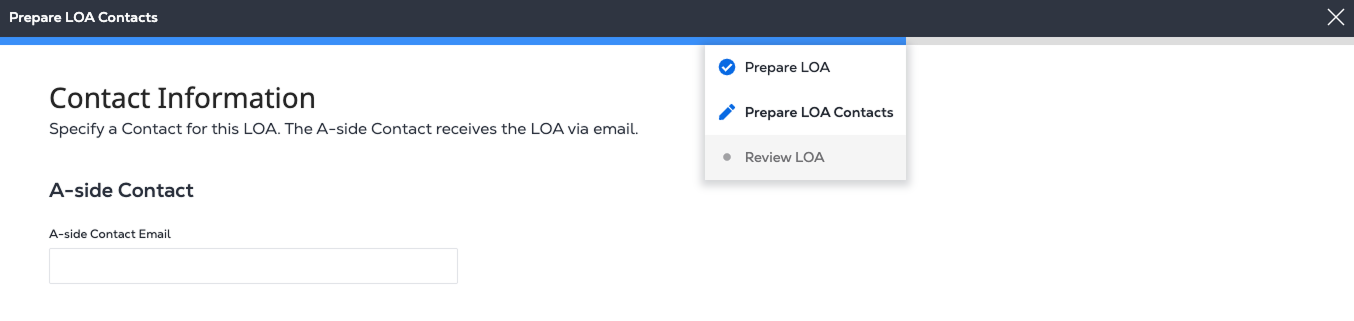
Enter A-side Contact Information
-
In the A-side Contact List section, add the A-side contact’s email address. If you need to add more than one contact, click Add Additional Email to include multiple A-side contacts. Once the LOA is created, it is emailed to all listed A-side contacts.
-
Click Next.
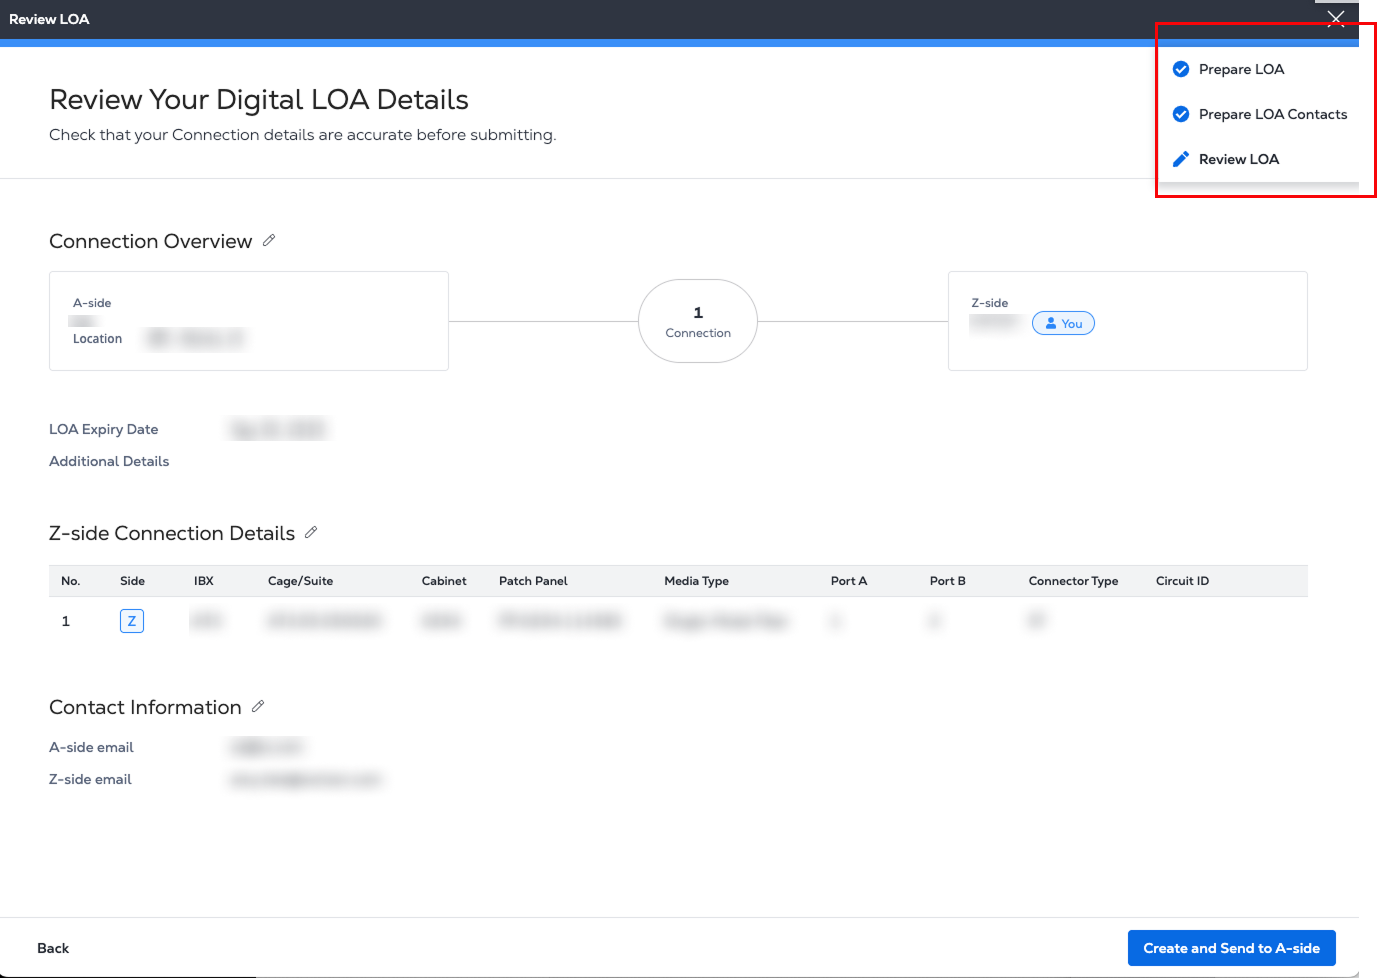
Review and Finalize the LOA
-
In Review Your Digital LOA Details, verify that the Z-side Connection Details and the Contact Information sections are correct.
To edit this information, hover over the blue progress bar at the top of the page. In the drop-down list, click Prepare LOA or Prepare LOA Contacts to return to the previous step and make your changes.
-
Click Create and Send to A-side.
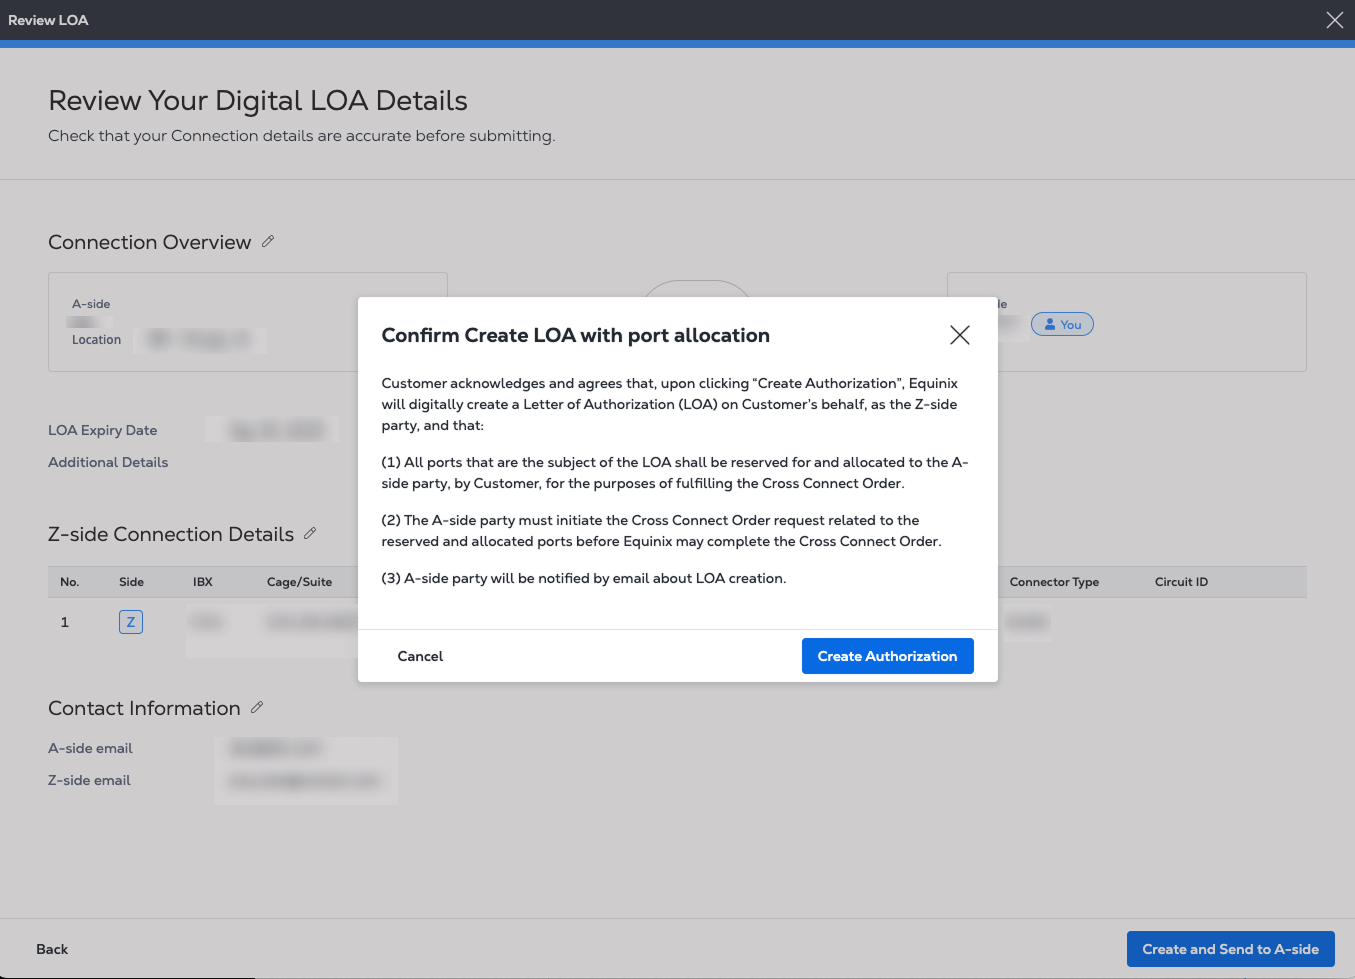
-
In the Confirm Create LOA with port allocation window, click Create Authorization.
View the LOA Summary
-
The LOA Summary contains the LOA Token number which is a unique ID for the Digital LOA across the PDF, email, and in the Customer Portal. Your A-side contacts receive an email notification that includes the new Digital LOA as a PDF attachment.
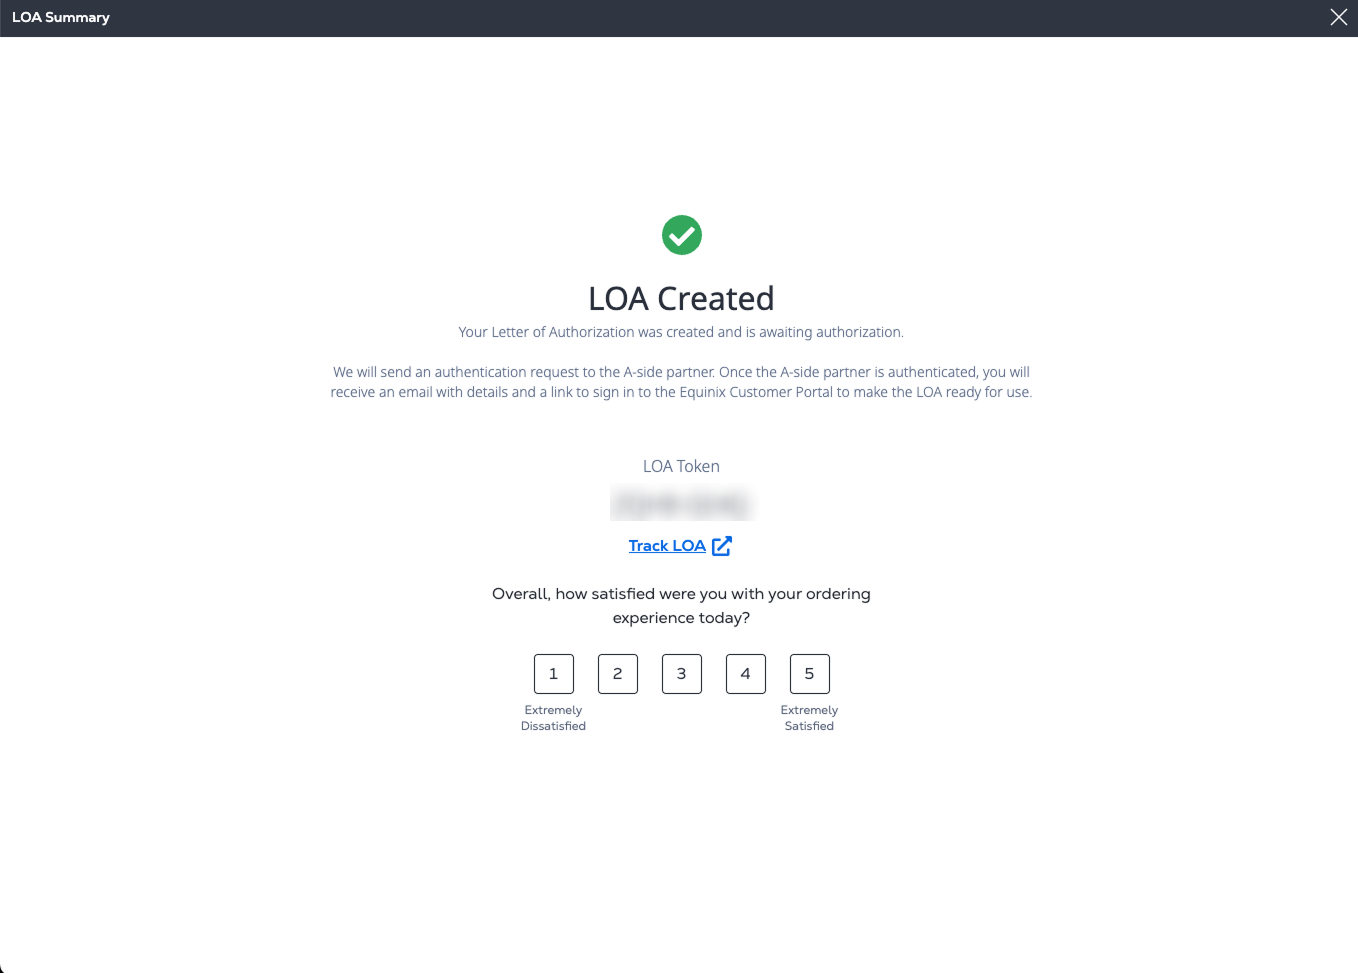
-
Click Track LOA to view this new LOA in the Digital LOA Manager under Z-side Authorizations. Depending on the output, the Digital LOA status is set to
Ready for useorPending Requestor Acceptance.
Step Progress Indicator
A blue progress bar is displayed across the top of the page during the LOA creation process. At any time, you can hover over the bar to view a drop-down list showing your current step and overall progress.
A check mark shows that you completed the previous page, Prepare LOA. To return to that step and make edits, click Prepare LOA in the drop-down list.
Partner Selection Information
When selecting an A-side partner from the drop-down list, you may notice company names that you don't currently have connections with. This is intentional, as the Digital LOA strategy is designed to authorize future connections between partners.
Equinix doesn't limit this list to current connections because we don't know which companies you may want to connect with in the future. If the A-side partners list doesn't contain the name of the company you'd like to authorize for a future connection, you can use the "Add a New Partner" option to include them.