Network Edge to Google Cloud Platform
Connect to Google Cloud Platform (GCP) from a Network Edge virtual device.
For instructions on connecting from a Fabric port, a Fabric Cloud Router, or using a service token, see Portal - Connecting to Google Cloud Platform.
Prerequisites
- Portal
- API
Before creating a connection to Google Cloud Platform from a Network Edge virtual device, you must have:
- An Equinix Customer Portal account, with the
Fabric Connections Managerrole.
- A Network Edge virtual device.
- A Google Cloud-issued pairing key or pairing keys, depending on the redundancy of your connection.
-
Authenticate - Submit your user credentials, Client ID, and Client Secret for OAuth2 authentication. Refer to API Authentication for instructions on how to call OAuth API to validate and authenticate your credentials.
-
Determine Your A-side Information. You need a provisioned Network Edge Virtual Device, Redundant Devices, or Cluster with a registered license. Send a
GETrequest to the/ne/v1/devicesendpoint or the/ne/v1/devices/{id}endpoint. You may choose any available interface on the device for your connection. However, Equinix will select an interface if you do not specify one. -
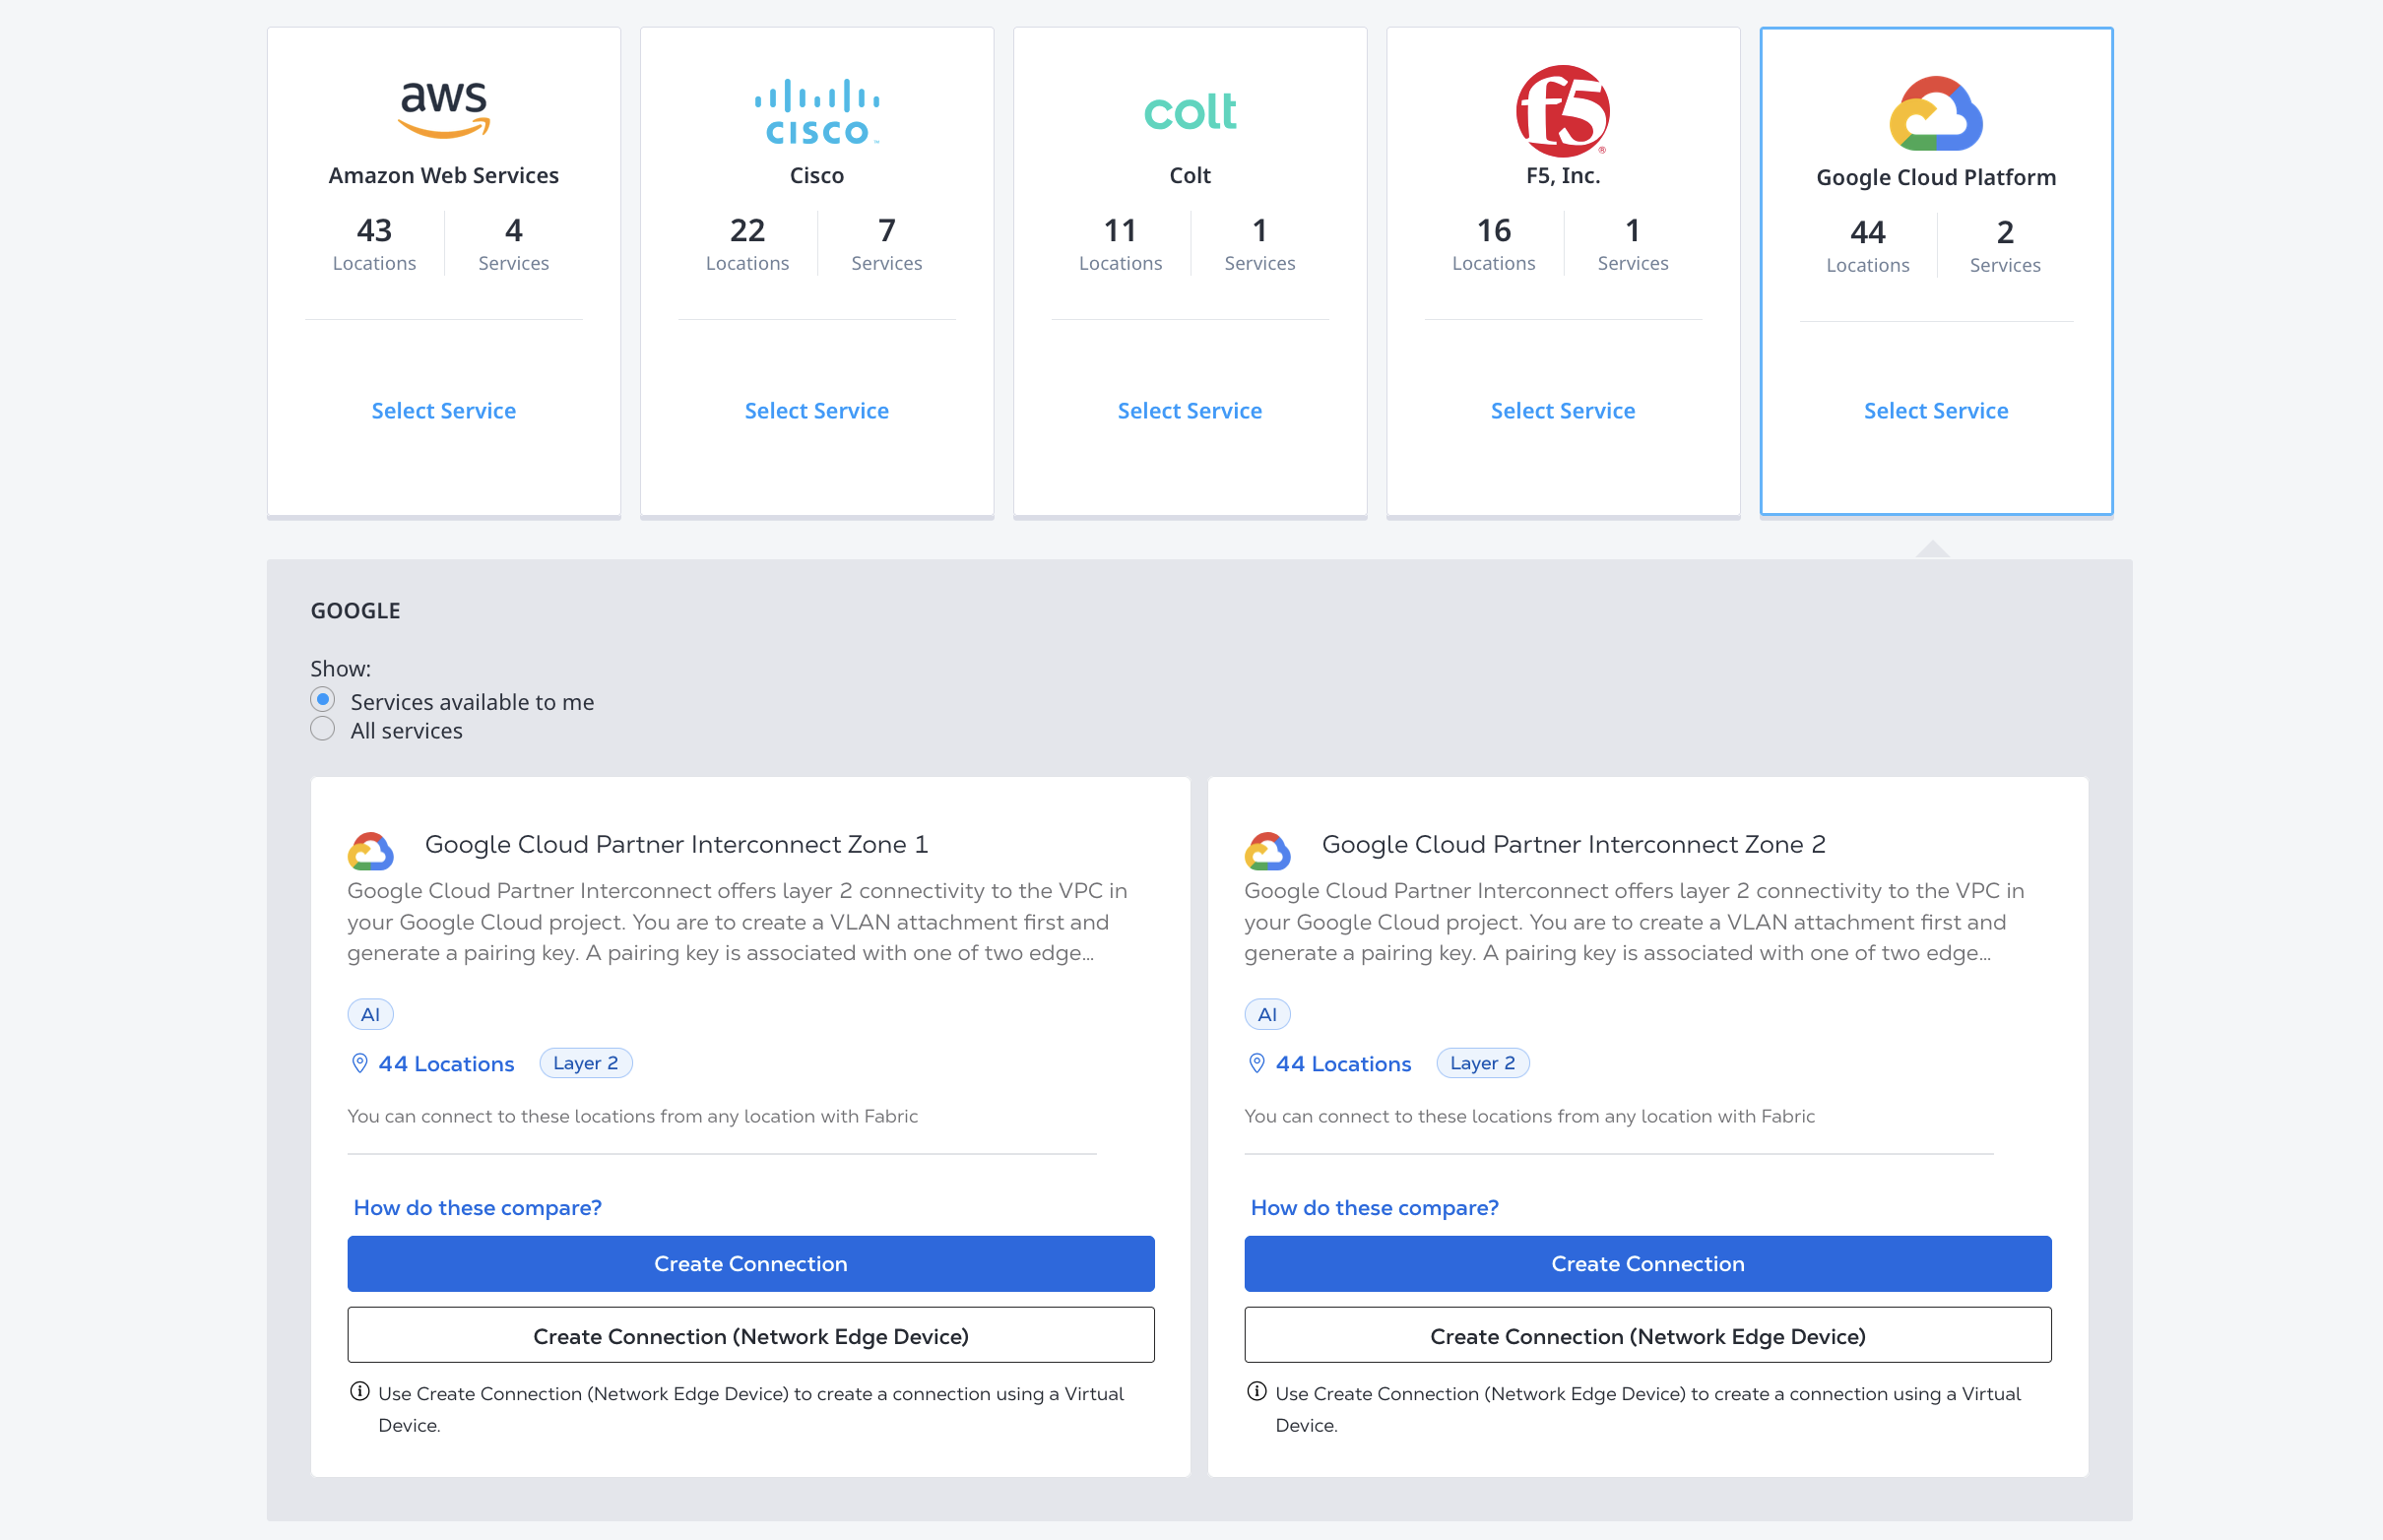
Identify the Google Cloud Partner Interconnect service profile information. More information on which service profile you should choose is on the Overview page.
- Zone 1 -
bd4570e2-d792-4a00-87f5-3bde040cdcd7 - Zone 2 -
b97dacca-abe6-4e8c-8be1-fcdd1be1defe
- Zone 1 -
-
Choose the Z-side metro location. Use the Get All Metros API request to find all metros where Equinix Fabric is available and determine destination location.
-
Validate your Authorization Key. Use the Validate Connection Authorization Key API request to verify that your pairing key can be used to create a connection to the selected service profile in the given metro.
Create a Connection to GCP
- Portal
- API
-
Sign in to the Customer Portal > Fabric Dashboard.
-
Use the Context Switcher and select the project under which you want to create the connection. For more information on projects, see Managing Projects.
-
From the Connections menu, select Create Connection.
-
In the A Service Provider card, click Connect to a Service Provider.

-
On the Google Cloud Platform card, click Select Service.
-
Choose the service profile you are creating a connection to. Click Create Connection (Network Edge Device).
-
Review the high-level process for connecting to Google Cloud via Partner Interconnect, then click Create a Connection.
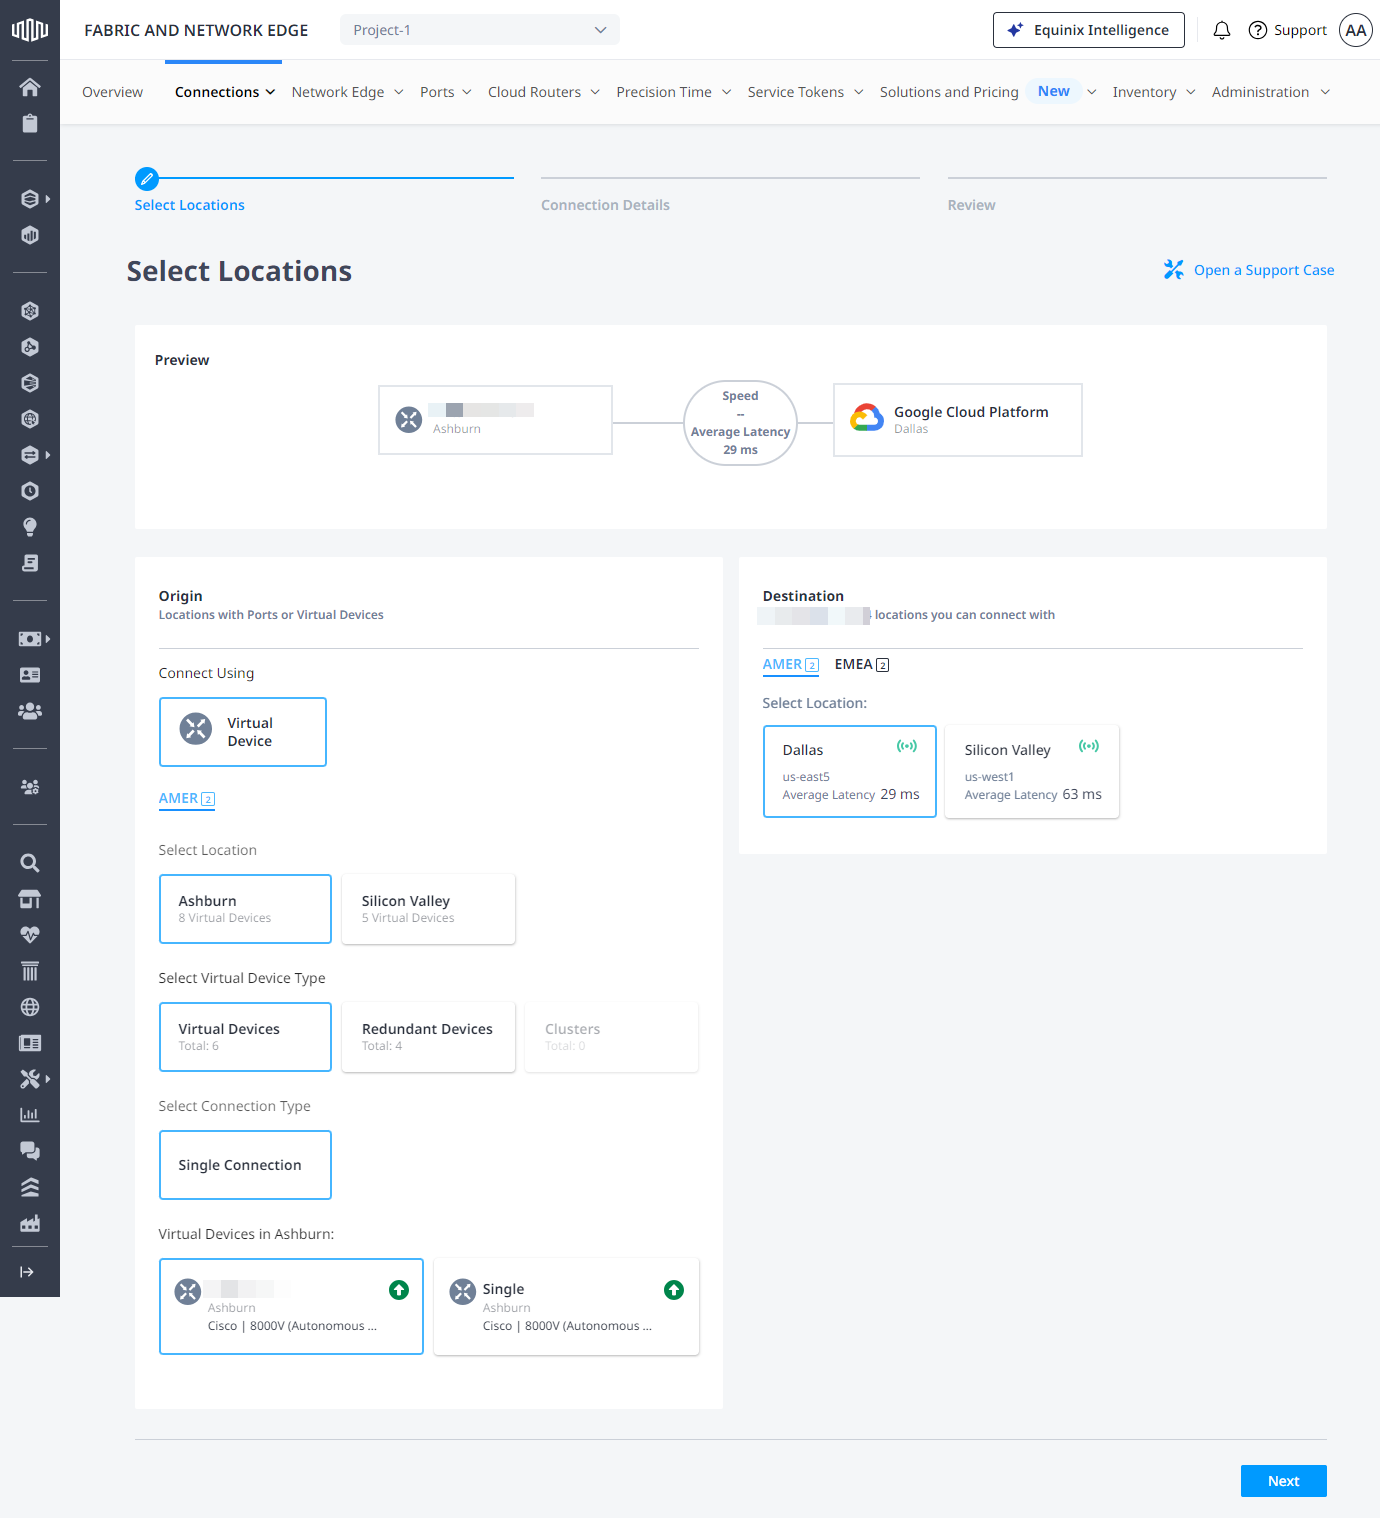
In the Origin section:
-
Click Virtual Device. If the Virtual Device option is disabled, there are no virtual devices available in the selected project. Choose a different project, that has virtual devices assigned to it, or create a new virtual device in this project.
-
Select a Metro.
-
Choose virtual device type, select connection type, then select a virtual device instance.
In the Destination section, select location where you want to terminate your connection, then click Next.
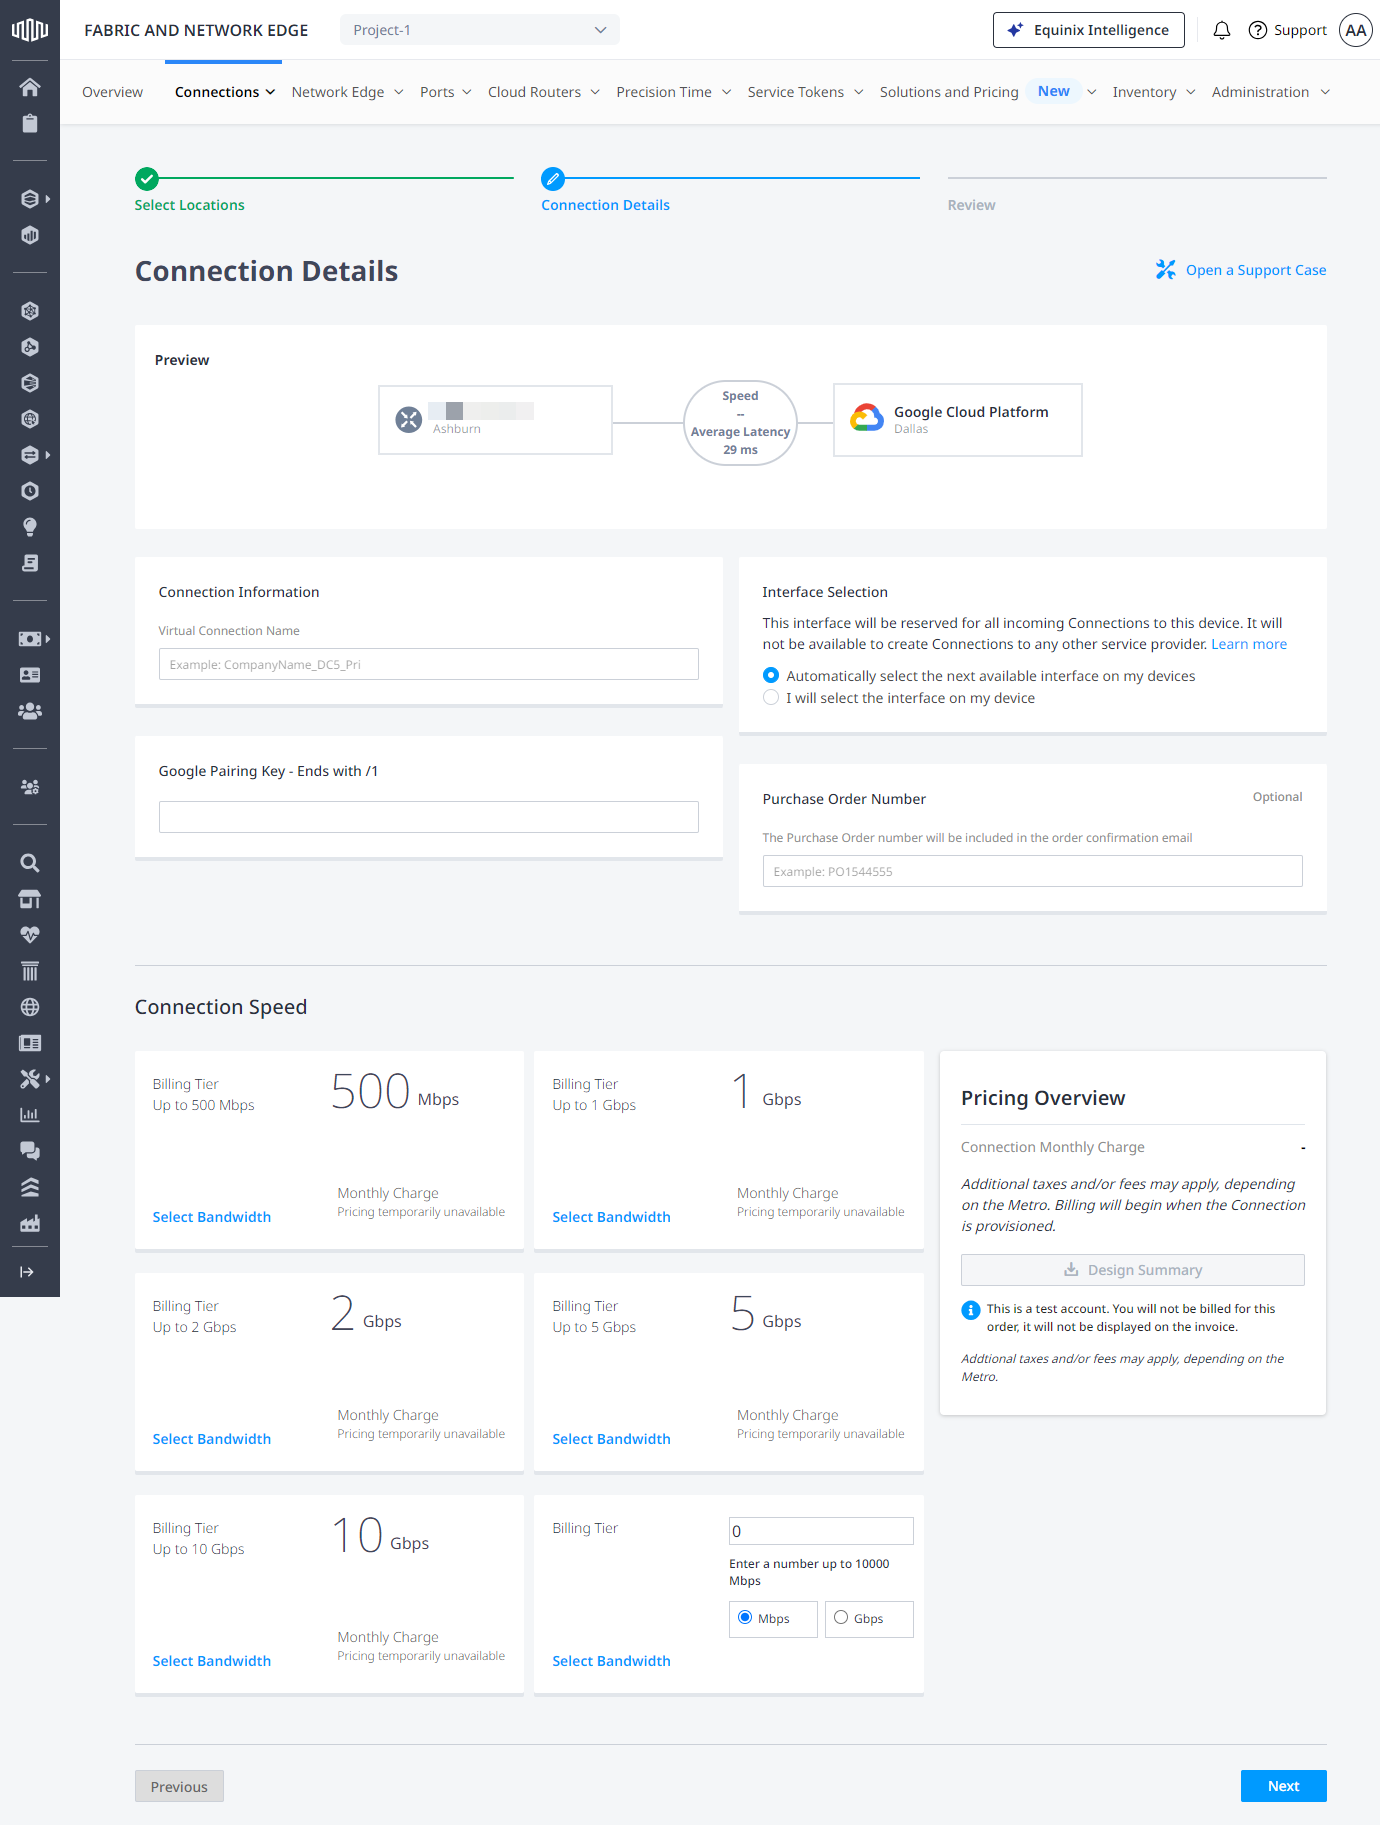
On the Connection Details page:
-
Enter connection name.
-
Enter the Google Pairing Key.
You must use the Pairing Key that corresponds to the selected zone, which is identified by /1 or /2 at the end of the Pairing Key value.
-
Select network interface on your virtual device.
-
Enter purchase order number.
-
Select connection speed, then click Next.
Review the Connection Summary, Pricing Overview, and Notifications sections, then click Submit Order.
For redundant connections, repeat the steps to create the second connection.
To create a connection from your Network Edge device to Google Cloud Partner Interconnect, send a POST request to the /fabric/v4/connections endpoint. Specify your connection's configuration details in the body of the request.
Define your Network Edge device in the aSide object including:
accessPoint.typeasVDvirtualDevice.typeasEDGEvirtualDevice.uuidas your device's UUID
Provide your GCP details and location details in the zSide object including:
- Set
accessPoint.typeasSP. - Set
profile.typeasL2_PROFILE. - Specify the service profile you are connecting to in
profile.uuid. - Specify the Equinix Metro location you are connecting to in
location.metroCode. - Set
authenticationKeyas your Google Cloud-issued pairing key.
Ensure that:
- If you are creating a connection where the
redundancyisPRIMARYthat the pairing key ends in/1and you are using the Google Cloud Partner Interconnect Zone 1 service profile UUIDbd4570e2-d792-4a00-87f5-3bde040cdcd7. - If you are creating a connection where the
redundancyisSECONDARYthat the pairing key ends in/2and you are using the Google Cloud Partner Interconnect Zone 2 service profile UUIDb97dacca-abe6-4e8c-8be1-fcdd1be1defe. - If you are creating redundant connections, send two API requests, one for each redundancy priority.
Specify any other connection configuration details, in the body of the request. For a full list of parameters and their descriptions, see the API Reference.
Sample cURL Request:
curl -X
POST 'https://api.equinix.com/fabric/v4/connections'
-H 'content-type: application/json'
-H 'authorization: Bearer <token>'
-d '{
    "type": "EVPL_VC",
    "name": "<connection_name>",
    "bandwidth": <bandwidth>,
    "redundancy": {
        "priority": "<priority_code>"
    },
    "aSide": {
        "accessPoint": {
        "type": "VD",
        "virtualDevice": {
            "type": "EDGE",
            "uuid": "<virtual_device_uuid>"
        }
        }
    },
    "zSide": {
        "accessPoint": {
        "type": "SP",
        "profile": {
            "type": "L2_PROFILE",
            "uuid": "<gcp_service_profile_id>"
        },
        "location": {
            "metroCode": "<equinix_metro_code>"
        },
        "sellerRegion": "<gcp_region>",
        "authenticationKey": "<pairing_key>"
        }
    },
    "project": {
        "projectId": "<project_id>"
    },
    "order": {
        "purchaseOrderNumber": "po_number"
    },
    "notifications": [{
        "type": "ALL",
        "emails": [
        "<contact_email>"
        ]
    }]
    }'
Monitoring the Connection Status
- Portal
- API
Once you have created the connection, it appears in your Connections Inventory where you can monitor its status.
Send a GET request to the fabric/v4/connections/{connectionId} endpoint to monitor connection status.
equinixStatus parameter values | providerStatus attribute values | Google Status | Description |
|---|---|---|---|
PROVISIONING | PROVISIONING | Connection request has not been sent to Google yet. | |
PROVISIONED | PENDING_APPROVAL | Waiting for service provider. | Connection waiting for acceptance. |
PROVISIONED | PROVISIONING | Activation needed -> Border Gateway Protocol (BGP) configuration required. | Connection establishment in progress. |
PROVISIONED | PROVISIONED | Pending -> availability | Connection accepted by client. |
Activating the Connection in the Google Cloud Portal
Once the provisioning job has been completed on the Equinix side, activate your connection in the Google Cloud Portal.
-
In the Interconnect section of the Google Cloud Portal, click Refresh at the top of your browser page. The Status displays
Activation needed. -
Click Activate, then click Accept. The Status updates to
BGP configuration needed. -
Click Configure BGP.
-
In the Peer ASN field, enter the ASN number for your on-premise router. Click Save and continue.
-
Review the Configuring on-premises routers page to complete any steps needed to connect your router to your Google Cloud environment via Google Cloud Interconnect.